Pfaff Tipmatic 1027 Owner's Manual - Page 22
Pfaff Tipmatic 1027 Manual
 |
View all Pfaff Tipmatic 1027 manuals
Add to My Manuals
Save this manual to your list of manuals |
Page 22 highlights
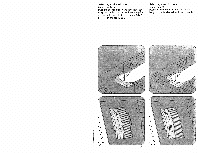
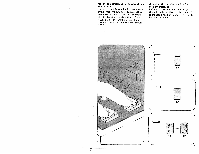
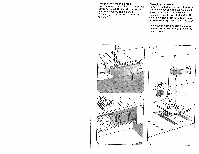
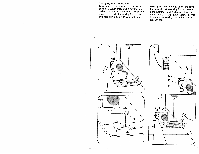
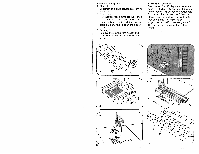
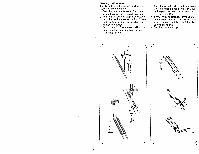
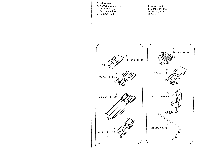
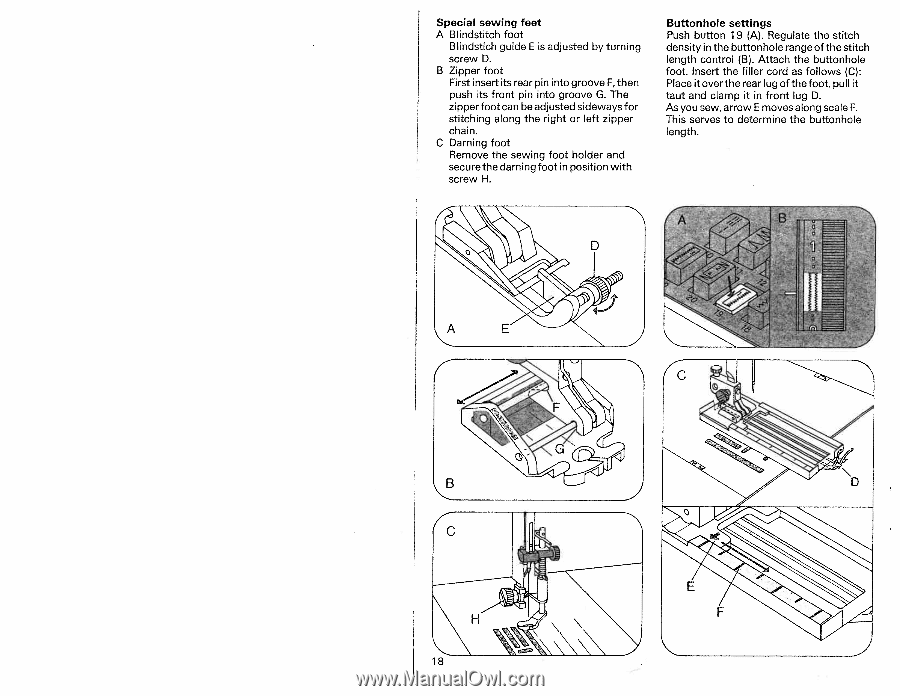
Special sewing feet A Blindstitch foot Blindstich guide E is adjusted by turning screw D. B Zipper foot First insert its rear pin into groove F, then push its front pin into groove G. The zipper foot can be adjusted sideways for stitching along the right or left zipper chain. C Darning foot Remove the sewing foot holder and secure the darning foot in position with screw H. Buttonhole settings Push button 1 9 (A). Regulate the stitch density in the buttonhole range of the stitch length control (B). Attach the buttonhole foot. Insert the filler cord as follows (C): Place it over the rear lug of the foot, pull it taut and clamp it in front lug D. As you sew, arrow E moves along scale F. This serves to determine the buttonhole length.
-
 1
1 -
2
-
3
-
4
-
5
-
6
-
7
-
8
-
9
-
10
-
11
-
12
-
13
-
14
-
15
-
16
-
 17
17 -
 18
18 -
 19
19 -
 20
20 -
 21
21 -
 22
22 -
 23
23 -
 24
24 -
 25
25 -
 26
26 -
 27
27
 |
 |
Special
sewing
feet
A
Blindstitch
foot
Blindstich
guide
E
is
adjusted
by
turning
screw
D.
B
Zipper
foot
First
insert
its
rear
pin
into
groove
F,
then
push
its
front
pin
into
groove
G.
The
zipper foot
can
be
adjusted
sideways
for
stitching
along
the
right
or left
zipper
chain.
C
Darning
foot
Remove
the
sewing
foot
holder
and
secure
the
darning
foot
in
position
with
screw
H.
Buttonhole
settings
Push
button
1
9
(A).
Regulate
the
stitch
density
in
the
buttonhole
range
of
the
stitch
length control
(B).
Attach
the
buttonhole
foot.
Insert
the
filler
cord
as
follows
(C):
Place
it
over
the
rear
lug
of
the
foot,
pull
it
taut
and
clamp
it
in
front
lug
D.
As
you
sew,
arrow
E
moves
along
scale
F.
This
serves
to
determine
the
buttonhole
length.