Pfaff Tiptronic 2020 Owner's Manual - Page 36
Pfaff Tiptronic 2020 Manual
 |
View all Pfaff Tiptronic 2020 manuals
Add to My Manuals
Save this manual to your list of manuals |
Page 36 highlights
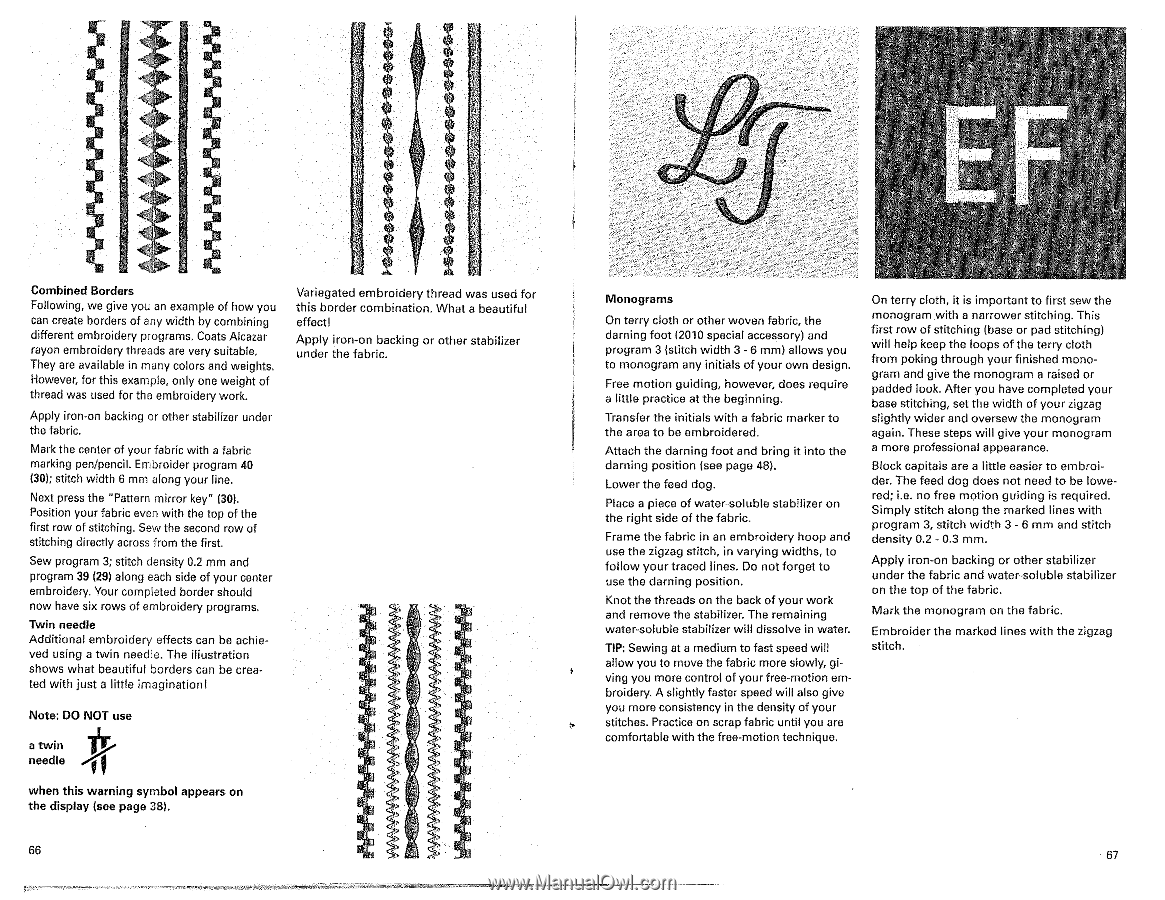
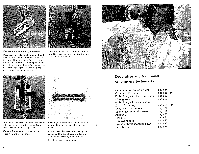
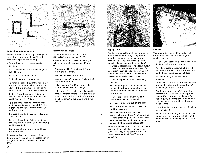
11 Combined Borders Following, we give you an example of how you can create borders of any width by combining different embroidery programs. Coats Alcazar rayon embroidery threads are very suitable. They are available in many colors and weights. However, for this example, only one weight of thread was used for the embroidery work. Apply iron-on backing or other stabilizer under the fabric. Mark the center of your fabric with a fabric marking pen/pencil. Embroider program 40 (30); stitch width 6 mm along your line. Next press the "Pattern mirror key" 130). Position your fabric even with the top of the first row of stitching. Sew the second row of stitching directly across from the first. Sew program 3; stitch density 0.2 mm and program 39 (29) along each side of your oenter embroidery. Your completed border should now have six rows of embroidery programs. Twin needle Additional embroidery effects can be achieved using a twin needle. The illustration shows what beautiful borders can be created with just a little imagination) Variegated embroidery thread was used for this border combination. What a beautiful effectl Apply iron-on backing or other stabilizer under the fabric. Note: DO NOT use a twin -11 needle when this warning symbol appears on the display (see page 38). Eiti Monograms On terry cloth or other woven fabric, the darning foot (2010 special accessory) and program 3 (stitch width 3 - 6 mm) allows you to monogram any initials of your own design. Free motion guiding, however, does require a little practice at the beginning. Transfer the initials with a fabric marker to the area to be embroidered. Attach the darning foot and bring it into the darning position (see page 48). Lower the feed dog. Place a piece of water-soluble stabilizer on the right side of the fabric. Frame the fabric in an embroidery hoop and use the zigzag stitch, in varying widths, to follow your traced lines. Do not forget to use the darning position. Knot the threads on the back of your work and remove the stabilizer. The remaining water-soluble stabilizer will dissolve in water. TIP: Sewing at a medium to fast speed will allow you to move the fabric more slowly, giving you more control of your free-motion embroidery. A slightly faster speed will also give you more consistency in the density of your stitches. Practice on scrap fabric until you are comfortable with the free-motion technique. On terry cloth, it is important to first sew the monogram with a narrower stitching. This first row of stitching (base or pad stitching) will help keep the loops of the terry cloth from poking through your finished monogram and give the monogram a raised or padded look. After you have completed your base stitching, set the width of your zigzag slightly wider and oversew the monogram again. These steps will give your monogram a more professional appearance. Block capitals are a little easier to embroider. The feed dog does not need to be lowered; i.e. no free motion guiding is required. Simply stitch along the marked lines with program 3, stitch width 3 - 6 mm and stitch density 0.2 - 0.3 mm. Apply iron-on backing or other stabilizer under the fabric and water-soluble stabi izer on the top of the fabric. Mark the monogram on the fabric. Embroider the marked lines with the zigzag stitch. 67
-
 1
1 -
2
-
3
-
4
-
5
-
6
-
7
-
8
-
9
-
10
-
11
-
12
-
13
-
14
-
15
-
16
-
17
-
18
-
19
-
20
-
21
-
22
-
23
-
24
-
25
-
26
-
27
-
28
-
29
-
30
-
 31
31 -
 32
32 -
 33
33 -
 34
34 -
 35
35 -
 36
36 -
 37
37 -
 38
38 -
 39
39 -
 40
40 -
 41
41 -
42
-
43
-
44
-
45
-
46
-
47
-
48
-
49
-
50
-
51
-
52
-
53
-
54
 |
 |