Pfaff coverlock 4772 Owner's Manual - Page 15
Ioöl
 |
View all Pfaff coverlock 4772 manuals
Add to My Manuals
Save this manual to your list of manuals |
Page 15 highlights
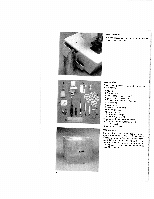
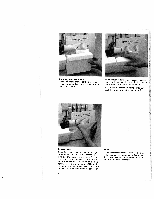
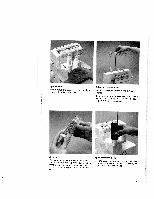
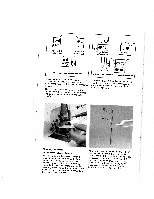
right overlock needle threaded A I! oöSIlI left overlock needle threaded C-I-c 2-thread chainstich needle threaded cLD os] cover-stitch needle threaded left and right overlock needles threaded walIenbionpthvgoiesso.itfiinothsntesrunacerteeiodsnlheomhwaonnlduieanrl.atShseecehvetahmreiaoetuixscandmerpaeldes wnNneeioleeltddebl:leee.Isfsobhmoatvheewtbhheeaetlnehfitingashneedrrtetrhdiga,hntthteohveleefrrteigdnhgeteedle 2-thread chainstitch and cover-stitch needles threaded ttaNhhnaeodntelte:thfhteIefncbreooiegvtdhheltret-hnsweteiietl2cdlh-lbtehe.nreeseaoddmlecehwaarhienastthtihrtecigahhdenerede, dle Changing the needle Switch off the electrical power. tfnunwTmhaepeoeshoeewterdvedneealnelemelreie,dntdohucignflvesheutieasonln:lcdngyetrogLheetowiodewhnvwlnegeeh(e(ritswasrgomti)hihtd,thraeehebleasolmycntupsceotptcreuevoerrsdreessesnlw.ismoeiteni.rdoorygLrnvfif.oitvonrhooeoPgesrtmueaahsinthnn)abddntoehtdhlfepoetuwhlel 2OsaitnTnch0ieovdtr0eoeee2idwranntlclahos.eecreceeReerksdtshhe:lrsneomaeoIenlqnrcdoekuyshvedi.earerl(rKeenNtatd)ghnotthyifedwfnaepogcnterieinnsegatseehsihEededtithLsd,relteelnsmxetocfht7alihheant0chaett5hnona,sifetgniatcdeiehtsandhe.tetgele.e(nhLnfaiIofloniuald.ogetl.lfyothf e 11
-
 1
1 -
2
-
3
-
4
-
5
-
6
-
7
-
8
-
9
-
 10
10 -
 11
11 -
 12
12 -
 13
13 -
 14
14 -
 15
15 -
 16
16 -
 17
17 -
 18
18 -
 19
19 -
 20
20 -
21
-
22
-
23
-
24
-
25
-
26
-
27
-
28
-
29
-
30
-
31
-
32
-
33
-
34
-
35
-
36
-
37
-
38
-
39
-
40
-
41
-
42
-
43
-
44
-
45
-
46
-
47
-
48
-
49
-
50
-
51
-
52
-
53
-
54
-
55
-
56
-
57
-
58
-
59
-
60
-
61
-
62
-
63
-
64
-
65
-
66
-
67
-
68
-
69
-
70
-
71
-
72
-
73
-
74
-
75
-
76
-
77
-
78
-
79
-
80
-
81
 |
 |
