Pfaff coverlock 4772 Owner's Manual - Page 69
illustration>.
 |
View all Pfaff coverlock 4772 manuals
Add to My Manuals
Save this manual to your list of manuals |
Page 69 highlights
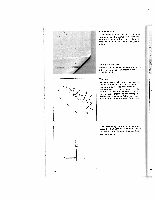
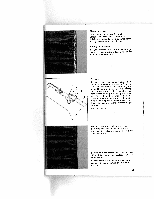
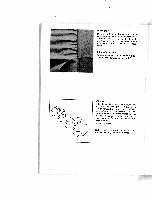
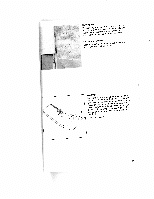
Elastic tape foot This presser foot is used for sewing on elastic tape. In the same operation, the fa bric is trimmed and serged, and also gathe red by the contracting elastic tape. Setting the machine Set your machine to the 4-thread overedge seam. The seam width is determined by the width of the elastic tape. Working: Raise the needle to its uppermost position and insert the elastic tape sewing foot. Loo sen screw 1 so that brake 3 at opening 2 is opened by approx. 2 mm. Insert elastic tape 4 into opening 2 and pull it beneath the se wing foot so that it protrudes approx. 4 in ches (10 cm) behind the latter. Re-tighten screw 1. The more the screw is tightened, the greater the pressure brake 3 exerts on the elastic tape and thus the greater the gat her effect. Sew a test seam. The next step is normally to stitch the elastic tape towards the left with one of your machine's elastic (expandable) stitches (see illustration>. Sewing on a non-elastic tape prevents stret ching of the seams (e.g. shoulder seams> in stretch fabrics. Loosen screw 1 until the non-elastic tape can pass through opening 2 without hin drance. 65
-
 1
1 -
2
-
3
-
4
-
5
-
6
-
7
-
8
-
9
-
10
-
11
-
12
-
13
-
14
-
15
-
16
-
17
-
18
-
19
-
20
-
21
-
22
-
23
-
24
-
25
-
26
-
27
-
28
-
29
-
30
-
31
-
32
-
33
-
34
-
35
-
36
-
37
-
38
-
39
-
40
-
41
-
42
-
43
-
44
-
45
-
46
-
47
-
48
-
49
-
50
-
51
-
52
-
53
-
54
-
55
-
56
-
57
-
58
-
59
-
60
-
61
-
62
-
63
-
 64
64 -
 65
65 -
 66
66 -
 67
67 -
 68
68 -
 69
69 -
 70
70 -
 71
71 -
 72
72 -
 73
73 -
 74
74 -
75
-
76
-
77
-
78
-
79
-
80
-
81
 |
 |
