Pfaff creative designer Owner's Manual - Page 20
Storing, stitch, points - creative design
 |
View all Pfaff creative designer manuals
Add to My Manuals
Save this manual to your list of manuals |
Page 20 highlights
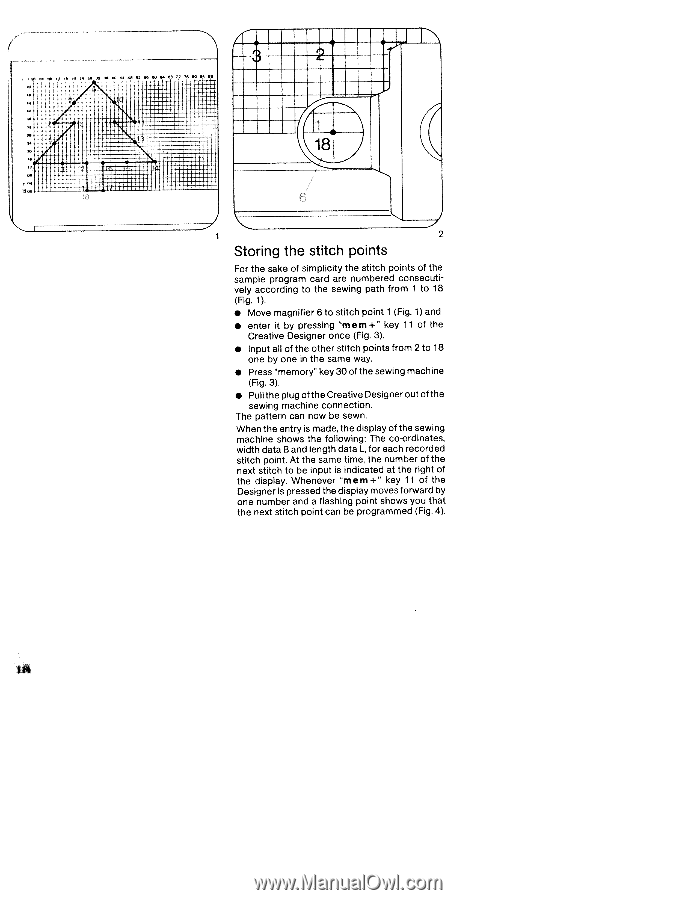
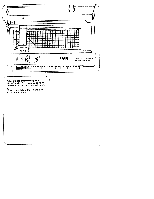
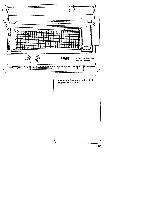
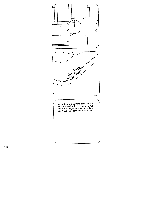
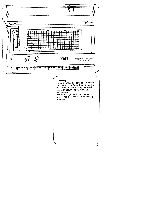
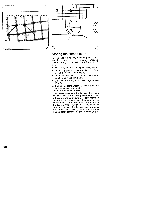
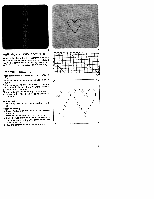
- Tfl: fl I ' jii :( 1 2 Storing the stitch points For the sake of simplicity the stitch points of the sample program card are numbered consecuti vely according to the sewing path from 1 to 18 (Fig. 1). • Move magnifier 6 to stitch point 1 (Fig. 1) and • enter it by pressing "mem+" key 11 of the Creative Designer once (Fig. 3). • Input all of the other stitch points from 2 to 18 one by one in the same way. • Press "memory" key 30 of the sewing machine (Fig. 3). • Pull the plug of the Creative Designer out of the sewing machine connection. The pattern can now be sewn. When the entry is made, the display of the sewing machine shows the following: The co'ordinates, width data B and length data L, for each recorded stitch point. At the same time, the number of the next stitch to be input is indicated at the right of the display. Whenever "mem+" key 11 of the Designer is pressed the display moves forward by one number and a flashing point shows you that the next stitch point can be programmed (Fig. 4).
-
 1
1 -
2
-
3
-
4
-
5
-
6
-
7
-
8
-
9
-
10
-
11
-
12
-
13
-
14
-
 15
15 -
 16
16 -
 17
17 -
 18
18 -
 19
19 -
 20
20 -
 21
21 -
 22
22 -
 23
23 -
 24
24 -
 25
25 -
26
-
27
-
28
-
29
-
30
-
31
-
32
-
33
-
34
-
35
-
36
-
37
-
38
-
39
-
40
-
41
-
42
-
43
-
44
-
45
-
46
-
47
-
48
-
49
-
50
-
51
-
52
-
53
-
54
-
55
-
56
-
57
-
58
-
59
-
60
-
61
-
62
-
63
-
64
-
65
-
66
-
67
-
68
-
69
-
70
-
71
-
72
-
73
-
74
-
75
-
76
-
77
-
78
-
79
-
80
-
81
-
82
-
83
-
84
-
85
-
86
-
87
-
88
-
89
-
90
-
91
-
92
-
93
-
94
-
95
-
96
-
97
-
98
-
99
-
100
-
101
-
102
-
103
-
104
-
105
-
106
 |
 |