Pfaff expression 2.0 Owner's Manual - Page 27
Alternatives 11, Wheel 12, Direct selection 13, F1 - Function 1 14, Settings menu 15, Info button 16 - buttonhole
 |
View all Pfaff expression 2.0 manuals
Add to My Manuals
Save this manual to your list of manuals |
Page 27 highlights
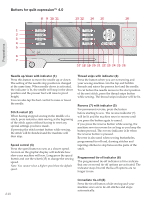
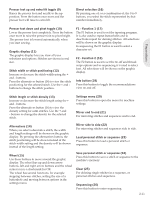
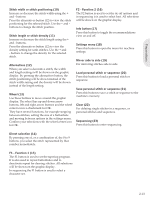
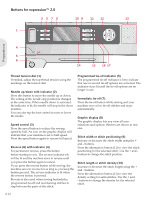
Alternatives (11) When you select a decorative stitch, the width and length settings will be shown on the graphic display. By pressing the alternatives button, the stitch positioning will be shown instead of the stitch width setting and the density will be shown instead of the length setting. Wheel (12) Use these buttons to move around the graphic display. The wheel has up and down arrow buttons, left and right arrow buttons and the wheel center icon is a checkmark for OK. They have several functions, for example stepping between stitches, setting the size of a buttonhole and moving between options in the settings menu. ConÀrm your selections with the wheel center icon for OK. Direct selection (13) By pressing one of, or a combination of, the 0 to 9 buttons, you select the stitch represented by that number immediately. F1 - Function 1 (14) The F1 button is used to activate the tie-off options. It is also used to repeat buttonholes and to deactivate repeat for darning stitches. All selections will be shown on the graphic display. Settings menu (15) Press this button to open the menu for machine settings. Info button (16) Press this button to toggle the recommendations view on and off. Mirror side to side (17) For mirroring stitches side to side. 2:15 Preparations
-
 1
1 -
2
-
3
-
4
-
5
-
6
-
7
-
8
-
9
-
10
-
11
-
12
-
13
-
14
-
15
-
16
-
17
-
18
-
19
-
20
-
21
-
 22
22 -
 23
23 -
 24
24 -
 25
25 -
 26
26 -
 27
27 -
 28
28 -
 29
29 -
 30
30 -
 31
31 -
 32
32 -
33
-
34
-
35
-
36
-
37
-
38
-
39
-
40
-
41
-
42
-
43
-
44
-
45
-
46
-
47
-
48
-
49
-
50
-
51
-
52
 |
 |
