Pfaff hobbylock 603A Owner's Manual - Page 14
Replacing, lower, knife
 |
View all Pfaff hobbylock 603A manuals
Add to My Manuals
Save this manual to your list of manuals |
Page 14 highlights
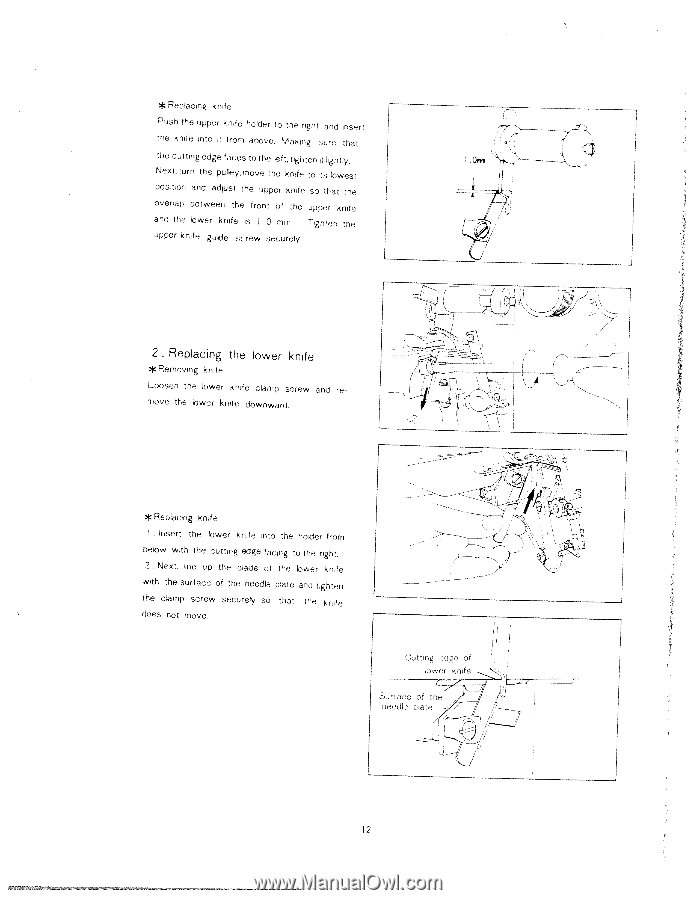
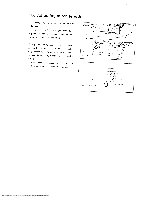
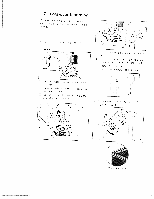
* Replacing knife Push the upper knife holder to the right and nsert the knife into t from above. 1aktng sure that the cutting edge faces to the loft, tighten it lightly. Next, turn the pulloy,move the knife to ts lowest position and adiust the upper knife so that the overlap between the front of the upper knife and the lower knife is I 0 mm. Tighten the upper knife gurie screw securely. 0mm ff.,.,. U 2. Replacing the lower knife *Removing knife Loosen the lower knife clamp screw and re move the lower knife downward. * Replacing knife Insert the lower knife into the hokier from below with the cutting edge facing to the right. 2 . Next, line up the blade of the lower knife with the surface of the needle plate and tighten the clamp screw securely so that the Knife toes not move. r 1 //ç/ -t: I Ctung edge of lower knite . --, Surface ot th / ni wle ola i.;::::;-.. 12
-
 1
1 -
2
-
3
-
4
-
5
-
6
-
7
-
8
-
 9
9 -
 10
10 -
 11
11 -
 12
12 -
 13
13 -
 14
14 -
 15
15 -
 16
16 -
 17
17 -
 18
18 -
 19
19
 |
 |