Philips 30PW8402 Quick start guide - Page 8
Helpful Hint
 |
View all Philips 30PW8402 manuals
Add to My Manuals
Save this manual to your list of manuals |
Page 8 highlights
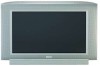
6 AV1 (AUDIO/VIDEO) AND AV2 INPUT CONNECTION The TV's audio/video input jacks are for direct picture and sound Back of TV connections between the TV and a VCR (or similar device) that has audio/video output jacks. Both the AV1 and AV2 Input Jack connections are shown on this page, but either one can be connected alone. Follow the easy steps below to connect your accessory device to the AV1 and AV2 IN Jacks located on the back of the TV. 1 Connect the VIDEO (yellow) cable to the VIDEO AV1 IN (or AV2 IN) jack on the back of the AV1 Connection TV. 2 Connect the AUDIO (red and white) cables to the AUDIO (left and right) AV1 IN (or AV2 in) Back of VCR jacks on the rear of the TV. 3 Connect the VIDEO (yellow) cable to the VIDEO OUT jack on the back of the VCR (either one or two) or accessory device being VCR One (or accessory device) (Equipped with Audio and used. Video Output Jacks) 4 Connect the AUDIO (red and white) cables to the AUDIO (left AV2 Connection and right) OUT jacks on the rear of the VCR (either one or two) or accessory device being used. 5 Turn the VCR (either one or two) or accessory device and the TV ON. 6 Press the AV button or the CH+ or CH- buttons to set the TV to its AV1 or AV2 channel. 7 With either of the VCRs (or accessory devices) ON and a prerecorded tape (CD, DVD, etc.) inserted, press the PLAY button to view the tape on the television. VCR Two (or accessory device) (Equipped with Video and Audio Output Jacks) Video In (Yellow) Audio In (Red and White) HELPFUL HINT Audio and video cables are not supplied with the TV, but are available from Philips or electronics retailers. POWER VCR DVD SAT AMP ACC SLEEP Select AV ACTIVE CC 47 3 SOUND CONTROL 4 8 CLOCK PICTURE
-
 1
1 -
2
-
 3
3 -
 4
4 -
 5
5 -
 6
6 -
 7
7 -
 8
8 -
 9
9 -
 10
10 -
 11
11 -
 12
12 -
 13
13 -
14
-
15
-
16
-
17
-
18
-
19
-
20
-
21
-
22
-
23
-
24
-
25
-
26
-
27
-
28
-
29
-
30
-
31
-
32
-
33
-
34
-
35
-
36
-
37
-
38
-
39
-
40
-
41
-
42
 |
 |
