Philips DVDR3355 Quick start guide - Page 1
Philips DVDR3355 Manual
 |
View all Philips DVDR3355 manuals
Add to My Manuals
Save this manual to your list of manuals |
Page 1 highlights
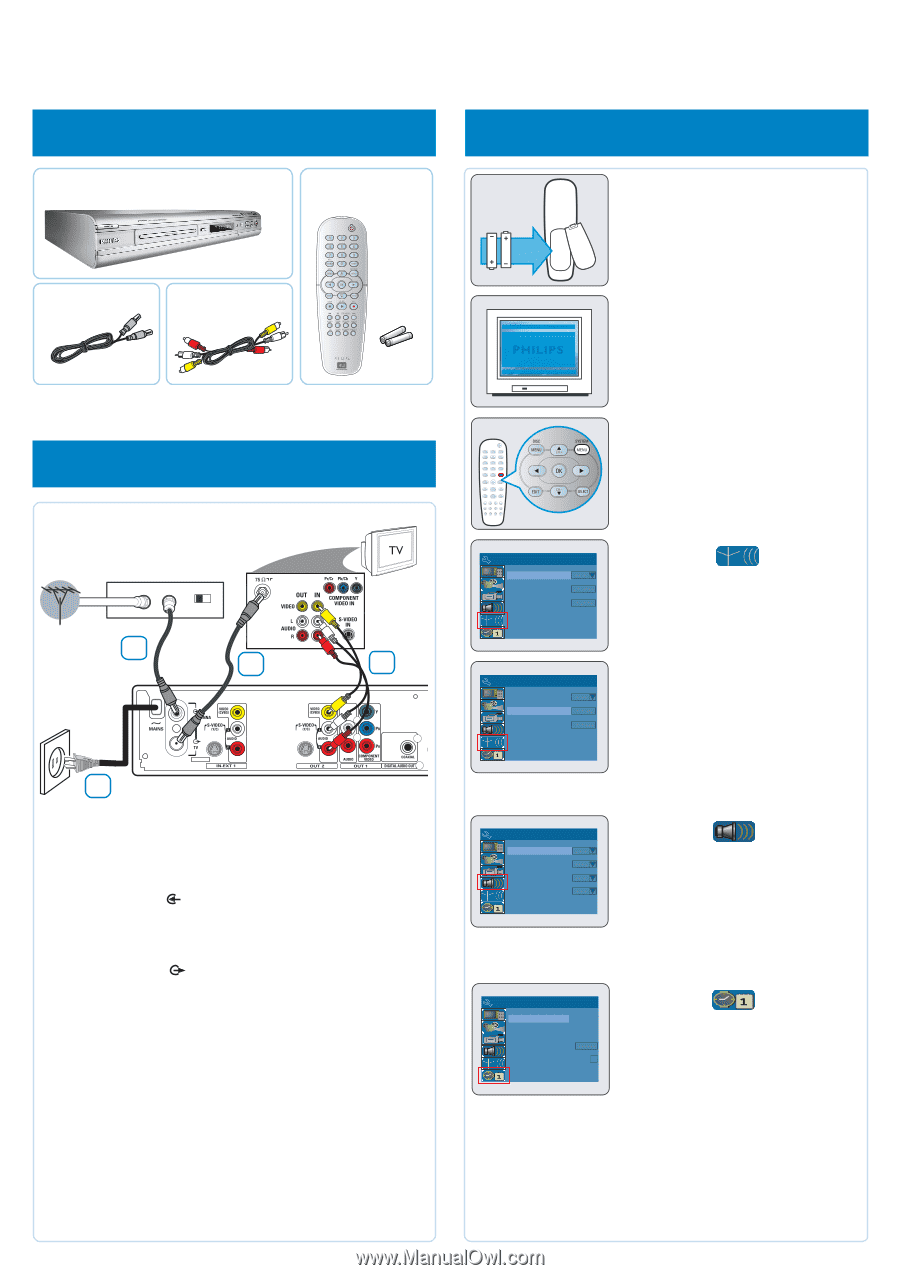
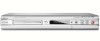
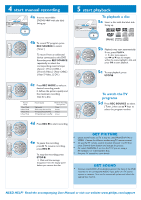
QUICK USE GUIDE 12nc: 3139 246 15331 DVDR3355 1 what's in the box A Main Unit B Remote control includes 2x AA batteries 3 Start initial setup 3a Insert batteries. C RF coaxial cable D Video/Audio (AV) cables (yellow/red/white) 2 connect DVD recorder Cable or satellite signal Cable/satellite box jack panel IN OUT CH3 CH4 2a 2b 2c 2d DVD recorder back panel 2a Connect existing antenna cable/satellite signal (or from the Cable/Satellite Box [RF OUT or TO TV]) to the ANTENNA input jack at the back of the DVD recorder. 2b Use the supplied RF coaxial cable to connect the DVD recorder's TV output jack to your TV's antenna input jack. 2c Use the supplied AV cables (yellow/red/white ends) to connect the DVD recorder's VIDEO (CVBS) and AUDIO L/R OUT2 jacks to the matching Video/Audio input jacks at the back of your TV. 2d Connect the power cable from the DVD recorder's ~ MAINS to the AC power outlet. Helpful Hint: For additional types of connections, see User Manual pages 12~19. 3b Turn on the TV to the correct program number for the input jack (e.g.'EXT','0','AV'). ➜ The blue PHILIPS DVD background screen will appear on the TV. 3c Press SYSTEM MENU on the remote control. ➜ Use 3 4 keys to go through the menu. Select an item by pressing 2, and confirm a setting by pressing OK. System Menu - Channel Setup Tuner Input Source Cable Channel Search Search Modify Channel Information Edit System Menu - Channel Setup Tuner Input Source Cable Channel Search Search Modify Channel Information Edit 3d Highlight and press 2. Setup and install TV channels. 1 Select { Tuner Input Source. } - { Cable } if the DVD recorder is connected via a cable/satellite box. - { Air } if the DVD recorder is connected directly to the antenna wall outlet. 2Select { Channel Search } and press OK on the remote control to start automatic TV channel search. System Menu - Language OnScreenDisplayLanguage English Default Disc Menu LanguageEnglish Default Subtitle Language English Default Audio Language English 3e Highlight and press 2. Select the language. - select TV On-Screen Display language. - select default Disc Menu language. - select default subtitle language. - select default audio language. System Menu - Clock Date (mm/dd/yy) 01/31/05 Time (hh:mm:ss} 10:33:57AM ShowDivX®RegistrationCode OK 3f Highlight and press 2. Set the Date and Time. Use the numeric keypad 0-9 to input the date/time, then press OK to confirm. 3g Press SYSTEM MENU to exit. The DVD recorder is ready for use! See next page for basic recording and playback.
-
 1
1 -
 2
2
 |
 |