Philips DVDR3545V User manual
Philips DVDR3545V - DVDr/ VCR Combo Manual
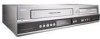 |
UPC - 689076461481
View all Philips DVDR3545V manuals
Add to My Manuals
Save this manual to your list of manuals |
Philips DVDR3545V manual content summary:
- Philips DVDR3545V | User manual - Page 1
Introduction Connections DIGITAL VIDEO DISC RECORDER & VIDEO CASSETTE RECORDER WITH DIGITAL TUNER User Manual STOP ARRÊT DVDR3545V/37 ALTO Basic Setup Recording Playback Editing Function Setup VCR Functions Others E9H90UD.indd 1 2007/06/20 13:35:48 - Philips DVDR3545V | User manual - Page 2
philips.com/welcome Know these safety symbols CAUTION RISK OF ELECTRIC SHOCK DO NOT OPEN CAUTION: TOREDUCE THE RISK OF ELECTRIC SHOCK, DO NOT REMOVE COVER (OR BACK). NO USER-SERVICEABLE PARTS INSIDE. REFER SERVICING TO QUALIFIED SERVICE to prevent operating and maintenance problems. WARNING: To - Philips DVDR3545V | User manual - Page 3
the building, as close to the point of cable entry as practical. Example of Antenna Grounding as per NEC - National Electric Code GROUND CLAMP ANTENNA LEAD IN WIRE Playback Editing Function Setup VCR Functions E9H90UD.indd 3 ELECTRIC SERVICE EQUIPMENT ANTENNA DISCHARGE UNIT (NEC SECTION 810 - Philips DVDR3545V | User manual - Page 4
that the user switch the connection to the 'standard definition' output. If there are questions regarding your TV set compatibility with this 525p (480p) DVD player, please contact our customer service center. Declaration of Conformity Model Number: DVDR3545V/37 Trade Name: Philips Responsible - Philips DVDR3545V | User manual - Page 5
Connections Basic Setup Recording Playback PRECAUTIONS Supplied Accessories remote control with batteries (AAAx2) RF coaxial cable RCA audio/video cables user manual User Manual quick start guide Maintenance Servicing • Please refer to relevant topics on "TROUBLESHOOTING" on pages 107 - Philips DVDR3545V | User manual - Page 6
30 Auto Clock Setting 30 Manual Clock Setting 31 Daylight Saving Time 31 TUNER SETTINGS 32 Switching Analog Mode / Digital Mode 32 Channel Selection 32 Selecting TV Audio 33 DTV Closed Caption 35 Closed Caption Style 36 Recording INFORMATION ON DVD RECORDING 38 BEFORE RECORDING 39 Make - Philips DVDR3545V | User manual - Page 7
All 103 VCR Functions VCR FUNCTIONS 104 Playback 104 Recording 104 One-touch Timer Recording (OTR 105 Index Search 105 Time Search 106 Other Operations 106 Others TROUBLESHOOTING 107 Frequently Asked Questions 111 LANGUAGE CODE 112 GLOSSARY 113 SPECIFICATIONS 114 LIMITED WARRANTY 115 - Philips DVDR3545V | User manual - Page 8
on DVD+RW/+R or DVDRW/-R. VCR mode Quick search for what you want to watch: You can easily find the part you want to watch using the index search/time search functions. An index mark will be assigned at the beginning of each recording you make. For time search function, you can go to a specific - Philips DVDR3545V | User manual - Page 9
Used in this User Manual To specify for what disc type each function is, we put the following symbols at the beginning of each item to operate. * DVD-RW/-R recorded in VR mode or non compatible recording format are not playable. * DVD-RW recorded in the mode other than +VR is not recordable on this - Philips DVDR3545V | User manual - Page 10
FUNCTIONAL OVERVIEW Front Panel 1 2 3* 4 STANDBY-ON 4 HEAD HI-FI STEREO ONE TOUCH RECORDING • LONG PLAY DVD RECORDER / VCR DVDR 3545V REW F.FWD STOP/EJECT PLAY REC OPEN/CLOSE DVD RECORDER CHANNEL REC VCR DVD STOP PLAY SOURCE SV VIDEO L-AUDIO-R DV 21 19 17 16 22 20 18 15 - Philips DVDR3545V | User manual - Page 11
AV receiver or other device with an RCA video cable. 7. VIDEO IN jack (E1) (DVD/VCR) Use to connect external device with an RCA video cable. 8. AUDIO IN jacks (E1) (DVD/VCR) Use to connect external device with an RCA audio cable. 9. S-VIDEO IN jack (E1) (DVD/VCR) Use to connect the S-video output of - Philips DVDR3545V | User manual - Page 12
remote control. • The maximum operable ranges from the unit are as follows. - Line of sight: approx. 23 feet (7m) - Either side of the center: approx. 16 feet (5m) within 30° - Above: approx. 16 feet (5m) within 15° - Below: approx. 10 feet (3m) within 30° STANDBY-ON DVD RECORDER / VCR DVDR 3545V - Philips DVDR3545V | User manual - Page 13
or time search menu. 34. TIMER SET button (DVD/VCR) • Press to set the unit in the timer standby mode. In the timer standby mode, press to cancel the mode and to turn the unit on. Note • If you turn off this unit, [OPEN/CLOSE A] on the remote control is not available. Be sure to use - Philips DVDR3545V | User manual - Page 14
timer programming or OTR has been set or is proceeding. : Flashes when all timer recordings have been finished. : Flashes when there is an error in programming. : Appears during recording process. : Flashes when a recording is in pause. : Appears when this unit is in DVD output mode and a disc is in - Philips DVDR3545V | User manual - Page 15
the RF coaxial cable from the ANTENNA IN jack before moving the unit. • If you use an antenna to receive analog TV, it should also work for DTV reception. Outdoor or attic antennas will be more effective than set-top versions. • Antenna out is for tuner pass through only. DVD playback through the - Philips DVDR3545V | User manual - Page 16
your TV and choose the same channel as you set the RF modulator's channel 3/4 switch to. For more details, follow the manual supplied with the RF modulator. rear of your TV ANT. IN HDMI OUT rear of this unit S-VIDEO DVD/VCR DVD DVD/VCR OUT DIGITAL AUDIO S-VIDEO COMPONENT S-VIDEO IN ---AUDIO - Philips DVDR3545V | User manual - Page 17
Setup Recording CONNECTION TO A CABLE / SATELLITE BOX 1) Disconnect the power cords of the devices from the AC outlet. 2) Make the connection as illustrated below. 3) Plug in the power cords of the devices to the AC outlet. e.g.) RCA video cable HDMI OUT rear of this unit S-VIDEO DVD/VCR DVD - Philips DVDR3545V | User manual - Page 18
RCA audio/video cables are connected to a VCR, pictures may be distorted due to the copy protection system. • You will not be able to hear the sound being output from DVD if you are not connecting DVD AUDIO OUT when you made either S-video or component video out connection. To set progressive scan - Philips DVDR3545V | User manual - Page 19
HDCP (high-bandwidth digital content protection system). HDCP is copy protection technology that comprises data encryption and authentication of the connected AV device. This unit supports HDCP. Please read the operating instructions of your display device (or AV amplifier) for more information - Philips DVDR3545V | User manual - Page 20
Refer to the manual accompanying external devices for audio coaxial cable DIGITAL AUDIO OUT DVD AUDIO S-VIDEO COMPONENT S-VIDEO OUT VIDEO OUT Y DVD/VCR IN ---AUDIO settings, refer to page 94. Note • The audio source on a disc in a Dolby Digital multi channel surround format cannot be recorded - Philips DVDR3545V | User manual - Page 21
channel (external input channel) for the recorder. • For some TVs, there may be a button on the TV's remote control that accesses the external input channel. It may be labeled "SOURCE", "AV", or "SELECT". In such case, press it repeatedly. Refer to your TV's user manual for details. • If more than - Philips DVDR3545V | User manual - Page 22
settings for playing back, recording, or editing to suite your preference. Guide to On-Screen Display / Menu The on-screen display changes in the following order as you press [INFO]. OFF DTV Program Guide (only in DTV mode) Disc Information/Menu (only in DVD mode) or VCR Information (only in VCR - Philips DVDR3545V | User manual - Page 23
Introduction Connections Basic Setup Recording BEFORE YOU START VCR mode VCR Information 1 12:00AM 2 CH 21 Stereo 3 HDMI Information video format. 3. Indicates the HDMI audio format. 4. Indicates an operation status. Title/File Name Information Title Name Information Title Name My Title - Philips DVDR3545V | User manual - Page 24
RW/-R with MP3 / Windows Media™ Audio / JPEG files is inserted into the unit. General Setting Menu 1 General Setting 110 2 Playback 3 Display 4 Video Recording 5 Clock 26 Channel DivX 37 HDMI 48 Reset All Parental Lock Disc Audio Disc Menu Language Audio Language Subtitle Language - Philips DVDR3545V | User manual - Page 25
the front panel, or press [VCR] on the remote control. (Verify that the VCR indicator is lit.) STANDBY-ON 4 HEAD HI-FI STEREO ONE TOUCH RECORDING • LONG PLAY DVD RECORDER / VCR DVDR 3545V REW F.FWD STOP/EJECT PLAY REC OPEN/CLOSE DVD RECORDER CHANNEL REC VCR DVD STOP PLAY SOURCE SV - Philips DVDR3545V | User manual - Page 26
): (When using basic cable) The channels broadcasted in analog CATV and digital CATV are automatically scanned and memorized. CH 1 Auto Presetting Now 4 Press [OK] to activate "Clock Setting". Initial Setup Clock Setting -- : -- -- 5 Proceed to step 5 in "Manual Clock Setting" on page 31. • If - Philips DVDR3545V | User manual - Page 27
the auto channel preset is canceled during presetting, some channels not yet preset may not be received. • You cannot change the channel when either VCR or DVD is in any recording mode (basic recording, onetouch timer recording or timer recording). E9H90UD.indd 27 EN 27 2007/05/16 15:44:02 Others - Philips DVDR3545V | User manual - Page 28
", then press [OK]. "General Setting" menu will appear. 3 Use [K / L] to select "Channel", then press [OK]. "Channel" menu will appear. 4 Use [K / L] to select "Manual Channel Preset", then press [OK]. Auto Channel Preset Manual Channel Preset TV Audio Select • If you are adding or deleting analog - Philips DVDR3545V | User manual - Page 29
) Add Delete Your setting will be activated. WARNING: • For the digital TV channels, you cannot recover the deleted channels once they are deleted unless you perform the auto channel preset again. 7 Press [SETUP] to exit. Recording Playback Editing Function Setup VCR Functions Others E9H90UD - Philips DVDR3545V | User manual - Page 30
your area, follow "Auto Clock Setting" below. If not, follow "Manual Clock Setting" on page 31. Auto Clock Setting This unit can set the time and date automatically by referring to a PBS station. Make sure • The antenna/cable TV connections are correct. • Channels are set. (Refer to page 27.) • If - Philips DVDR3545V | User manual - Page 31
Recording Playback Editing Function Setup VCR Functions Note • Your setting will be canceled if you press [BACK ] before pressing [OK] at step 5. • Your clock setting set the clock manually. • For setting the day, year, hour, and minute, [the Number buttons] can also be used. • You can set the - Philips DVDR3545V | User manual - Page 32
TUNER SETTINGS Switching Analog Mode / Digital Mode You can easily switch the analog TV (NTSC) and digital TV (ATSC) with the remote control. Press [DTV/TV] on the remote control broadcasting offers a service that enables multiple signals manually by using [CH / ] 32 EN E9H90UD.indd 32 2007/05 - Philips DVDR3545V | User manual - Page 33
audio language you have selected will be recorded. Basic Setup Recording Playback Editing Function Setup VCR Functions Note • You cannot change the audio language for the timer recording of digital TV broadcasting. • Pressing [AUDIO] does not control external device audio. • When there is only - Philips DVDR3545V | User manual - Page 34
audio. 5 Press [SETUP] to exit. 34 EN E9H90UD.indd 34 Note on recording analog TV audio • When you record an analog TV program available in second audio or stereo, you have to select either "Stereo" or "SAP" in "General Setting" menu beforehand. Refer to the following table to check an appropriate - Philips DVDR3545V | User manual - Page 35
CC", then press [OK]. CC Style DTV CC User Setting Font Size Font Style Edge Type Font Opacity Font Color Back Opacity Back Color Note • Even if you set "DTV CC" to anything other than "OFF", its effect will temporarily be canceled while recording. 5 Use [K / L] to the desired DTV closed caption - Philips DVDR3545V | User manual - Page 36
TUNER SETTINGS Digital TV Digital TV can also change the style of its closed caption such as font, color or size, etc. 1 Press [SETUP] and use [K / L] to select "General Setting", then press [OK]. "General Setting to select "User Setting", then press [OK]. CC Style DTV CC User Setting Font Size - Philips DVDR3545V | User manual - Page 37
Basic Setup Recording TUNER SETTINGS 6 Use [K / L] to select the item and switch the setting for each item you want to set, then press [OK]. • When "User Setting" is set to "ON", you can set the following items. CC style set by "User Setting" will be displayed. • The setting description for - Philips DVDR3545V | User manual - Page 38
need to finalize. Unrecordable Discs • DVD-RW recorded in the mode other than +VR is not recordable on this unit unless you erase all contents in the disc (refer to page 87). • DVD-R recorded in the mode other than +VR is not recordable on this unit. • The recording time is only an estimate. The - Philips DVDR3545V | User manual - Page 39
specified time for chapter marks. Use this feature to make the unfinalized +VR mode discs recorded on other unit recordable on this unit. When you make an additional recording on this unit with "Make Recording Compatible" set to "ON", the title menu is automatically converted to our style. 1) Press - Philips DVDR3545V | User manual - Page 40
38 for the list of compatible discs.) It may take a while to load the disc. • When inserting a brand-new DVD+RW/DVDRW, the unit automatically starts to format. • If titles have been recorded on the disc, the title list is displayed. Press [STOP C] to exit the title list. 2 Press [REC MODE] to - Philips DVDR3545V | User manual - Page 41
list. (Refer to "Guide to a Title List" on page 76.) e.g.) DVD+R Connections Basic Setup Recording I Press [PAUSE F] to pause recording. Press [PAUSE F]] or [REC I] again to restart recording. To set one-touch timer recording (OTR)... This is a simple way to set the recording time in blocks of - Philips DVDR3545V | User manual - Page 42
currently in progress. In this case, the recording of the same channel will be made on both DVD and VCR. • Cancel the timer-standby mode by pressing [TIMER SET] before operation for either DVD or VCR. When finished operating, press [TIMER SET] to resume the timer-standby mode. • In the timer - Philips DVDR3545V | User manual - Page 43
list will appear. Press TIMER SET to Timer Standby mode. When Timer set on DVD or VCR, it is not available in the standby mode. Press TIMER SET to cancel the Standby mode. 6 Use [K / L] to select the recording media ("DVD" or "VCR"), then press [B]. e.g.) recording to DVD Date JAN/02 CH DTV125 - Philips DVDR3545V | User manual - Page 44
start at the start time. Power failed No disc when recording Already 49 titles recorded Already 254 chapters recorded Copy prohibited program It is impossible to record additionally on a disc recorded by other units when setting " Make Recording Compatible" to "OFF". • E23, E27, E28, E31, E32, E33 - Philips DVDR3545V | User manual - Page 45
the cassette tape, and turn itself off. To continue recording, insert a recordable tape. • When all the timer recordings are completed, flashes. Press [TIMER SET] to release the unit from the timer standby mode. • If both DVD and VCR are timer programmed, you cannot use any functions for either - Philips DVDR3545V | User manual - Page 46
that the TV input is set on the unit. 2) Load 37:52 SP(2Hr) 5) Use [K / L] to select "Overwrite", then press [OK]. Play Edit Overwrite 1 SP (2Hr) NOV/21/07 11:00AM CH12 SP NOV/21/07 0:20:44 2 6) Select the channel you want to record. (Refer to page 32 on how to select a channel.) e.g.) DVD - Philips DVDR3545V | User manual - Page 47
: A title name : C When overwriting in the middle of the title: overwrite recording : A existing title : B after overwriting 30 - 180 seconds will be cut off name as the original existing title (B). Playback Editing Function Setup VCR Functions Others Note • When a title name is overwritten, - Philips DVDR3545V | User manual - Page 48
cable E2 or to E2 & E3 IN STANDBY-ON 4 HEAD HI-FI STEREO ONE TOUCH RECORDING • LONG PLAY DVD RECORDER / VCR DVDR 3545V REW F.FWD STOP/EJECT PLAY REC E3 OPEN/CLOSE DVD RECORDER CHANNEL REC VCR DVD / L] to select "General Setting", then press [OK]. "General Setting" menu will appear. 2 - Philips DVDR3545V | User manual - Page 49
VCR DVDR 3435V REW F.FWD STOP/EJECT PLAY REC 64 OPEN/CLOSE DVD RECORDER 5 Start playback on the external device to record from. O CHANNEL 6 For disc: Press [STOP C] on the unit to stop recording. For cassette tape: Press [STOP/EJECT C A] on the unit to stop recording. This operation - Philips DVDR3545V | User manual - Page 50
video camcorder) to DVD or cassette tape. You can control basic operations of the DVC from the remote control of this unit if the DVC is in video mode. Guide to DV and On-Screen Display 1) Connect your DVC to the DV input jack on the front panel using a DV cable. (Use the DV cable that has 4-pin - Philips DVDR3545V | User manual - Page 51
DVC to DVD Dubbing Before recording from DVC, refer to page 48 for connection instructions. 2 Press [REC MODE] to select a recording mode. (Refer to page 38.) 3 Press [INFO]. 4 With "Control" highlighted, press [OK] to display the available devices to control with the remote control of this - Philips DVDR3545V | User manual - Page 52
to DV camcorder. • For the proper operation, connect DVC to the unit directly. cable / satellite box or D-VHS VCR cannot be recognized. • If no video signal is detected from the DVC during DVC to DVD dubbing, the recording not be recorded. • Pictures with a copy-guard signal cannot be recorded. • A - Philips DVDR3545V | User manual - Page 53
Playback Editing Function Setup VCR Functions Note for dubbing • Dubbing direction setting in "Dubbing Mode" menu is always reset to "VCR DVD" whenever you turn off the power. • You cannot change the output mode during VCR to DVD or DVD to VCR duplication. Note for recording to a tape: Make sure - Philips DVDR3545V | User manual - Page 54
. This is not a malfunction. Be advised to play back the tape until the picture is stabilized, then set the starting point which you wish to start recording, and start VCR to DVD duplication. • This unit will automatically stop the duplication if playback with no image is detected for more than - Philips DVDR3545V | User manual - Page 55
e.g.) DVD+RW Disc Edit Edit Disc Name Erase Disc Make Edits Compatible Disc Protect OFF ON 4 Use [K / L] to select "Yes", then press [OK]. Protect this disc? Yes No A disc will be protected. This operation may take a while to be completed. Recording Playback Editing Function Setup VCR Functions - Philips DVDR3545V | User manual - Page 56
finalized a DVD+R/ DVD-R, you cannot edit or record anything on that disc. • There is no need to finalize DVD+RW. • When you insert a DVD-RW finalized will be continued. • You cannot cancel finalizing the DVD+R/DVD-R once it has started. This operation may take a while to be completed. 5 Finalizing - Philips DVDR3545V | User manual - Page 57
[OK]. Auto Finalize Disc Full End of Timer Rec 5 Use [K / L] to select "ON", then press [OK]. e.g.) "Disc Full" Disc Full ON OFF Your setting will be activated. 6 Press [SETUP] to exit. Recording Playback Editing Function Setup VCR Functions Others E9H90UD.indd 57 EN 57 2007/05/16 15:44:30 - Philips DVDR3545V | User manual - Page 58
in the United States and Canada). This unit uses NTSC, so DVD you play back must be recorded in the NTSC system. You cannot play back DVD recorded in other color systems. Region Codes This unit has been designed to play back DVD with region 1. DVD must be labeled for ALL regions or for region 1 in - Philips DVDR3545V | User manual - Page 59
. DVD-video title 1 title 2 chapter 1 chapter 2 chapter 1 chapter 2 chapter 3 track 1 audio CD, video CD track 2 track 3 track 4 track 5 MP3, Windows Media™ Audio, JPEG folder 1 folder 2 file 1 file 2 file 3 file 4 file 5 Recording Playback Editing Function Setup VCR Functions - Philips DVDR3545V | User manual - Page 60
guide. * Make sure the disc is compatible with this unit. (Refer to page 58 for the list of compatible discs.) It may take a while to load the disc. 2 Press [PLAY B] to start playback. If you are playing back a DVD PBC (playback control) function (page 59). 60 EN E9H90UD.indd 60 2007/05/16 15:44:33 - Philips DVDR3545V | User manual - Page 61
PLAYBACK Playback from the Title List Press [DVD] first. 1 Insert a playable disc Recording Playback Editing Function Setup VCR Functions Note • Some discs may start playback automatically. • You can also start playback by pressing [PLAY B] instead of [OK] at step 2. E9H90UD.indd 61 Instructions - Philips DVDR3545V | User manual - Page 62
10:33 3 EMPTY TITLE 1:37:52 SP(2Hr) 3 DVD+RW/DVD+R/ DVD-RW/DVD-R) 3. Total number of title (include "EMPTY TITLE") 4. Total time of recorded disc space 5. Status of disc protection ("ON" is protected disc.) 6. Making edits compatible/finalize • When DVD+RW is inserted: If the disc needs to be set - Philips DVDR3545V | User manual - Page 63
replaced with asterisks. • If there are no files in the folder, "No Files" will be displayed. It is recommended that files to be played back in this unit are recorded under the following specifications: • Sampling frequency : 44.1 kHz or 48 kHz. • Constant bit rate - Philips DVDR3545V | User manual - Page 64
a DivX® BASIC PLAYBACK 64 EN E9H90UD.indd 64 Press [DVD] first. 1 Insert a playable disc (refer to page 25 by the user... The subtitle created by the user can be displayed during DivX® playback. 1) After selecting the DivX® file, the "Subtitle List" will appear when "DivX Subtitle" is set to - Philips DVDR3545V | User manual - Page 65
recorded under the following specifications user can view another part on , bit rates, or audio format settings, etc. support, the playback will be stopped and error message will appear. • If DivX® files written on a CD-RW/-R cannot be played back, rewrite them on a DVD+RW/+R or DVD codes - Philips DVDR3545V | User manual - Page 66
of the disc, or a disc menu, which guides you through the available functions in the disc. Press [DVD] first. 1) Insert a playable disc (refer exit. F 2) Press [PLAY B] to return to the normal playback. Note • On DVD, set "Still Mode" to "Field" in "Playback" menu if pictures in the pause mode are - Philips DVDR3545V | User manual - Page 67
You can skip TV commercials to enjoy the recorded programs without interrupting. During playback, press [SKIP changed as follows. Fast forward or fast reverse playback across titles (for DVD) or files (for MP3 / Windows Media™ Audio files) is Setup VCR Functions Others E9H90UD.indd 67 EN 67 2007/05/16 15 - Philips DVDR3545V | User manual - Page 68
only during playback. This function is available only on discs recorded in the Dolby Digital format, and plays back in a effects. 2) Press [PLAY B] to continue the normal playback. Note • Audio (language) setting cannot be changed while using this mode. • This feature may not work at some point - Philips DVDR3545V | User manual - Page 69
these operations listed below. - Opening the disc tray - Turning off the power - Record on a recordable disc • You can mark up to 6 points. • Marker setting is not available when you play back the video CD with PBC function. Playback Editing Function Setup VCR Functions Others E9H90UD.indd - Philips DVDR3545V | User manual - Page 70
files 1/ 5 0:00:15 MP3 OFF Track All Group The selected repeat playback will start. 1/ 5 1/ 5 0:01:00 / 1:23:45 DVD Repeat Title Note • Point B for the repeat A-B playback should be set within the same title or track as point A. • To cancel the repeat playback, select "OFF" at step 3. The - Philips DVDR3545V | User manual - Page 71
Introduction Connections Basic Setup Recording Program Playback SPECIAL PLAYBACK Slide For video CD with PBC function, the PBC setting will be switched to off automatically when you start program playback. Playback Editing Function Setup VCR Functions Others E9H90UD.indd 71 EN 71 2007/05 - Philips DVDR3545V | User manual - Page 72
audio CD 1/ 5 0:00:15 / 0:05:00 CD 1/ 5 1/ 5 0:01:00 / 1:23:45 DVD Video e.g.) MP3 files 1/ 5 0:00:15 MP3 The number next to will be highlighted. 3) Title: Use with PBC function. 1/ 5 1/ 5 0:01:00 / 1:23:45 DVD Video total number total time of titles total number of the title of - Philips DVDR3545V | User manual - Page 73
INFO]. 2) Use [{ / B] to select , then press [OK]. e.g.) DVD-video 1/ 5 1/ 5 0:01:00 / 1:23:45 DVD Video e.g.) audio CD 1/ 5 0:00:15 / 0:05:00 CD The video CD with PBC function. Recording Playback Editing Function Setup VCR Functions Others E9H90UD.indd 73 EN 73 2007/05/16 15:44:52 - Philips DVDR3545V | User manual - Page 74
are playing back. Switching Subtitles Switching Audio Soundtrack DVD-video may have subtitles in 1 or more CODE" on page 112. • For disc with DivX® files, the TV screen only displays the number of subtitle languages and "_ _ _ _" next to the numbers. When playing back a DVD-video recorded - Philips DVDR3545V | User manual - Page 75
Type 1 Type 2 Your setting will be activated. OFF : When playing back titles with a few noises such as DVD-video discs. Type 1 : For the titles recorded in long time mode such as SLP or SEP mode. Type 2 : Same as type 1, only more effective. Playback Editing Function Setup VCR Functions Others - Philips DVDR3545V | User manual - Page 76
Guide to a Title List Editing Discs Title list allows you to check the titles recorded on the disc easily. You can choose a title to play back from this list and easily edit the titles as you prefer. Press [DVD Titles (Refer to page 78.) • Setting Chapter Marks (Refer to page 79.) • Clearing Chapter Marks - Philips DVDR3545V | User manual - Page 77
0:20:44 2 NOV/22/07 11:35AM CH13 EP NOV/22/07 0:10:33 3 EMPTY TITLE 1:37:52 SP(2Hr) Note • Deleted part of the titles in the capacity indicator changes in color. • As for DVD+RW/DVD-RW if you delete the title, deleted title will be displayed as "EMPTY TITLE". E9H90UD.indd - Philips DVDR3545V | User manual - Page 78
the title. 5 After this operation is completed, press [BACK ] to exit. Data will be written onto the disc momentarily. This operation may take a while to be 1 ABC abc 123 @! ? character set Guide to Edit Title Name 1) Use [K / L] to select a desired character set, then press [OK]. 2) Follow - Philips DVDR3545V | User manual - Page 79
Introduction Connections Basic Setup Recording Playback EDITING DISCS Setting Chapter Marks You can put chapter be written onto the disc momentarily. This operation may take a while to be completed. EN 79 Editing Function Setup VCR Functions Others E9H90UD.indd 79 2007/05/16 15:45:01 - Philips DVDR3545V | User manual - Page 80
SP 0:00:59 The selected chapter mark will be deleted. 6 Press [BACK ] twice to exit. Data will be written onto the disc momentarily. This operation may take a while to be completed. Note • Remaining time of the disc may decrease when adding chapter marks or increase when clearing chapter marks - Philips DVDR3545V | User manual - Page 81
the disc momentarily. This operation may take a while to be completed. Playback Editing Function Setup VCR Functions Note • Remaining time of the disc may decrease when adding chapter marks or increase when clearing chapter marks depending on the recording - Philips DVDR3545V | User manual - Page 82
07 11:00AM CH12 SP 0:00:59 5 After this operation is completed, press [BACK ] twice to exit. Data will be written onto the disc momentarily. This operation may take a while to be completed. If you EP NOV/22/07 0:10:33 3 EMPTY TITLE 1:37:52 SP(2Hr) 82 EN E9H90UD.indd 82 2007/05/16 15:45:04 - Philips DVDR3545V | User manual - Page 83
:00AM CH12 SP 0:00:59 A picture for thumbnail will be set. 5 Press [BACK ] to exit. Data will be written onto the disc momentarily. This operation may take a while to be completed. Recording Playback Editing Function Setup VCR Functions Others Note • If the selected picture for a thumbnail - Philips DVDR3545V | User manual - Page 84
point. Data will be written onto the disc momentarily. This operation may take a while to be completed. Note • You cannot divide a title of the disc when the number of recording titles reaches the maximum of 49, and the number of recording chapters reaches the maximum of 254. 84 EN E9H90UD.indd - Philips DVDR3545V | User manual - Page 85
Recording • You cannot select "Disc Edit" when finalized DVD+R or DVD-R is inserted. 0:00:00 4 To enter a disc name, follow the steps of "Guide to Edit Title Name" on page 78. When . This operation may take a while to be completed. EN 85 Editing Function Setup VCR Functions Others E9H90UD.indd 85 - Philips DVDR3545V | User manual - Page 86
EDITING DISCS Setting or Releasing Disc Protect To prevent accidental editing, or erasing the titles, you can protect them. 1 Follow steps 1 to 2 in "Putting Name on Disc" on page 85 to display "Disc Edit" menu. 2 Use [K / L] to select "Disc Protect OFF ON", then press [OK]. e.g.) DVD+RW Disc Edit - Philips DVDR3545V | User manual - Page 87
menu. 2 Use [K / L] to select "Erase Disc", then press [OK]. e.g.) DVD+RW Disc Edit Edit Disc Name Erase Disc Make Edits Compatible Disc Protect OFF ON 3 the disc momentarily. This operation may take a while to be completed. Recording Playback Editing Function Setup VCR Functions Note • When - Philips DVDR3545V | User manual - Page 88
OFF ON 3 Use [K / L] to select "Yes", then press [OK]. Activate the Make Edits Compatible? Yes No Data will be written onto the disc momentarily. This operation may take a while to be completed. 88 EN E9H90UD.indd 88 2007/05/16 15:45:10 - Philips DVDR3545V | User manual - Page 89
Contents Playback Parental Lock Pages 92-95 OFF Set the parental level for DVD playback. level 8 [Adult] to 1 [Kid Safe] Disc Audio Dynamic Range ON Control OFF Compressing the range of sound volume. PCM 48kHz 96kHz Set whether the sound recorded in 96kHz will be down sampled in 48kHz - Philips DVDR3545V | User manual - Page 90
Dubbing Mode Pages 53-54 Make Recording Compatible Page 39 VCR DVD DVD VCR ON OFF Clock Clock Setting Pages 30-31 Auto Clock Setting Daylight Saving Time OFF Auto Manual ON(MAR-NOV) ON(APR-OCT) OFF Contents Set edge type of the displayed caption. Set the font opacity of the displayed caption - Philips DVDR3545V | User manual - Page 91
Yes No Contents Tune the channels automatically. Tune the channels manually. Set the analog TV audio type for output and recording. Provide DivX®VOD registration code. Set the language for DivX® Subtitle. Set the color space for the HDMI output. Set whether or not to output the HDMI audio signal - Philips DVDR3545V | User manual - Page 92
back a disc. 1 Press [SETUP] and use [K / L] to select "General Setting", then press [OK]. "General Setting" menu will appear. 2 Use [K / L] to select "Playback", then press [OK]. General Setting Playback Display Video Recording Clock Channel DivX HDMI Reset All 3 Use [K / L] to select a desired - Philips DVDR3545V | User manual - Page 93
: OFF) Some DVD-video feature a parental lock level. Playback will stop if the ratings exceed the levels you set, it will require parental lock function operates in the way that you have set. • Record the password in case you forget it. • If there is a DVD in the unit when you set up the parental - Philips DVDR3545V | User manual - Page 94
signals When your amplifier/decoder is compatible with Dolby Digital, set to "Stream". Dynamic Range Control ON OFF Your setting will be activated. Note • Dynamic range control function is available only on the discs which are recorded in the Dolby Digital format. B PCM (Default : 48kHz) Use - Philips DVDR3545V | User manual - Page 95
• When you finish entering the code, press [OK]. Refer to the language code table on page 112. Note • Only the languages supported by the disc can be selected. • Audio language setting may not be available to some discs. • You can change or switch off the subtitles on a DVD also from the disc menu - Philips DVDR3545V | User manual - Page 96
playing back a disc. 1 Press [SETUP] and use [K / L] to select "General Setting", then press [OK]. 2 Use [K / L] to select "Display", then press [OK]. to 1 to 5 on page 97 and set the selected item. • For 4 refer to pages 35-37. 5 When you finish with setting, press [SETUP] to exit. 96 EN E9H90UD - Philips DVDR3545V | User manual - Page 97
Password will be cleared. • Depending on the type of rating system, you may set the levels individually. 2) Use [K / L] to select a desired item, then press [OK]. V-Chip A Downloadable Rating B Change Password EN 97 Editing Function Setup VCR Functions Others E9H90UD.indd 97 2007/05/16 15:45 - Philips DVDR3545V | User manual - Page 98
Video SETUPS Press [STOP C] if you are playing back a disc. 1 Press [SETUP] and use [K / L] to select "General Setting", then press [OK]. 2 Use [K / L] to select "Video", then press [OK]. 3 Use [K / L] to select a desired item, then press [OK]. 1 Progressive Scan 2 TV Aspect 3 Video Input Submenu - Philips DVDR3545V | User manual - Page 99
cable and set the progressive scan to "OFF" or press and hold [SETUP] for more than 3 seconds during DVD playback. • When selecting "No" or not pressing any buttons on the unit or remote control within 15 seconds at step 3, progressive scan remains to be "OFF" (interlace scan). Recording Playback - Philips DVDR3545V | User manual - Page 100
supported by the disc can be selected. • Audio language setting may not be available to some discs. • You can change or switch off the subtitles on a DVD also from the disc menu if it is available. • One registration code DivX® VOD (video-on-demand) services. The files are available on the internet - Philips DVDR3545V | User manual - Page 101
item, then press [OK]. 1 Format 2 HDMI Audio 3 RGB Range 4 Refer to 1 to 3 on page 102 and set the selected item. 5 When you finish with setting, press [SETUP] to exit. Basic Setup Recording Playback Editing Function Setup VCR Functions Others E9H90UD.indd 101 EN 101 2007/05/16 15:45:21 - Philips DVDR3545V | User manual - Page 102
, then press [OK]. • When the connected device is not compatible with the Y/Cb/Cr, HDMI signal is output as RGB regardless of the setting. Format RGB YCbCr Your setting will be activated. 2 HDMI Audio (Default : ON) If you do not want to output the audio through HDMI (when you digitally output the - Philips DVDR3545V | User manual - Page 103
Select "Yes" again using [K / L] , then press [OK]. Are you sure? Yes No Your setting in recording will be initialized. Basic Setup Recording Playback Editing Function Setup VCR Functions Note • The settings listed below will remain unchanged even after resetting to the factory default. - OSD - Philips DVDR3545V | User manual - Page 104
• Tracking will be automatically adjusted upon playback. To adjust the tracking manually, press [CH / ] on the remote control. • S-VHS cassette tape is not available on this unit. Press [VCR] first. 1) Insert a recordable tape with an erase-protection tab intact. Accidental erasure prevention To - Philips DVDR3545V | User manual - Page 105
feature allows you to set the recording length simply by pressing [REC I] on the remote control. Press [VCR] first. 1) Insert a recordable tape with an erase-protection tab intact. An index mark will be assigned at the beginning of each recording you make. You may skip to a specific marked point by - Philips DVDR3545V | User manual - Page 106
VCR FUNCTIONS Other Operations This feature allows you to go to a specific point on a cassette tape by entering the exact amount of time you wish to skip in order to reach the point. Press [VCR . To cue or review picture during playback ( recorded in Hi-Fi stereo: Press [AUDIO] on the remote control - Philips DVDR3545V | User manual - Page 107
Basic Setup Recording TROUBLESHOOTING Before requesting service for this unit, check the table below for a possible cause of the problem you are experiencing. Some simple checks or a minor adjustment on your part may eliminate the problem and restore proper operation. GENERAL Symptom - Philips DVDR3545V | User manual - Page 108
to do some of the operations. Refer to the instruction manual supplied with the disc. • The title does not have the multilingual audio tracks. • The DVD-video prohibits the changing of the language for the sound track. • Multilingual subtitle are not recorded on the DVD-video. • Multi-angles are not - Philips DVDR3545V | User manual - Page 109
other than camera mode. In this case, switch to DVD control and execute the normal recording procedure while operating the DVC. • Some functions may not operate depending on the type of DVC. For example, if the DVC does not support slow playback mode, the slow playback function is disabled. • With - Philips DVDR3545V | User manual - Page 110
the disc that had been recorded by other recorders. • Set "Make Recording Compatible" to "ON" to rewrite the menu, after that you will record to disc (page 39). * If you are still having trouble with the unit after checking "TROUBLESHOOTING", write down the error code and the error description for - Philips DVDR3545V | User manual - Page 111
has an antenna in jack using an RF coaxial cable? - Can I change the channels on the cable / satellite box using the remote control of this unit? No, this unit records only DVD. Possible when the region code of the disc is 1 and All. No, you cannot control the unit by PC. Yes, you can. Select "E1 - Philips DVDR3545V | User manual - Page 112
Croatian Czech Danish Dutch English Esperanto Estonian Faroese Fiji Finnish French Frisian Galician Georgian German Greek Greenlandic Guarani Gujarati Hausa Hebrew Hindi LANGUAGE CODE Code 4748 4747 4752 6563 4759 4764 5471 4765 4771 4772 4847 5167 4860 5072 4854 4855 4864 4853 5971 4851 5759 4947 - Philips DVDR3545V | User manual - Page 113
have been recorded on, possible to play back in DVD players. With this unit, it is possible to finalize DVD+R, DVD-RW, and DVD-R. HDMI (high definition multimedia interface) A digital interface between audio and video source. It can transmit component video, audio, and control signal with one cable - Philips DVDR3545V | User manual - Page 114
lbs. ( 4.3kg ) 41°F (5°C) to 104°F (40°C) Less than 80% (no condensation) ATSC / NTSC-M TV standard +VR (video recording) format DVD+Rewritable, DVD+Recordable DVD-Rewritable, DVD-Recordable (+VR mode only) 13.5 MHz MPEG 48 kHz Dolby Digital Channel frequency synthesized tuning system VHF 2~13, UHF - Philips DVDR3545V | User manual - Page 115
is received by Philips within the Warranty Period. At its option, Philips will either (1) repair the product at no charge, using new or refurbished replacement parts, or (2) exchange the product with a product that is new or which has been manufactured from new, or serviceable used parts and is at - Philips DVDR3545V | User manual - Page 116
Corp P.O. Box M67a1r5ie3t9taM, GarAie3tt0a0, 0G6A-030020606 00296 Meet Philips at the Internet http://www.philips.com/welcome DVDHRT3S5664050V/37 CLASS 1 LASER PRODUCT 82313399 324050256685392 E9H90UD.indd 116 Printed in China JpnCN-0721/37-3 1VMN23624A **** E9H90UD 2007/05/16 19:19:11
-
 1
1 -
 2
2 -
 3
3 -
 4
4 -
 5
5 -
 6
6 -
 7
7 -
8
-
9
-
10
-
11
-
12
-
13
-
14
-
15
-
16
-
17
-
18
-
19
-
20
-
21
-
22
-
23
-
24
-
25
-
26
-
27
-
28
-
29
-
30
-
31
-
32
-
33
-
34
-
35
-
36
-
37
-
38
-
39
-
40
-
41
-
42
-
43
-
44
-
45
-
46
-
47
-
48
-
49
-
50
-
51
-
52
-
53
-
54
-
55
-
56
-
57
-
58
-
59
-
60
-
61
-
62
-
63
-
64
-
65
-
66
-
67
-
68
-
69
-
70
-
71
-
72
-
73
-
74
-
75
-
76
-
77
-
78
-
79
-
80
-
81
-
82
-
83
-
84
-
85
-
86
-
87
-
88
-
89
-
90
-
91
-
92
-
93
-
94
-
95
-
96
-
97
-
98
-
99
-
100
-
101
-
102
-
103
-
104
-
105
-
106
-
107
-
108
-
109
-
110
-
111
-
112
-
113
-
114
-
115
-
116
 |
 |
DIGITAL VIDEO DISC RECORDER &
VIDEO CASSETTE RECORDER
WITH DIGITAL TUNER
DVDR3545V/37
User Manual
STOP
ARRÊT
ALTO
Recording
Playback
Editing
Introduction
Connections
Basic Setup
Function Setup
VCR Functions
Others
E9H90UD.indd 1
E9H90UD.indd
1
2007/06/20 13:35:48
2007/06/20
13:35:48