Philips DVDR3545V User manual - Page 49
Recording from an External Device
 |
UPC - 689076461481
View all Philips DVDR3545V manuals
Add to My Manuals
Save this manual to your list of manuals |
Page 49 highlights
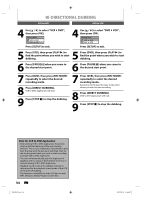
Introduction Connections Basic Setup Recording SETTINGS FOR AN EXTERNAL DEVICE Recording from an External Device Before recording from an external device, refer to the instructions for the connection on page 48. 1 Recording to a DVD Press [DVD]. Insert a recordable disc (refer to page 25 on how to insert a disc). It takes a while to load the disc. Recording to a Cassette Tape Press [VCR]. Insert the cassette tape with an erase-protection tab intact. 2 Select the appropriate external input channel (E1 or E2) by pressing [SOURCE] or [CH / ]. • If the external device is connected to the rear of this unit, select E1. • If the external device is connected to the front of this unit, select E2. • If you are connecting the digital video camcorder to the DV-IN jack of this unit, refer to "DV DUBBING" on pages 50-52. • You can also select E1 or E2 channel by using [the Number buttons]. e.g.) For E1, press [0], [0], [1]. 3 Press [REC MODE] to select a recording mode. Refer to "Recording Mode" on page 38 for DVD, or "Recording" on page 104 for VCR. 4 Press [DVD REC I] or [VCR REC I] on the unit to start recording. 64 STANDBY-ON 4 HEAD HI-FI STEREO ONE TOUCH RECORDING • LONG PLAY DVD RECORDER / VCR DVDR 3435V REW F.FWD STOP/EJECT PLAY REC 64 OPEN/CLOSE DVD RECORDER 5 Start playback on the external device to record from. O CHANNEL 6 For disc: Press [STOP C] on the unit to stop recording. For cassette tape: Press [STOP/EJECT C A] on the unit to stop recording. This operation may take a while to be completed. CHANNEL REC VCR DVD STOP PLAY SOURCE SV VIDEO L-AUDIO-R DV Playback Editing Function Setup VCR Functions Others E9H90UD.indd 49 EN 49 2007/05/16 15:44:21
-
 1
1 -
2
-
3
-
4
-
5
-
6
-
7
-
8
-
9
-
10
-
11
-
12
-
13
-
14
-
15
-
16
-
17
-
18
-
19
-
20
-
21
-
22
-
23
-
24
-
25
-
26
-
27
-
28
-
29
-
30
-
31
-
32
-
33
-
34
-
35
-
36
-
37
-
38
-
39
-
40
-
41
-
42
-
43
-
 44
44 -
 45
45 -
 46
46 -
 47
47 -
 48
48 -
 49
49 -
 50
50 -
 51
51 -
 52
52 -
 53
53 -
 54
54 -
55
-
56
-
57
-
58
-
59
-
60
-
61
-
62
-
63
-
64
-
65
-
66
-
67
-
68
-
69
-
70
-
71
-
72
-
73
-
74
-
75
-
76
-
77
-
78
-
79
-
80
-
81
-
82
-
83
-
84
-
85
-
86
-
87
-
88
-
89
-
90
-
91
-
92
-
93
-
94
-
95
-
96
-
97
-
98
-
99
-
100
-
101
-
102
-
103
-
104
-
105
-
106
-
107
-
108
-
109
-
110
-
111
-
112
-
113
-
114
-
115
-
116
 |
 |
