Philips FWC250 User manual - Page 20
Recording
 |
View all Philips FWC250 manuals
Add to My Manuals
Save this manual to your list of manuals |
Page 20 highlights
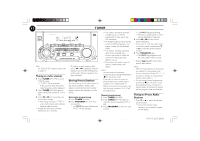
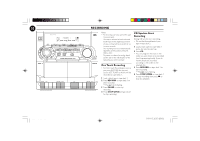
DBB v v v v v vv v v v v 20 MINI HIFI SYSTEM STANDBY-ON JOG CONTROL CD1 • 2 • 3 CD FM•AM TUNER TAPE 1 • 2 TAPE VIDEO AUX OPTIMAL vv vv TUNING DEMO STOP v PRESET v JAZZ ROCK SEARCH STOP• CLEAR PLAY• PAUSE PREV PROGRAM CLOCK•TIMER DIM NEXT TECHNO SOUND NAVIGATION - JOG VOLUME TAPE 1 PLAY/ REC RECORD PLAY FULL AUTO STOP STOP.OPEN PAUSE PLAY RECORDING TAPE 2 PLAYBACK STOP.OPEN PAUSE Notes: - For recording, use only tape of IEC type I (normal tape). - The tape is secured at both ends with leader tape. At the beginning and end of tape, nothing will be recorded for six to seven seconds. - The recording level is set automatically, regardless of the position of Volume, DBB or DSC. - To prevent accidental recording, break out the tab on the left shoulder of the tape side you want to protect. One Touch Recording • For One Touch Recording, as soon as you press RECORD, the current source (CD,TUNER or AUX) will be recorded on tape deck 1. 1 Load a blank tape in tape deck 1. 2 Press RECORD on tape deck 1 to start recording. ™ The REC starts flashing. 3 Press PAUSE to interrupt recording. 4 Press STOP•OPEN on tape deck 1 to stop recording. CD Synchro Start Recording During CD synchro start recording, • Do not fast forward/rewind your tape in tape deck 2. 1 Load a blank tape into tape deck 1 and a disc into the disc tray. 2 Press CD. • You can program the tracks in the order you want them to be recorded (see Programming Tracks). If you do not, the tracks are recorded according to the order on the selected disc. 3 Press RECORD on tape deck 1 to start recording. ™ The REC starts flashing. 4 Press STOP•OPEN on tape deck 1 to stop recording, then press Ç to stop disc playback. pg 01-28/C250/37-En 20 12/6/00, 2:20 PM 3139 115 20353 (ENG)
-
 1
1 -
2
-
3
-
4
-
5
-
6
-
7
-
8
-
9
-
10
-
11
-
12
-
13
-
14
-
 15
15 -
 16
16 -
 17
17 -
 18
18 -
 19
19 -
 20
20 -
 21
21 -
 22
22 -
 23
23 -
 24
24 -
 25
25 -
26
-
27
-
28
 |
 |
