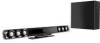
Philips HSB3280 User manual - Page 17
Install remote control, batteries, Set clock
 |
UPC - 609585172234
View all Philips HSB3280 manuals
Add to My Manuals
Save this manual to your list of manuals |
Page 17 highlights
3 Connect the other end to the wall outlet. 4 Connect the power plug of the digital wireless subwoofer to the wall outlet. Install remote control batteries Caution • Risk of explosion! Keep batteries away from heat, sunshine or fire. Never discard batteries in fire. • Perchlorate Material - special handling may apply. See www.dtsc.ca.gov/hazardouswaste/perchlorate. For first-time use: 1 Remove the protective tab to activate the remote control battery. To replace the remote control battery: 1 Open the battery compartment. 2 Insert one lithium CR2025 battery with correct polarity (+/-) as indicated. 3 Close the battery compartment. Note • Before pressing any function button on the remote control, first select the correct source with the remote control instead of the main unit. • If you are not going to use the remote control for a long time, remove the battery. 18 EN Set clock 1 In the standby mode, press and hold SET TIME/PROG to enter the clock setting mode. » The hour digits are displayed and begin to blink. » If the hour digits are not displayed, press and hold for more than 2 seconds to switch to standby mode, then repeat step 1. 2 Press + VOL - to set the hour. » The minute digits are displayed and begin to blink. 3 Press + VOL - to set the minute.
-
 1
1 -
2
-
3
-
4
-
5
-
6
-
7
-
8
-
9
-
10
-
11
-
 12
12 -
 13
13 -
 14
14 -
 15
15 -
 16
16 -
 17
17 -
 18
18 -
 19
19 -
 20
20 -
 21
21 -
 22
22 -
23
-
24
-
25
-
26
-
27
-
28
-
29
-
30
 |
 |
