Philips MC147/05 User Manual - Page 10
Connect power, Prepare the remote control, Set clock - 12
 |
View all Philips MC147/05 manuals
Add to My Manuals
Save this manual to your list of manuals |
Page 10 highlights
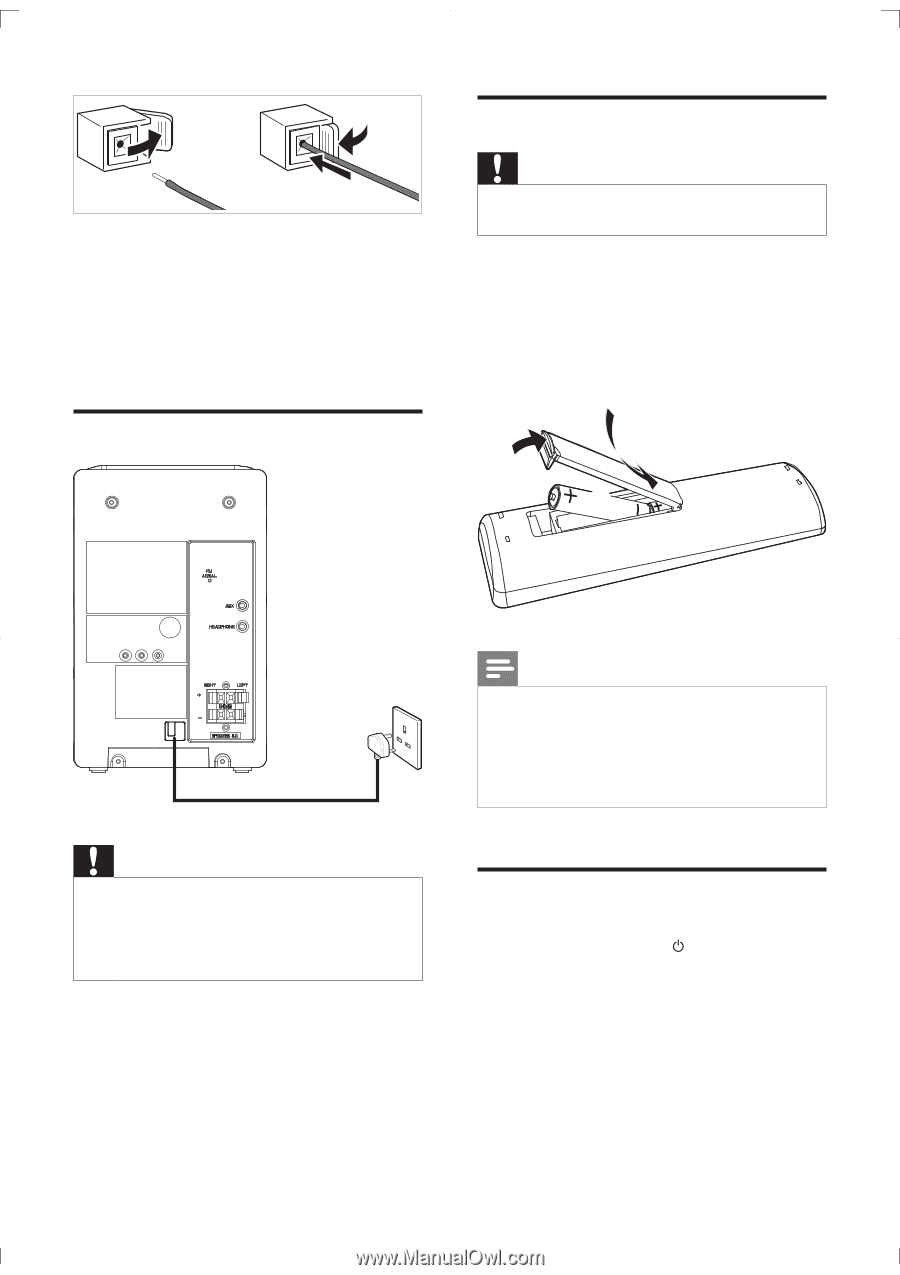
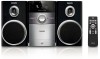
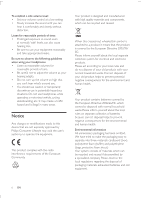
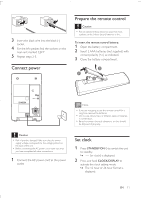
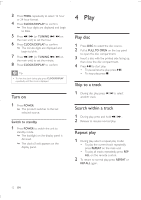
3 Insert the black wire into the black (-) socket. 4 main unit marked 'LEFT'. 5 Repeat steps 2-3. Connect power Prepare the remote control Caution Risk of explosion! Keep batteries away from heat, To insert the remote control battery: 1 Open the battery compartment. 2 Insert 2 AAA batteries (not supplied) with correct polarity (+/-) as indicated. 3 Close the battery compartment. 3 1 2 Note If you are not going to use the remote control for a long time, remove the batteries. Do not use old and new or different types of batteries in combination. Batteries contain chemical substances, so they should be disposed of properly. Caution Risk of product damage! Make sure that the power supply voltage corresponds to the voltage printed on the back of the unit. Before connecting the AC power cord, make sure that you have completed all other connections. 1 Connect the AC power cord to the power outlet. Set clock 1 Press STANDBY-ON to switch the unit to standby. » --:-- (or clock) is displayed. 2 Press and hold CLOCK/DISPLAY to activate the clock setting mode. » The 12 hour or 24 hour format is displayed. EN 11
-
 1
1 -
2
-
3
-
4
-
 5
5 -
 6
6 -
 7
7 -
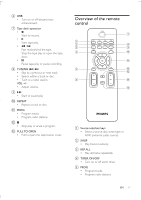 8
8 -
 9
9 -
 10
10 -
 11
11 -
 12
12 -
 13
13 -
 14
14 -
 15
15 -
16
-
17
-
18
-
19
 |
 |