Philips VOIP8411B Quick start guide - Page 1
Philips VOIP8411B - Cordless Phone / VoIP Manual
 |
UPC - 609585128354
View all Philips VOIP8411B manuals
Add to My Manuals
Save this manual to your list of manuals |
Page 1 highlights
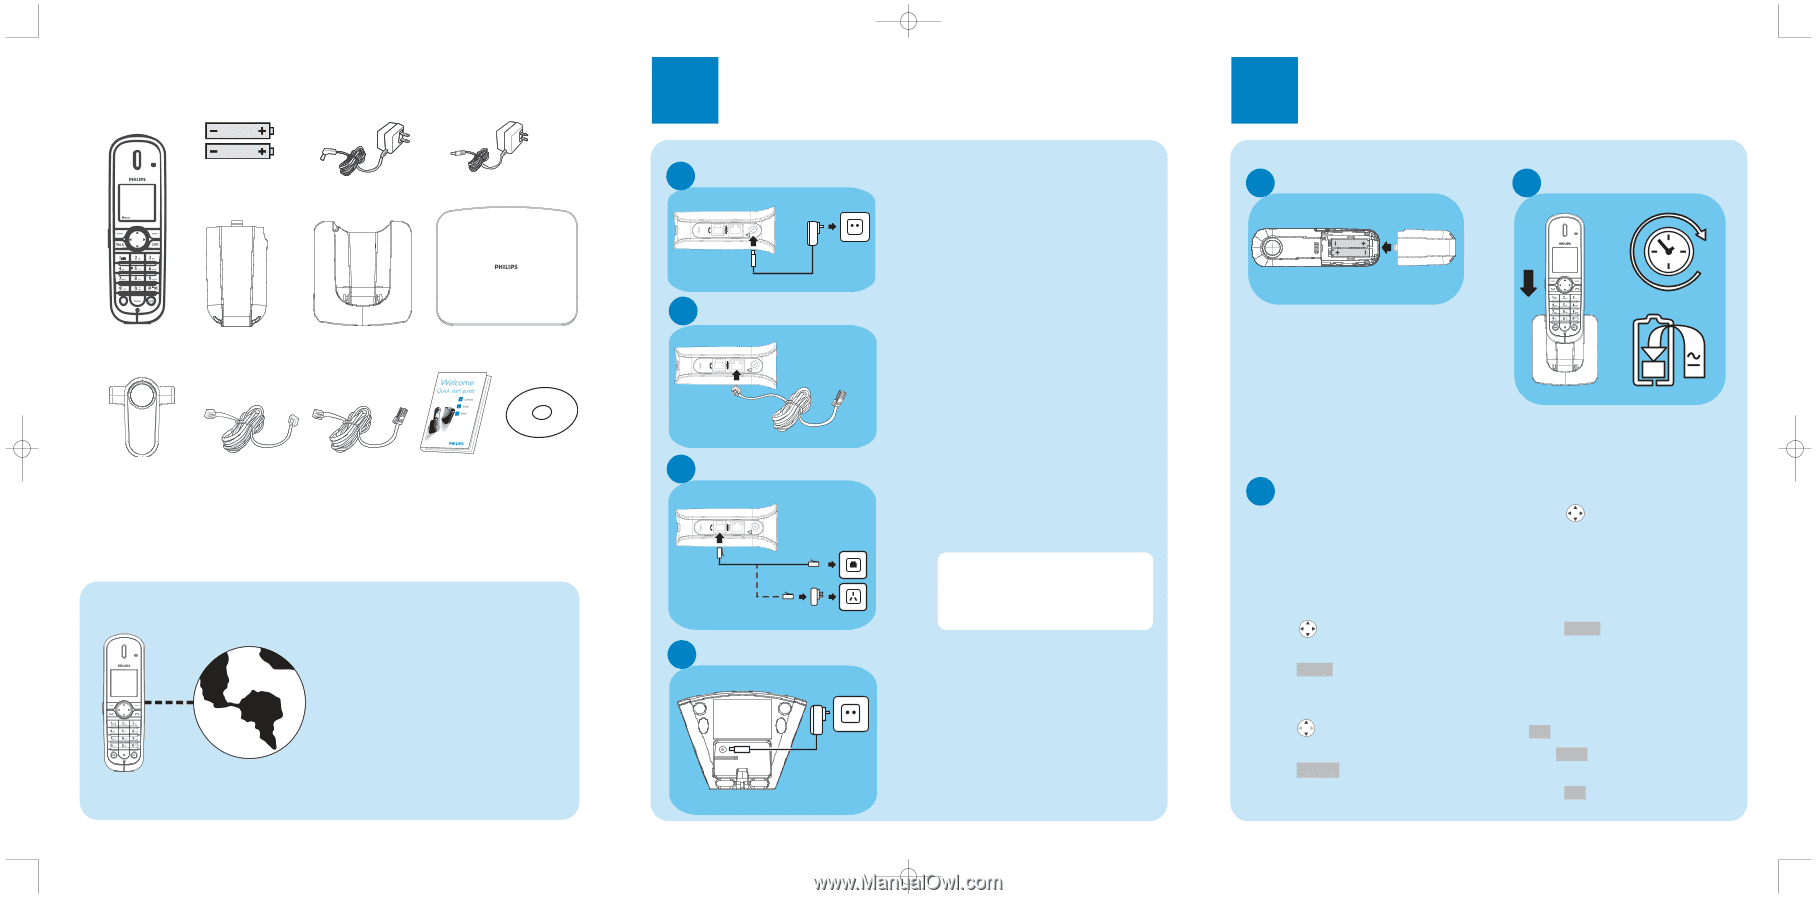
QSG_VOIP841_USA mit Belt clip.qxd 20.01.2007 21:12 Seite 1 What's in the box Two 750mAh AAA NiMH batteries Power supply for Power supply for base charger Handset Battery door Charger Base station Belt clip Line cord Ethernet cable Quick start User manual (blue cable) guide on CD What else will you need A telephone line ● Internet connection (high speed Internet connection) ● A Skype account ● Internet connection with an ADSL/Cable modem router or a router connected to an ADSL/Cable modem. Need at least one Ethernet LAN plug available. 1 Connect A Connect to main supply ● Insert the plug of the base power adapter into the socket on the side of the base unit. ● Plug the base power adapter into your power outlet. B Connect the Ethernet cable C Connect the line D Connect the charger ● Connect one end of the Ethernet cable to the Ethernet socket on the side of the base unit. ● Connect the other end of the ethernet cable to an available ethernet LAN plug of your ADSL/modem (or a router connected to Internet). ● Connect the telephone line cord to the phone socket on the side of the base unit and the wall phone socket. If using ADSL subcription, an ADSL filter should be inserted between the phone plug and the wall socket. ● Insert the plug of the charger power adapter into the socket on the bottom of the charger. ● Plug the power adapter into your power outlet. 2 Install A Insert batteries B Charge handset ● Place the 2 rechargeable NiMH AAA batteries, observing their polarities, into the battery compartment on the handset. ● Slide the battery door firmly into place. C Settings before first use At first start up, you will be asked to set the language, accept an agreement, select the country where the phone is to be used and set the area code. Set the display language: ● Scroll to the language you want. ● Press Select to confirm. Review the agreement ● Press (Up or Down) to scroll through the agreement. ● Press Accept to accept the agreement and proceed. 14 ● Before first use, put the handset on the charger and charge batteries for 14 hours. Select your country: ● Scroll to your country name. If you don't see your country name, select "OTHERS" on the bottom of the list and enter your international calling code (i.e. "1" for Canada or "61" for Australia), see section "8.10 Country codes list" in the user manual. ● Press Select to confirm. Set your area code: ● Enter the area code. Area code is depending of the country, if you are not using area code press OK . Use Clear to correct typing errors. ● Press OK to confirm. 3111 285 32052
-
 1
1 -
 2
2
 |
 |