Pioneer 6100TV Owners Manual - Page 12
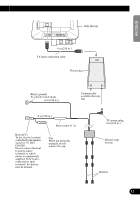
Connecting the Units
 |
UPC - 012562594552
View all Pioneer 6100TV manuals
Add to My Manuals
Save this manual to your list of manuals |
Page 12 highlights
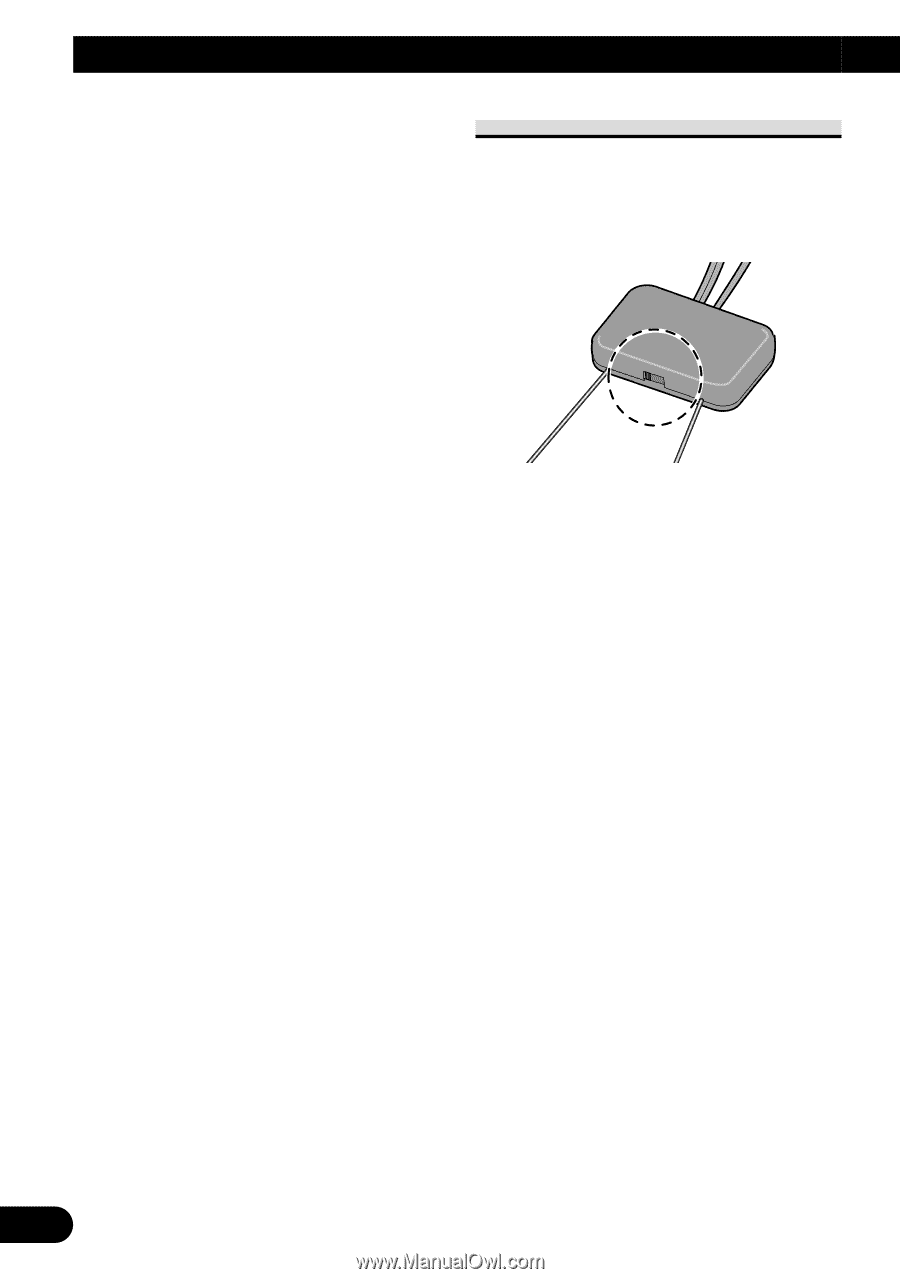
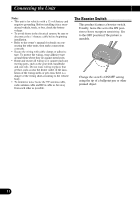
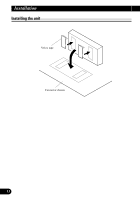
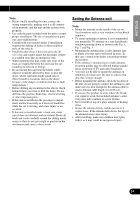
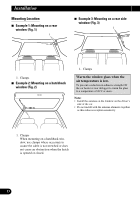
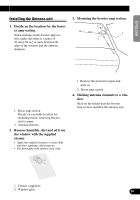
Connecting the Units Note: • This unit is for vehicles with a 12-volt battery and negative grounding. Before installing it in a recreational vehicle, truck, or bus, check the battery voltage. • To avoid shorts in the electrical system, be sure to disconnect the (-) battery cable before beginning installation. • Refer to the owner's manual for details on connecting the other units, then make connections correctly. • Secure the wiring with cable clamps or adhesive tape. To protect the wiring, wrap adhesive tape around them where they lie against metal parts. • Route and secure all wiring so it cannot touch any moving parts, such as the gear shift, handbrake and seat rails. Do not route wiring in places that get hot, such as near the heater outlet. If the insulation of the wiring melts or gets torn, there is a danger of the wiring short-circuiting to the vehicle body. • To minimize noise locate the TV antenna cable, radio antenna cable and RCA cable as far away from each other as possible. The Booster Switch This product features a booster switch. Usually, leave this set to the ON position to boost reception sensitivity. Set to the OFF position if the picture is unstable. Change the switch's ON/OFF setting using the tip of a ballpoint pen or other pointed object. 11
-
 1
1 -
2
-
3
-
4
-
5
-
6
-
 7
7 -
 8
8 -
 9
9 -
 10
10 -
 11
11 -
 12
12 -
 13
13 -
 14
14 -
 15
15 -
 16
16 -
 17
17 -
18
-
19
-
20
-
21
-
22
-
23
-
24
-
25
-
26
-
27
-
28
-
29
-
30
-
31
-
32
-
33
-
34
-
35
-
36
-
37
-
38
-
39
-
40
-
41
-
42
-
43
-
44
-
45
-
46
-
47
-
48
-
49
-
50
-
51
-
52
-
53
-
54
-
55
-
56
 |
 |