Pioneer AS-WL300 Owner's Manual - Page 1
Pioneer AS-WL300 Manual
 |
View all Pioneer AS-WL300 manuals
Add to My Manuals
Save this manual to your list of manuals |
Page 1 highlights
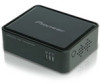
"con v- 150Mbps WIRELESS LAN CONVERTER WIRELESS LAN CONVERTER AS-W1300 Getti 0 0 Version: AS-WL300_QIG-A_V1 • This guide explains the usage of and necessary settings for this unit. Please follow the procedure to complete the settings. Do not lose this guide. • Refer to the USER'S MANUAL found on the supplied CD-ROM or on the Web for details of other settings and uses not explained in this guide. Refer to "The USER'S MANUAL" on the reverse for more details. • Some Pioneer products that connect to this product will need to be configured. Refer to their respective USER'S MANUAL for more details. • For technical enquiries regarding this product, refer to "Please Read First" for Support Centre details. Features Connect the following Pioneer AV devices using a Wireless LAN. AV RECEIVER 0 Blu-ray Disc player Wireless LAN Converter (this unit) Internet connection O O O O ADSL modem ONU (Optical Network Unit) Wired router, etc. Connect supported AV devices easily over a Wireless LAN using this unit. Wireless LAN router (base) Setup Procedure STEP1 Check the Base * Check that the base has no problem connecting to the Internet. STEP 2 Connect the Unit • If the base has a WPS button - Follow the instructions in "Step 2 Connect the Unit (WPS)" to connect the unit to the base. • If the base does not have a WPS button - Follow the instructions in "Step 2 Connect the Unit (Manual)" to connect the unit to the base. * If you have problems using the "WPS Button," use the "Manual" procedure. STEP 3 Step 3 Connect AV Devices Preparation Prepare the following. El Wireless LAN Converter (this unit) rIRELESS LAN CONVERTER u LAN/USB feeder cable (included) * This cable is a combination of a LAN cable and a USB feeder cable that supplies power to the unit without using an AC adapter. Use the supplied cable only. El Getting Started (this guide) LI Supported AV device, computer (not included) 111 Internet connection (not included) Part Names Front Back Side 0 ■ o CC 5 V ETHERNET RESET, 0 0 CD, 0 POWER indicator C) WPS indicator C) WIRELESS indicator ® POWER connector C) ETHERNET port © WPS button C) RESET button Before Configuring the Unit • If you do not have an Internet connection, subscribe before configuring the unit. • Do not connect the LAN/USB feeder cable to a USB hub. STEP 1 Check the =ase Check that the Wireless LAN router (base) has no problem connecting to the Internet. Internet connection O O O O Internet connectivity Modem Wireless LAN router (base) Computer ro This procedure requires a separate Wireless LAN router (base). If you do not have a base, please prepare one. Check that the base has a WPS function. Refer to the Wireless LAN router user's manual for details. WPS is a function that configures the base connection and security using a button. * Some bases have WPS written on them. • If the base has a WPS button Continue to "Step 2 (WPS)" and "Step 3". • If the base does not have a WPS button Continue to "Step 2 (Manual)" and "Step 3". Please connect using either method. -I STEP 2 Connect the Unit (WPS STEP 2 Connect the Unit (Manual) • This procedure explains how to connect the unit using the WPS function. If the base does not have a WPS function, refer to the "Manual" procedure below. • Do not connect the LAN cable to the unit until instructed. • When using multiple units of this product, the IP address of this unit needs to be changed. Refer to "Troubleshooting" on the reverse. 1. Switch on the unit Switch off the AV device. OFF OFF 0 O AV RECEIVER Blu-ray Disc player Connect the POWER connector on the unit to the USB port on the AV device using the USB end of the supplied feeder cable. O di. • DC 5 V ETHERNET WPS • * The location of the USB port and its name may vary depending on the device. If you cannot locate a USB port, refer to the device's user's manual for help. A USB port is the horizontally (or vertically) long port (as shown above). * On some devices, it is labelled [DC OUTPUT for WIRELESS LAN]. Switch on the AV device. 12 AV RECEIVER Blu-ray Disc player 10 ON O I AV RECEIVER ON Blu-ray Disc player Check that the " (POWER)" , " indicators on the unit are lit. * Once the indicators light up, wait 2 minutes before proceeding. (WPS)" and " ii ,N (WIRELESS)" ELE88 LAN CONVERTER ll 0 Lit 2. Connect thr Unit U Press the "WPS" button on the base. Refer to the base user's manual for more details on the WPS button. Press and hold the "WPS" button on the back of the unit until the WPS indicator on the front flashes. (over 2 seconds). (Press and hold for over 2 secondi) Li DC 5 V ETHERNET 0 (The WPS indicator (centre) will flash:,' V lb* • • Check that the WPS indicator on the unit changes from a flashing light to a steadily lit light. 70007_* If the WPS indicator stops flashing and is steadily lit, the unit is connected to the Wireless LAN. (The unit is not connected if the WPS indicator is flashing.) * If the WPS indicator does not flash, press the "WPS" button again. * If the WPS indicator stops flashing and turns off, press the "WPS" button again. Once the WPS indicator lights, wait 2 minutes before proceeding toD.) Disconnect the USB feeder cable end of the supplied cable that is connected to the unit. • WPS AV RECEIVER Blu-ray Disc player Connection to the base is now complete. Continue to Step 3. 43 • Use this procedure to manually connect the unit, especially if connecting the unit using the "WPS" procedure, above, does not work. • If the computer on which you will configure the unit is connected to the Wireless LAN cable disconnect it. • When using multiple units of this product, the IP address of this unit needs to be changed. Refer to "Troubleshooting" on the reverse. 1. Search for Network Connection Before connecting or configuring this unit, you must know the Wireless LAN settings for your base. Write the settings in the table below. * Refer to the base user's manual for details on the Wireless LAN settings. • When using WEP security settings Name Wireless LAN Settings (1) SSID (Network name) (2) Authentication 0 OPEN 0 SHARED (3) Authentication key method El Hexadecimal*1 0 ASCII*2 (4) Default key 0 Key 1 0 Key 2 0 Key 3 D Key 4 (5) Encryption key 1: 16-digit number (0-9, A-F) * 2: ASCII (1-byte letters and numbers, including upper and lowercase letters) • When using WPA/WPA2 security settings Name (1) SSID (Network name) (2) Authentication (3) Authentication key (4) Encryption (5) Encryption key Wireless LAN Settings 0 WPA-PSK D Hexadecimal*1 0 TKIP D WPA2-PSK D ASCII*2 0 AES 1: 16-digit number (0-9, A-F) * 2: ASCII (1-byte letters and numbers, including upper and lowercase letters) 0 This unit cannot connect to a base with a SSID (Network name) that includes a semicolon (:). Refer to the base user's manual for details on changing the SSID. 2. Conner :o the Computer Switch off the computer. OFF Connect the ETHERNET port on the unit to the computer LAN port on the computer using the LAN end of the supplied feeder cable. „AU * The location of the LAN port and its name may vary depending on the computer. If you cannot locate a LAN port, refer to the computer user's manual for help. L_L=3 The LAN port is the large port that is slightly 16 LAN larger than a telephone modular jack. * Some bases have LAN written on them. • Connect the POWER connector on the unit to the USB port on the computer using the USB end of the supplied feeder cable. * The location of the USB port and its name may O vary depending on the device. If you cannot locate a USB port, refer to the device's user's manual for help. L A USB port is the horizontally (or vertically) long port (as shown above). USB * On some computers, it is labelled "USB" or marked by a Switch on the computer. ON Check that the " (POWER)" , " indicators on the unit are lit. * Once the indicators light up, wait 2 minutes before proceeding. (WPS)" and " 1' (WIRELESS)" 3. Configure .ne Unit Lit Launch the Web browser. O Enter "cv.setup" in the Address bar and press . cv.setup If you cannot display the Web Configuration window by entering "cv.setup" , enter 192 168 1 249" and proceed to . If the window still does not open, refer to "Troubleshooting" on the reverse. 0 Enter "admin" as the user name and "password" the password. 0 Click [OK]. The serve, cvsetupat AS-WL353 ',mesa USGInallIG and password. Waroily This senrei iegu¢ling that your username and password be sent in an insecuie manner (basic authentication without a secuie .onne, ion). If you cannot log in to the Web Configuration window, check that you have entered the settings, correctly. Continued over the page
-
 1
1 -
 2
2
 |
 |