Pioneer AS-WL300 Owner's Manual - Page 2
Connect, Manual, Connection, complete., Continue, Configuration
 |
View all Pioneer AS-WL300 manuals
Add to My Manuals
Save this manual to your list of manuals |
Page 2 highlights
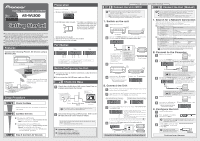
STEP 2 Connect the Unit (Manual) cont' C) Click "Wireless" . C) Click "Site Survey" . Status Profile Site Stici =IP Network e In' Paton 1 The Status page shows the settings alcl current operabon statu T Select the same SSID in "Site Survey" that you wrote in "1. Search for a Network Connection", above. * Click the "Select" button. © Click [Connect]. Site survey page shows In-format. of AF's nearby You may choose one of these PPs connecting °, ackeng It to profile_ 1 ) • If the SSID is not displayed, click [Rescan]. alia Configure the unit using the settings you wrote in "1. Search for a Network Connection," above. When (2) in the table is "OPEN" or "SHARED" * Configure the unit referring to the list you wrote under "When using WEP security settings" . CI When (2) in the table is "Open" -.Select "OPEN" in "Security Mode" . When (2) in the table is "SHARED" -.Select "SHARED" in "Security Mode" . 0 When (5) in the table is a 10-digit or 5-digit encryption key -.Select "64 bit (10 hex digits/5 ascii keys)" in "WEP Key Length" . When (5) in the table is a 26-digit or 13-digit encryption key -.Select "128 bit (26 hex digits/13 ascii keys)" in "WEP Key Length" . 0 When (3) in the table is "Hexadecimal" -.Select "Hexadecimal" in "WEP Key Entry Method" . When (3) in the table is "ASCII" -.Select "ASCII Text" in "WEP Key Entry Method" . ® Enter the encryption key in (5) in the table in the field that corresponds to the WEP key checked in (4) in the table. * For example, If (4) in the table is "Key 1" , enter the same encryption key in (5) in the table in the "WEP Key 1" field. 0 Select the same default key as in (4) in the table. © Click [Apply]. SSID Securit Polio ( Security Mode O Wire E• uivalence Protection WEP 0 C) O WEP Key Length I WEP Key Entry Method I WEP Key 1 WEP Key 2 WEP Key 3 WEP Key 4 ( Default Key © OPEN 64 PI(SO hex digits,' 5 ascii keys) Y. ' Hexadecimal ) Key1 ) * Refer to "When using WPA/WPA2 security settings" on the front to complete the settings. C) Enter the same encryption key as in (5) in the table. ) Click [Apply]. SSID EME Policy e•ccd'Hy %lack WP42-Personal - * The base selected in 6 is displayed in "Security Mode" and "WPA Algorithms" . WPA Alnerithens * TKIP * AES 0 Pas Phrase 1{6-63 ASCII or 64 HEX chaacters) Cancel Check the details and click [OK]. No.) The browser will close 10 seconds after you clicked [OK] in above. Disconnect the LAN/USB feeder cable connected to the unit. 0 din Connection to the base is complete. Continue to Step 3. STEP 3 Connect AV Devices Once configuration is complete, connect the unit to the AV device. Switch off the AV device. o r O AV RECEIVER OFF OFF 00 0 Blu-ray Disc player Connect the ETHERNET port on the unit to the LAN port on the AV device using the LAN end of the supplied feeder cable. 0 CM."' r ir DC 5V ETHERNET WPS ilh * The location of the LAN port and its name may vary depending on the computer. If you cannot locate a LAN port, refer to the computer user's manual for help. The LAN port is the large port that is L__ slightly larger than a telephone modular jack. * Some bases have LAN written on them. AV RECEIVER Blu-ray Disc player Connect the POWER connector on the unit to the USB port on the AV device using the USB end of the supplied feeder cable. O ETH ET WP •E• * The location of the USB port and its name may vary depending on the device. If you cannot locate a USB port, refer to the device user's manual for help. A USB port is the horizontally (or vertically) long port (as shown above). * On some devices, it is labelled "DC OUTPUT for WIRELESS LAN". Switch on the AV device. ,D) AV RECEIVER (2_ Blu-ray Disc player ON O O AV RECEIVER ON Blu-ray Disc player Check that the " (POWER)" , " (WPS)" and " (WIRELESS)" indicators on the unit are lit. * Once the indicators light up, wait 2 minutes before proceeding. Lit cr Check that the network function of the connected AV device is operating properly. Refer to the device user's manual for more details. Configuration is complete. Troubleshooting This section contains helpful tips and solutions to problems you may have when configuring the unit. Read the unit "USER'S MANUAL" for explanations on the advanced settings. Refer to "The USER'S MANUAL" below, for details on how to view it. The unit will not turn on. • Check that the USB feeder cable is properly connected to the unit and the AV device. The unit will not connect to the Internet. • Refer to "Step 3 Connect AV Devices" and check that the device and the cables are properly connected. • Switch the unit off and on. • If the unit and the base (Wireless LAN router) are too far apart or have an obstacle between them, move the base closer to where there are no obstructions and try again. • The electromagnetic waves from microwave ovens may interfere with Wireless Transmission. Connect away from microwave ovens. • Check the AV device IP address settings (automatic and fixed settings). If it is a fixed setting, you will need to set the IP address to match the Wireless LAN router network settings. For example, if Wireless LAN router IP address is "192.168.1.1" , set the AV device IP address to "192.168.1.XXX*" , the Subnet Mask to "255.255.255.0" and the Gateway or DNS to "192.168.1.1" . * Set the "XXX" in "192.168.1.XXX" to a value between 2 and 248 that will not conflict with other devices. • If the above settings do not work, reset the unit. Refer to "Reset the Unit" for instructions. When using multiple units of this product or the IP address of another device is "192.168.XXX.249" *. * The "XXX" in "192.168.XXX.249" may vary depending on the environment. • The unit cannot connect with the base if the unit IP address overlaps. Change the IP address using the following procedure. 1) Reset the unit. Refer to "Reset the Unit" for instructions. 2) Refer to "Step 2 Connect the Unit (Manual)" -> "2. Connect to the Computer" on the front for details on how to connect the unit to a computer. 3) Refer to "Step 2 Connect the Unit (Manual)" -> "3. Configure the Unit" on the front and follow ['through to configure the unit. 4) Click "Network" in the top menu. 5) Click "LAN Interface Setup" in the left menu. 6) Set the IP address to "192.168.1.XXX"* in the "Local Area Network (LAN) Settings" window. * Set the "XXX" in "192.168.1.XXX" to a value between 2 and 248 that will not conflict with other devices. 7) Click [Apply]. 8) Follow the procedure in either "Step 2 Connect the Unit (WPS)" or "Step 2 Connect the Unit (Manual)" on the front to reconfigure the unit. An error occurs when entering "cv.setup" or "192.168.1.249" in the Address bar of the browser. • Reset the unit. Refer to "Reset the Unit" for instructions. Reset the Unit - Resetting the unit will erase all existing settings. Be sure to note all important information before resetting it. 1. Check that the unit is switched on. 2. Press the RESET button on the unit for over 3 seconds. 3. Release the RESET button when the POWER indicator turns off then flashes. 4. Wait. Reset is complete when the unit restarts. Once the unit is reset, follow the procedure in either "Step 2 Connect the Unit (WPS)" or "Step 2 Connect the Unit (Manual)" on the front to configure the unit. ac ory The factory settings are as follows. User name (login ID) admin Password password IP address 192.168.1.249 Package Contents Check that the following items are supplied in the package. El AS-WL300 (this unit) El CD-ROM (USER'S MANUAL) El Please Read First El LAN/USB feeder cable El Getting Started (this guide) * If the contents of the package are damaged or missing, please contact us or the store. The USER' MANUA ■ Refer to the USER'S MANUAL on the supplied CD-ROM or on the Internet for advanced settings. ( Viewing the Manual on the Supplied CD-ROM) The USER'S MANUAL will automatically launch when you insert the supplied CD-ROM in your computer CD or DVD drive. L J • Click "run rund1132.exe" on the Autorun window. • Click [Yes] on the "Active content can ..." window. • If the USER'S MANUAL does not open, open the CD-ROM from "Computer" or "My Computer" and double click "index.html" . • If using a Mac, double click on the CD-ROM icon on the desktop, then double click "index.html" . L Viewing the Manual on the Web Access the following web site. http://www.pioneerelectronics.com http://www.pioneerelectronics.ca http://www.pioneer.co.uk http://www.pioneer.eu http://www.pioneer.com.sg http://www.pioneer.com.au Software 'cense Notic The licenses for the open source software used on this product are shown below. GNU GENERAL PUBLIC LICENSE and GNU LIBRARY GENERAL PUBLIC LICENSE This product includes the following software licensed for use under the terms of GNU General Public License Version 2 or GNU Library General Public License Version 2.0. - Linux kernel-2.6.21 Copyright C 1991 Linus Torvalds. Licensed under GPLv2. - BusyBox-1.12.1 multi-call binary Copyright C 1998-2008 Erik Andersen, Rob Landley, Denys Vlasenko and others. Licensed under GPLv2. - Host AP driver Copyright © 2001-2002 SSH Communications Security Corp and Jouni Malinen. Copyright C 2002-2007 Jouni Malinen and contributors. Licensed under GPLv2. - Dnsmasq-2.40 Copyright C Simon Kelley. Licensed under GPLv2. - OpenWrt-1.1.2.2 Copyright C 2005 Waldemar Brodkorb. Felix Fietkau. Licensed under GPLv2. - ntpclient Copyright C 1997, 1999, 2000, 2003, 2006, 2007 Larry Doolittle. Licensed under GPLv2. - Wireless Tools for Linux-29 Copyright C 1996-2008 Jean Tourrilhes. Licensed under GPLv2. - libuClibc-0.9.28 Copyright © 2000-2005 Erik Andersen. Licensed under LGPLv2.0. NO WARRANTY BECAUSE THE ABOVE PROGRAMS ARE LICENSED FREE OF CHARGE, THERE IS NO WARRANTY FOR THE PROGRAMS, TO THE EXTENT PERMITTED BY APPLICABLE LAW. EXCEPT WHEN OTHERWISE STATED IN WRITING, THE COPYRIGHT HOLDERS AND/OR OTHER PARTIES PROVIDE THE PROGRAMS "AS IS" WITHOUT WARRANTY OF ANY KIND, EITHER EXPRESSED OR IMPLIED, INCLUDING, BUT NOT LIMITED TO. THE IMPLIED WARRANTIES OF MERCHANTABILITY AND FITNESS FOR A PARTICULAR PURPOSE. THE ENTIRE RISK AS TO THE QUALITY AND PERFORMANCE OF THE PROGRAMS IS WITH YOU. SHOULD THE PROGRAMS PROVE DEFECTIVE, YOU ASSUME THE COST OF ALL NECESSARY SERVICING, REPAIR OR CORRECTION. IN NO EVENT UNLESS REQUIRED BY APPLICABLE LAW OR AGREED TO IN WRITING WILL ANY COPYRIGHT HOLDER, OR ANY OTHER PARTY WHO MAY MODIFY AND/OR REDISTRIBUTE THE PROGRAMS AS PERMITTED ABOVE. BE LIABLE TO YOU FOR DAMAGES. INCLUDING ANY GENERAL. SPECIAL. INCIDENTAL OR CONSEQUENTIAL DAMAGES ARISING OUT OF THE USE OR INABILITY TO USE THE PROGRAMS (INCLUDING BUT NOT LIMITED TO LOSS OF DATA OR DATA BEING RENDERED INACCURATE OR LOSSES SUSTAINED BY YOU OR THIRD PARTIES OR A FAILURE OF THE PROGRAMS TO OPERATE WITH ANY OTHER PROGRAMS). EVEN IF SUCH HOLDER OR OTHER PARTY HAS BEEN ADVISED OF THE POSSIBILITY OF SUCH DAMAGES. You can get corresponding open source code from the following URL. http://www.oss-pioneer.com/homeav/accessory We are unable to answer any questions about the source code for the open source software. Please refer to following URL for further information of GNU General Public License Version 2. http://www.gnu.org/licenses/gpl-2.D.html Please refer to following URL for further information of GNU Library General Public License Version 2.0. http://www.gnu.org/licenses/old-licenses/Igpl-2.0.html BSD-STYLE LICENSE This product includes the following software licensed for use under the terms of BSD-Style License. - libupnp-1.3.1 Copyright C 2000-2003 Intel Corporation, All rights reserved. Redistribution and use in source and binary forms, with or without modification, are permitted provided that the following conditions are met: * Redistributions of source code must retain the above copyright notice. this list of conditions and the following disclaimer. * Redistributions in binary form must reproduce the above copyright notice, this list of conditions and the following disclaimer in the documentation and/or other materials provided with the distribution. * Neither name of Intel Corporation nor the names of its contributors may be used to endorse or promote products derived from this software without specific prior written permission. THIS SOFTWARE IS PROVIDED BY THE COPYRIGHT HOLDERS AND CONTRIBUTORS "AS IS" AND ANY EXPRESS OR IMPLIED WARRANTIES, INCLUDING, BUT NOT LIMITED TO, THE IMPLIED WARRANTIES OF MERCHANTABILITY AND FITNESS FOR A PARTICULAR PURPOSE ARE DISCLAIMED. IN NO EVENT SHALL THE COPYRIGHT HOLDER OR CONTRIBUTORS BE LIABLE FOR ANY DIRECT, INDIRECT. INCIDENTAL. SPECIAL. EXEMPLARY. OR CONSEQUENTIAL DAMAGES (INCLUDING. BUT NOT LIMITED TO, PROCUREMENT OF SUBSTITUTE GOODS OR SERVICES: LOSS OF USE, DATA, OR PROFITS; OR BUSINESS INTERRUPTION) HOWEVER CAUSED AND ON ANY THEORY OF LIABILITY, WHETHER IN CONTRACT, STRICT LIABILITY, OR TORT (INCLUDING NEGLIGENCE OR OTHERWISE) ARISING IN ANY WAY OUT OF THE USE OF THIS SOFTWARE, EVEN IF ADVISED OF THE POSSIBILITY OF SUCH DAMAGE. I • Microsoft®, Windows® 7,Windows® Vista and Windows® XP the registered trademarks or trademarksofMicrosoft® Corporation in the U.S.and othercountries. • Other product names, technology names, and company names mentioned in this manual may be trademarks or registered trademarks of their respective owners and are hereby acknowledged. • Note:Pleasesuretoread the productUSER'SMANUALthoroughly before usingthis producttoensuresafeand correct usage. AS-WL300 < ARH7110 >
-
 1
1 -
 2
2
 |
 |
