Pioneer CD-VS33 Owner's Manual - Page 14
Installation using Velcro tape
 |
UPC - 012562528700
View all Pioneer CD-VS33 manuals
Add to My Manuals
Save this manual to your list of manuals |
Page 14 highlights
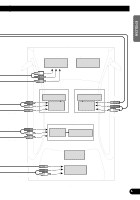
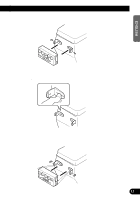
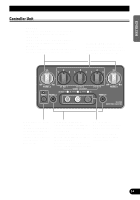
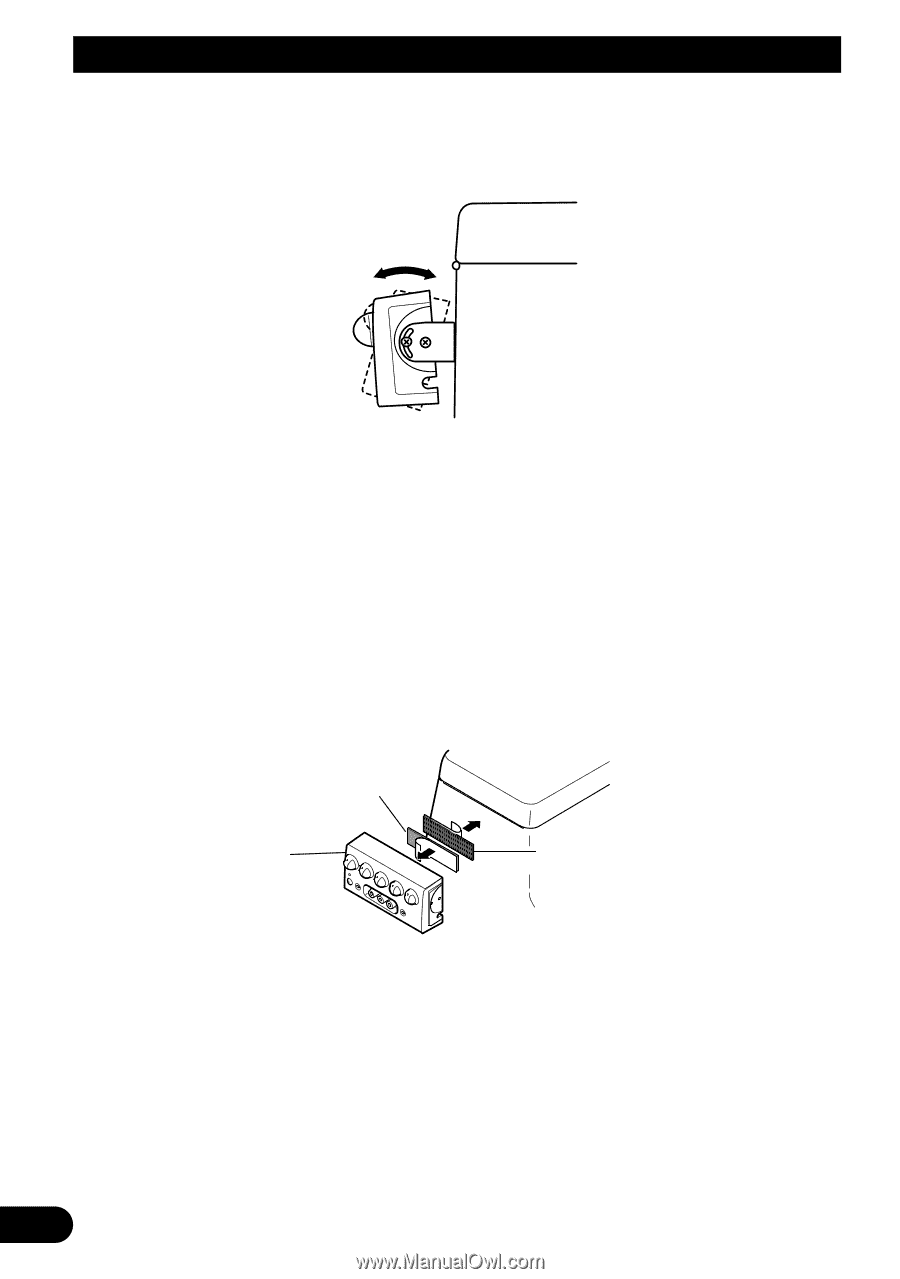
Installation 6. Adjust the installation angle of the controller unit. Adjust the angle for optimal ease of use. 7. Secure the controller unit firmly with the L-fixtures. Tighten the screws fully. Note: • Be careful not to overtighten the screws or tighten them slanted. An expanded screw hole might result, disabling attachment of the L-fixtures. s Installation using Velcro tape Adhere the Velcro tape (hard) (provided) to the back of the controller unit, adhere the Velcro tape (soft) to the installation location and then install. Velcro tape (hard) Controller unit Velcro tape (soft) 13
-
 1
1 -
2
-
3
-
4
-
5
-
6
-
7
-
8
-
 9
9 -
 10
10 -
 11
11 -
 12
12 -
 13
13 -
 14
14 -
 15
15 -
 16
16 -
 17
17 -
 18
18 -
 19
19 -
20
-
21
-
22
-
23
-
24
-
25
-
26
-
27
-
28
-
29
-
30
-
31
-
32
-
33
-
34
-
35
-
36
-
37
-
38
-
39
-
40
-
41
-
42
-
43
-
44
-
45
-
46
-
47
-
48
-
49
-
50
-
51
-
52
-
53
-
54
-
55
-
56
-
57
-
58
-
59
-
60
-
61
-
62
-
63
-
64
-
65
-
66
-
67
-
68
-
69
-
70
-
71
-
72
-
73
-
74
-
75
-
76
-
77
-
78
-
79
-
80
-
81
-
82
 |
 |
13
Installation
6.
Adjust the installation angle of the controller unit.
Adjust the angle for optimal ease of use.
7.
Secure the controller unit firmly with the L-fixtures.
Tighten the screws fully.
Note:
•
Be careful not to overtighten the screws or tighten them slanted.
An expanded screw hole might
result, disabling attachment of the L-fixtures.
■
Installation using Velcro tape
Adhere the Velcro tape (hard) (provided) to the back of the controller unit, adhere the
Velcro tape (soft) to the installation location and then install.
Velcro tape
(hard)
Controller unit
Velcro tape
(soft)