Pioneer DEH-P4200UB Owner's Manual - Page 8
Menu operations identical, for function settings/audio, adjustments/initial, settings/lists, Tuner - new
 |
UPC - 884938101400
View all Pioneer DEH-P4200UB manuals
Add to My Manuals
Save this manual to your list of manuals |
Page 8 highlights
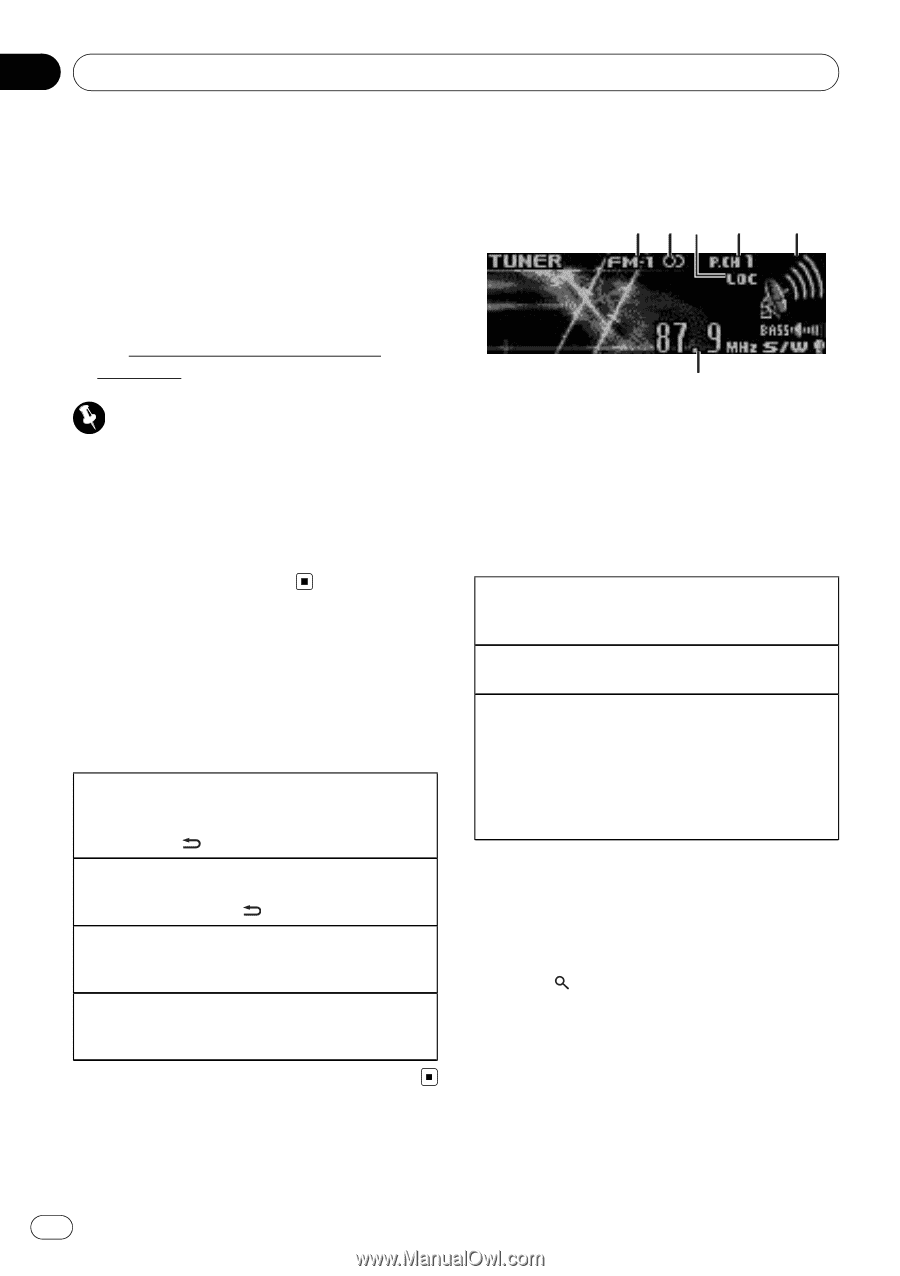
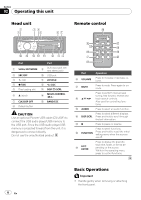
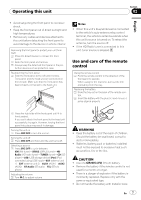
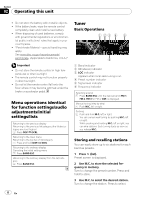
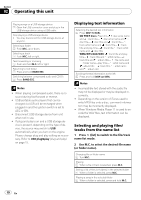
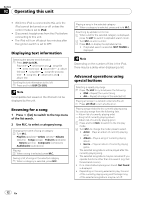
Section 02 Operating this unit ! Do not store the battery with metallic objects. ! If the battery leaks, wipe the remote control completely clean and install a new battery. ! When disposing of used batteries, comply with governmental regulations or environmental public institutions' rules that apply in your country/area. ! "Perchlorate Material - special handling may apply. See www.dtsc.ca.gov/hazardouswaste/ perchlorate. (Applicable to California, U.S.A.)" Important ! Do not store the remote control in high temperatures or direct sunlight. ! The remote control may not function properly in direct sunlight. ! Do not let the remote control fall onto the floor, where it may become jammed under the brake or accelerator pedal. Menu operations identical for function settings/audio adjustments/initial settings/lists Returning to the previous display Returning to the previous list/category (the folder/category one level higher) 1 Press DISP/ /SCRL. Returning to the main menu Returning to the top tier of list/category 1 Press and hold DISP/ /SCRL. Returning to the ordinary display Canceling the initial setting menu 1 Press BAND/ESC. Returning to the ordinary display from the list/category 1 Press BAND/ESC. Tuner Basic Operations 1 23 4 5 6 1 Band indicator 2 5 (stereo) indicator 3 LOC indicator Appears when local seek tuning is on. 4 Preset number indicator 5 Signal level indicator 6 Frequency indicator Selecting a band 1 Press BAND/ESC until the desired band (FM-1, FM-2, FM-3 for FM or AM) is displayed. Manual tuning (step by step) 1 Push M.C. left or right. Seeking 1 Push and hold M.C. left or right. You can cancel seek tuning by pushing M.C. left or right. While pushing and holding M.C. left or right, you can skip stations. Seek tuning starts as soon as you release M.C. Storing and recalling stations You can easily store up to six stations for each band as presets. 1 Press (list). Preset screen is displayed. 2 Use M.C. to store the selected frequency in memory. Turn to change the preset number. Press and hold to store. 3 Use M.C. to select the desired station. Turn to change the station. Press to select. 8 En
-
 1
1 -
2
-
 3
3 -
 4
4 -
 5
5 -
 6
6 -
 7
7 -
 8
8 -
 9
9 -
 10
10 -
 11
11 -
 12
12 -
 13
13 -
14
-
15
-
16
-
17
-
18
-
19
-
20
-
21
-
22
-
23
-
24
-
25
-
26
-
27
-
28
-
29
-
30
-
31
-
32
-
33
-
34
-
35
-
36
-
37
-
38
-
39
-
40
-
41
-
42
-
43
-
44
-
45
-
46
-
47
-
48
-
49
-
50
-
51
-
52
-
53
-
54
-
55
-
56
-
57
-
58
-
59
-
60
-
61
-
62
-
63
-
64
-
65
-
66
-
67
-
68
-
69
-
70
-
71
-
72
-
73
-
74
-
75
-
76
-
77
-
78
-
79
-
80
-
81
-
82
-
83
-
84
-
85
-
86
-
87
-
88
-
89
-
90
-
91
-
92
-
93
-
94
-
95
-
96
-
97
-
98
-
99
-
100
-
101
-
102
-
103
-
104
-
105
-
106
-
107
-
108
-
109
-
110
-
111
-
112
-
113
-
114
-
115
-
116
-
117
-
118
-
119
-
120
-
121
-
122
 |
 |