Pioneer DVR-RT500 Owner's Manual - Page 80
Dubbing, Dubbing using other equipment
 |
View all Pioneer DVR-RT500 manuals
Add to My Manuals
Save this manual to your list of manuals |
Page 80 highlights
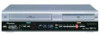
08 Dubbing Dubbing using other equipment VR mode Video mode DVD-R VCR You can connect another VCR or camcorder for dubbing. Preparation: • Typical connection: When using this unit as a recording device Playback VCR To Video OUT AUDIO/VIDEO cord (supplied) Recording DVD/VCR To Audio (R) OUT To Audio (L) OUT When a video is recorded using this unit Preparation: • Turn ON the TV and set the unit to the video input mode. • Select the input mode in LINE1 (LINE2) INPUT setting on page 30. • Load a video tape where the erase-protection tab is not activated or a disc with enough recording space. • To record onto a video tape, set the unit to VCR mode, whereas to record onto a disc, set it to DVD mode. 1 Press INPUT SELECT and set the channel to L2 (or L1). L1 (LINE 1):on the rear panel L2 (LINE 2):on the front panel Confirm that L2 (or L1) appears on the display window. To Video IN To Audio (R) IN To Audio (L) IN You can also connect to the audio/video input jack (L1) at the rear side of this unit. In addition, each S-Video input jack at the front and rear sides can be used for recording on the disc. (The S-Video input jack cannot be used for recording on the video tape.) Playback Camcorder To AV jack 2 Press REC MODE/SPEED and select the recording mode. VCR: SP or SLP (See page 48) DVD: SP, LP, SLP or XP (See page 52) 3 Press REC on this unit, then press PAUSE/STILL. 4 Press the PLAY button on the playback device, then press the PAUSE/STILL button. 5 Release the recording pause and the playback still simultaneously to begin the duplicating process. 6 To stop dubbing, press STOP. Recording DVD/VCR To Video IN To Audio (R) IN To Audio (L) IN AUDIO/VIDEO cord (not supplied) Note • When this unit is used as a playback device, a mark or a character displayed on the screen is also dubbed as an image. When the screen display is set to OFF, see "DISPLAY/CALL" on page 29. • If no special permission is obtained from the copyright owner, videos recorded from TV programs or movies can only be used for your own personal enjoyment. • You may not dub a copy protected video or DVD disc. 80 En
-
 1
1 -
2
-
3
-
4
-
5
-
6
-
7
-
8
-
9
-
10
-
11
-
12
-
13
-
14
-
15
-
16
-
17
-
18
-
19
-
20
-
21
-
22
-
23
-
24
-
25
-
26
-
27
-
28
-
29
-
30
-
31
-
32
-
33
-
34
-
35
-
36
-
37
-
38
-
39
-
40
-
41
-
42
-
43
-
44
-
45
-
46
-
47
-
48
-
49
-
50
-
51
-
52
-
53
-
54
-
55
-
56
-
57
-
58
-
59
-
60
-
61
-
62
-
63
-
64
-
65
-
66
-
67
-
68
-
69
-
70
-
71
-
72
-
73
-
74
-
 75
75 -
 76
76 -
 77
77 -
 78
78 -
 79
79 -
 80
80 -
 81
81 -
 82
82 -
 83
83 -
 84
84 -
 85
85 -
86
-
87
-
88
-
89
-
90
-
91
 |
 |
