Pioneer GM-D1004 Owner's Manual - Page 13
Installation
 |
View all Pioneer GM-D1004 manuals
Add to My Manuals
Save this manual to your list of manuals |
Page 13 highlights
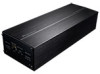
Installation 5 Install the amplifier with the use of supplied tapping screws (4 mm × 18 mm (1/8 in. × 3/4 in.)). 1 23 1 Tapping-screws (4 mm × 18 mm (1/8 in. × 3/4 in.)) 2 Floor mat or chassis 3 Drill a 2.5 mm (1/8 in.) diameter hole. Notes ! Do not install the cords in places where they touch the legs of a person as a disconnection or short-circuit may result. ! Do not install the amplifier in a place where water drop may be attached. English Section 04 En 13
-
 1
1 -
2
-
3
-
4
-
5
-
6
-
7
-
 8
8 -
 9
9 -
 10
10 -
 11
11 -
 12
12 -
 13
13 -
 14
14 -
 15
15 -
 16
16 -
 17
17 -
 18
18 -
19
-
20
-
21
-
22
-
23
-
24
-
25
-
26
-
27
-
28
-
29
-
30
-
31
-
32
-
33
-
34
-
35
-
36
-
37
-
38
-
39
-
40
-
41
-
42
-
43
-
44
 |
 |

5
Install the amplifier with the use of
supplied tapping screws (4 mm × 18 mm
(1/8 in. × 3/4 in.)).
1
2
3
1
Tapping-screws (4 mm × 18 mm (1/8 in. ×
3/4 in.))
2
Floor mat or chassis
3
Drill a 2.5 mm (1/8 in.) diameter hole.
Notes
!
Do not install the cords in places where they
touch the legs of a person as a disconnection
or short-circuit may result.
!
Do not install the amplifier in a place where
water drop may be attached.
En
13
English
Section
04
Installation