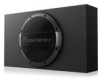
Pioneer TS-WX1010LA Owners Manual - Page 2
c>u,e:,u,®
 |
View all Pioneer TS-WX1010LA manuals
Add to My Manuals
Save this manual to your list of manuals |
Page 2 highlights
IIIPARTS INCLUDED OMIT GELIEFERTES ZUBEHOR IIIPIECES COMPRISES OPEZZI INCLUSI 0 0 yb 5 mm X25 mm 0 q55 mm X25 mm X 5 &' X 4 I x4 0.2 m X 8 (7) X 1 0 cb3 mmX12 mm x INCLUIDAS OFEcAS INCLUiDAS 11,1 X 1 •ft 5 m X 2 • This product does not contain connecting cords. When using cords, be sure to use one thicker than 18 gauge. Mit diesem Produkt werden keine Verbindungakabel mitgeliefert. Verwenden Sie kabel mit einer Starke von mehr als 18. • Ce produit ne comprend pas de cables de raccordement. Utiliser des cables de raccordment plus grosgue le calibre 18. • Questo prodotto non contiene cavi di collegamento. Quando si usa un cavo, accertarsi di usarne uno con uno spessore maggiore del calibro 18. • ESte prOdUCte ne COntiene CerdeneS. Si Se Utilizan CerdeneS, agegtheSe de USar mayor Clue el Calibre 18. • Este produto nao contem floe de conexao. Quando do uso de fios, assegure-se de user aqueles que tenham uma grossura superior ao calibre 18. B KOMnfleKTO 14313,efIHR HOT COKIISHIATOIlbHbIX utitypoe. PlcrlOrlithyembie untypira ft0fIXHbl 6bITb TOJILLte 18 memepa. . 1n ,S) • X 1 IIICONNECTIONS IIIVERBINDUNGEN IIICONNEXIONS IlICONNESSIONI IlICONEXIONES OCONEXOES Wiring Example 1 (Speaker line Input system) Anschlugbeispiel 1 (Lautsprecher-Line-Eingangs-System) Exemple de branchement des fils 1 (Systeme d'entree du haut-parleur) Esemplo dl cablagglo 1(Systeme dell'Ingresso della Ilnea degll altoparlantl) Ejemplos de alambrado 1 (Sistema entrata de la !Irma del altavoz) Exempla de SKIM 1 (Sistema de entry de linha do alto-falante) Battery wire (not included) Batteriekabel (nicht enthalten) Cable de a la batterie (non inches) Cava della battens (non incluso) Cable de berteria (no incluido) Cabo de bateria (Ma inelaldo) Cieurnaii caber% (we BKOANT B meanness') (J,..1._s4-)4t.,1-14 JIL4 Connect all the other leads, and finally connect this terminal to the positive (+) terminal of the battery. Recommended wire size is AWG 12 (TS-WX1220AH) / AWG 14 (TS-1A0(1210AH / WX1010LA) Alle anderenLeitungen anschlithan,mid danach these Klemrne art die positive (+)Klerrune der Batterie anschlithen, Empfohlener Kabelquersdmitt AWG 12 (IS-INX1220AH) / AWG 14 (1S-WX1210AH / ilpmrsep 1 (CeM70Ma C MCCOMe.30BeeetiM morearroro axoAa ilKyCTWHICK011 CeCTeMbl) WX1010LA) ( rlita ) Connecter taus les entree fits, et en dernier lieu connecter setts borne A la borne positive (+) de la batterie. Taille de cable recommandee AWG 12 (TS-WX1220AH)/ AWG 14 (TS-WM.210AB / WX1010LA) Collegara tutti gli altri fill, e collegare per ultimo questo terminale al morsetb (+) paddy() della batteCe. La dimensione consigliata del filo 6 AWG 12 (TS-WX1220AH) / AWG 14 (TS-WX1210AH / INX1010LA) l=e Conecte todos los demas cables, y finalmente conecte este terminal al terminal positive (+) de la batteria. El temefio de cable recomendado es AWG 12 (TS-WX1220AH) / AWG 14 (TS-WX1210AH / WX1010LA) Speaker Lautsprecher Haut-parleur Altoparlante Altavoz Alto-falante Acycrameccarg cmcrema Cut Sehneiden Conner Tagliara Corte Cortar Peaars c-kg Speaker tine input Lautsprecherkabel-Eingang Entree de cordon de haut-parleur Conectar toles es outros condutores, finabnente conectar este terminal ao terminal positive (+) da bateria. 0 tamanho de fie recomendado 6 AWG 12 (TS-WX1220AH) / AWG 14 (IS-WX1210AH / WX1010LA) nOACOPAIIHNTb rice ppyraie BbIBOAbl B samuomerime COOnlIHIITb 9TO memo c nonommrensimm (+) niesnom 6arapeat Pecommippeammoe cemerme itabena - AWG 12 (TS-WX1220AH) / AWG 14 (TS-WX1210AH /1A0C1010LA) J5 L,It-tI'Jrt AWG t (TS-WX1210AH / WX1010LA) / AWG 11 (TS-VVX1220AH) _fa ts•w•_14 tzNI Ingress° in linea speaker Entra.da de linea para altavoces Entrada de lithe do alto-falante flaarefocrail °mon acyammeccon CNCTeMbl 80 A (TS-WX1220AH) 40 A (TS-WX1210AH / WX1010LA) La.©, c>u,e(:),u,® =:› "\W For ground Far Erdung Pour la masse Per la massa Para masa Para o terra aasemneeme k..:+00itth Wiring Example 2 (RCA Input system) AnschluBbeispiel 2 (RCA-Eingangs-System) Exemple de branchement 2 (Systeme d'entree RCA) Esemplo dl cablagglo 2 (Slstema dell'Ingresso RCA) Ejemplos de alambrado 2 (Sistema de entrata RCA) Exempla de finial 2 (Sistema de enrada do RCA) TIpmrsep 2 (mimosa c mcnonbsoeaumem excula mina RCA) (RCA J Speaker Lautsprecher Haut-parleur Altopariante Altavoz Alto-falante Acymmiteccen acrema Battery wire (not included) Batteriekabel (nicht enthalten) Cable de la batterie (non inclus) Cave della batteria (non incluse) Cable de baterfa (no incluido) Cabo de bateria (Mo inclukto) Cemosoil Katienb (He exacurr Komnneer) sz)A.z.garli Connect all the other leads, and finally connect this terminal to the positive (+) terminal of the battery. Recommended wire size is AWG 12 (TS-WX1220AH) / AWG 14 (TS-VVX1210AH /1=10101A) Alle anderen Leitungen anschliegan, und danach these Klemme art die positive (+) Menu. der Batterie anschlithert Empfohlener ICabelquerschnitt AWG 12 (TS-VVX1220AH) / AWG 14 (IS-WX1210AH / WX1010LA) Connecter tous les Endres file, et en dernier lieu connecter cette borne A la borne positive (+1de la batterie. Taille de cable recommandee AWG 12 (TS-WX1220AH)/AWG 14 (TS-WX1210AH / WX1010LA) Collegara tutti gli earl fill, e collegare per ultimo quests terminate al morsetto (+1 positive della batteda. La dimensione consigliata del lib 6 AWG 12 (TS-1A0C1220AH) /AWG 14 (TS-WX1210AH / VVX1010LA) Conecte todos los demas cables, y finalmente conecte este terminal al terminal positive (+1 de la batteria. El temafio de cable recomendado es AWG 12 (TS-WX1220AH) / AWG 14 (TS-WX1210AH / VVX1010LA) Conectar [odes os outros condutores, e fmalmente conectar este terminal ao terminal positive (+) da bateris 0 tanumhe de fio recomendado AWG 12 (TS-WX1220AH) / AWG 14 (TS-WX1210AH / WX1010LA) floppoenamenrs see BbIBOAbl B saimuommime COOAHHI4Tb 9TO niesno c (10/10)KHTenbtlblM (+) rtle3,190M 69Tapell. Pecomerippearitioe cemerme cabers - AWG 12 (TS-WX1220AH) /AWG 14 (TS-INX1210AH / INX10101A) AWG It (TS-WX1210AH / WX1010LA) / AWG 1V (TS-WX1220AH) 44 Le4._}.11 c•-; LJ4til Power amplifier Leistungsverstarker Amplificateur de pouissance Arnplificatore di potenza Arnplificador de potencia Amplificadoar de form YCNANTEUlb MOLKHOCTN RCA cord (Not included) RCA-ICabel (Nicht mitgelieferri Cable RCA (Nest pas Indus) Cordone RCA (Non compreso) Cordon RCA (No este incluido) Pio do RCA (Nap incluido) Reber° RCA (e comnnecr He MAW) ( Red Rosso Kpacrace Rot Rouge Rojo Vermelho J.orni / 80 A (TS-WX1220AH) 40 A (TS-WX1210AH / WM 010LA) r©) .7 ROM KOMI \V!_j-vj • 7'-.4\0- For ground Far Erclung Pour la masse Per la massa / Para masa Para o term grin eatemneraiga 6 Car stereo Autostereoanlage Auto-radio Autostereo Sistema esters° pale automoviles Estenzo de cans Aeromoesisman CTI3p,3004CTBMa INPUT MODE SELECT switch EINGANGSWAHLSCHALTER SELECIEUR D'ENTREE SELETTORE MODALITA D'INGRESSO INTERRUPTOR SELECGION MODO ENTRADA MODO DELIGAcito SELECIONEBOTAO DEPEKnIOLIATErlb PERKIIMA BX0i9A tlitall ,,d4si INPUT RCA SPLINE Shall be set in SP LINE Einstellung "SP LINE" Position :Bur SP UNE Sara impostato in SP LINE Se configurara en SP LINE Devera set definido em SP LINE Heo6rmatemo yorarmalers a SP LINE "SP LINE" m•I dubio Ground wire (not included) Maosekabel (nicht enthalten) Cable de masse (non inches) Cava di massa (non incluso) Cable de puesta a tierra (no incluido) Cabo de terra (ale incluldo) 3asersneromere Katienb (He BKOANT e aoranneird (J",34_,A) AL. Connect firmly to a metal part of the car body. Improper grounding will cause this unit to operate abnormally. Recommended wire size is AWG 12 (TS-WX1220AH) / AWG 14 (TS-VVX1210AH / WX1010LA) EinenMetallteil fest mit der ICarosserie verbinden.Durch sthiechteErdung wirdFehlfunktion des Gerates hervorgerufers Empfohlener ICabelquerschnitt AWG 12 (TS-WX1220AH) / AWG 14 (TS-WX1210AH / WX1010LA) Bien connecter a une partie metallique du chassis de la voiture. Une mise it la masse non correcte amenera un fonctionnement incorrect de l'appareil. Taille de cable recommandee AWG 12 (TS-WX1220AH) /AWG 14 (TS-WX1210AH /WX1010LA) Collegare saldamente ad una parte metallica dll'auto. Una messa a terra scorretta cause malfunzionamenti dell'apparecchio. La dimensione consigliata del filo 6 AWG 12 (TS-WX1220AH) / AWG 14 (TS-WX1210AH / WX1010LA) Conecte firmemente a una parte metalica de la carroceria del automovil. Una puesta a masa incorrecta causer& el funcionamiento anormal de esta unidad. El tamafio de cable recomendado es AWG 12 (TS-WX1220AH) / AWG 14 (TS-WX1210AH / INX1010LA) Ligado firmemente a uma parte medlica da carrosseria do carro. Caso contratio a unidade podera operar deficientemente. 0 tamanho de fio recomends.do AWG 12 (TS-WX1220A11) / AWG 14 (TS-WX1210All / WX1010LA) HaAEOKHO COBANHI4Tb C MBTEITUM4BCKOil 4aCTbK, cyscrea acrromobigna. Henpaeignsmoe 3a3BMOEMNB 6yPAT nammuirry K iiapyineiriam B perm yarpoiicrea. POKOMBHA0BaHHOB CE113M4B Ka6ene - AWG 12 (TS-WX1220AH) / AWG 14 (TS-WX1210AH / WX1010LA) • ^lel, Llit„P.1 0,.."4,1-d, • J-S••• J AWG 1t (TS-WX1210AH / WX1010LA) /AWG 1V (TS-WX1220AH) ..e1 urr....ra &gal selell System remote control wire (not included) Systemsteuerkabel (nic.ht enthalten) Cable de commando a distance d'alimentation (non incises) Cava per il controllo remota del sistema (non incluso) Cable del control remota del sistema (no incluido) Cabo de controle remota de astern& Ogio inclefdo) ropasnmosera Kalienb REMOTE (He pawner a eoesnnenr) Jib) LIA,A ettrall This connection is made to be accessory connector in the car's fuse unit from which over 2 A can be supplied. Die Verbindung wird zur Zubethirklemme in der Sicherungseinheit des Fahrzeugs hergestellt, Ober die 2 A angelegt werden konnen. Cette connesion est effectude au niveau du conneeteur accessoire dans l'unite de fusible de la voiture et a partir duquel plus de 2 A peuvent etre fournis. Quest° collegamento va eseguito al connettore accessorio nell'unita fusibile dell'auto da cui possono essere forniti Ore 2 A. Esta conexien se realizare al conector para acr,esorios de la unidad de fusibles del automevil que pueda suministrar mas de 2 A. Esta conexilo 6 feita com o conector de accessed° na unidade de fusfvel do carro, de onde male de 2 A podem ser alimentados. nOACOBALIHREITCH K nonomerrensmomy COEdlitHaTTEI/110 nagpoma c (1/10BIGIMII npencomairtmendmig arnomobaina , or icaroporo eoemcoiera nortama mica ctinoti banes 2 A. „,..i ;Si Deck, etc Deck usw. Appareil Piastre, ecc. Deck, etc Deck, etc ABTOMO6NlaHblii pecseep II T. n. • ti! • .)44- RCA precut RCA Vorausgang Sortie de preampli RCA Preuscita RCA Presalida RCA Pre-setae RCA Bblo0A RCA RCA System remote control output System-Fembedienungsausgang Sortie telecommande de votre appardl Uscita del telecomando del sistema Sistema de control remoto del sistema Safda d.o controle remora do sistema BblX0A 6noca WICTEIHUHOHHOr0 ynpasnemmd CNCTeMbl 6 White Bianco Benbth Weig Blanco I Blanc Branco Ground wire (not included) Massekabel (nicht enthalten) Cable de masse (non Moles) Cave di massa (non incluse) Cable de puesta a lierra (no incluido) Cabo de terra (tho inclutdo) 3asemnalornial sabans (we BKOANT noun/teal (J..r./.. L+14_iiiii Connect firmly to a metal part of the car body. Improper grounding will cause this unit to operate abnormally. Recommended wire size is AWG 12 (TS-WX1220AH) / AWG 14 (TS-WX1210AH / WX1010LA) Einen Metallteil fest mit der ICarosserie verbinden. Durch schiedite Erdung wird Fehlfunktion des Gera. hervorgerufen. Empfohlener ICabelquersdinitt AWG 12 (TS-WX1220AII) / AWG 14 (TS-WX1210AH / WX1010LA) Bien connecter une partie metallique du chassis de la voiture. Une raise la masse non correcte amenera un fonctionnement incorrect de l'apparth. Taille de cable recommandee AWG 12 (TS-WX1220AH)/AWG 14 (TS-WX1210AH /WX1010LA) Collegare saldamente ad una parte metallica dll'auto. Una messa a terra scorretta causa malfunzionamenti dell'apparecchio. La dimensione consigliata del filo AWG 12 (TS-WX1220AH) /AWG 14 (TS-WX1210AH / VVX1010LA) Gonads firmemente a una parte metalica de la carroceria del automovil Una puesta a masa incorrecta causer& el funcionamiento anormal de este unidad. El lamark de cable recomendado es AWG 12 (TS-VVX1220AH) /AWG 14 (TS-16/X1210AH / VVX1010LA) Ligado firmemente a uma parte metalicadacarrosseria do caw. Case contrario a unidade podera operar dthcientemente. 0 tamanho de fio recomendado 6 AWG 12 (TS-WX1220AH) / AWG 14 (TS-WX1210AH/WX1010LA) HaAEBKHO COBANHNTb C merannarreccoit 4aCTWO Klemm awromothust Henpaemnbraoe easemnerame byner npaugoner° K iiapyinesnam B pabore ympoRcrea. PEKOMBHAOBaHHOB CEP4BHIle cabana - AWG 12 (TS-VVX1220AH) /AWG 14 (TS-16/X1210AH / VVX1010LA) INPUT MODE SELECT switch EINGANGSWAHLSCHALTER SELECTEUR D'ENTREE SELETTORE MODALITA D'INGRESSO INTERRUPTOR SELECCIoN MODO ENTRADA MODO DELIGAcA0 SELECIONE BOTAO DEPEKBIONATEllb PERKIRMA BXOTIA prm Cui" J-c• rK-L, J AWG 1 (TS-VVX1210AH / VVX1010LA) / AWG IV (TS-WX1220AH) .14 te-itmil 'ALAI System remote control wire (not included) Systemsteuerkabel (nicht enthalten) Cable de commande A distance d'alimentation (non inclus) Cave per II contralto remote del sIsteme (non Incluse) Cable del control remoto del slstema (no Inclulde) Cabo de controle remoto de sistema incluido) Ynpaommoumit Katienb REMOTE (He exoisar e Kosenneirr) job) ao CF. 4.31Sa...0 411., INPUT RCA SP LINE Shall be set in RCA Einstellung "RCA" Position sur NIVEAURCA Serb impostato in RCA Se configurarti en RCA Etyma ser definido emRCA Heolkonwmo yCTBHOEINTb a RCA "RCA" ',1) awn' fl System remote control input cord supplies power to your unit, determining whether it is ON or OFF. Wire the cord to the system remote control output of your deck, etc. Das Eingangs babel der System-Pernbedienung versorgt das Gerat mit Strom urod stellt fest, ob es ein-oder ausgeschaltet ist. Das k.abel am Ausgang far die System-Pernbedienung des Decks usw. artschliefiert Cable servant A la teldcommande. fournit l'alimentation A votre appareil et determine son etateteint ou allume. Branches ce cable A la sortie tthecommande de votre appareil. II cave dell'ingresso del telecomando del sistema fornisce l'alimeMazione alla unite, determinando se 6 attivata (ON) oppure disattivata (OFF). Collegare cordone all'uscila del telecomando del sistema della piastre. ecc. El cable de entrada de control remote del sistema alimenta la unidad, deterrninado si este encendida (ON) o apagada (OFF). Conecte el cable a la salida de control remoto del sistema de su deck, etc. 0 fie de entrada do connote remote do sistema fornece energia pare a ma unidade, determinando se ela este Ligada (ON) es Desligada (OFF). Conecte o fie com a sake de controle remoto do sistema de see deck, etc. Bxoppoil cabens 6noca ANCTaHLINOHH040 ynpaenerma CNCTOMM obecnemmeaer nonamy nwraming Ha yarponcreo, onpenenaa, ecmomem OH Him ablICOI040H. Raba% anepyer 00ACOBANHNTb K Buxom nynbra ANCTaHLLNOHH040 ynpaenersia awromo6mnbmoro pecingepa mrsi emy nono6moro annapara. ;44 f ULU FINAL STEP OF THE INSTALLATION Finish the installation by reconnecting the vehicle's negative (-) battery lead. ABSCHLUSS DER INSTALLATION Die installation durch den Anschlu8 des negativen Batteriekabels (-) des Fahrzeugs beenden. ETAPES FINALES DE L'INSTALLATION Finissez l'installation en rebranchant le fil morns (-) de la batterie. OPERAZIONE FINALE PER L'INSTALLAZIONE Completere la installazione collegando di nuOv0 il fib negative della batteria (-) del veiCele. PASO FINAL DE LA INSTALACION Termine la instalacian reconectando el cable negativo (-) de la bateria del vehiculo. ETAPA FINAL DA INSTALACAO Termine a instated° reconectando o fio do polo negativo (-)da bateria do carro. 3AKIll0,414TEllbliAR CTARAFI YCTAHOBIGI Yam-Iowa 3ariepwae-ron COOLIIIHOHHOM Orifintarensmere (-) Keens accymynareparnar 6arapew aaremeifigna. (-) I OEXAMPLE OF MOUNTING OHINWEISE ZUM EINBAU OEXEMPLE DE MONTAGE IDESEMPIO DI MONTAGGIO OEJEMPLO DE MONTAJE OEXEMPLO DE INSTALACAO OllPHMEP Lis • TS-VVX1220AH / TS-VVX1210AH / TS-VVX1010LA • TS-INX1010LA IIIHOW TO INSTALL IDEINBAU OMODE D'INSTALLATION • TS-VVX1220AH / TS-VVX1210AH / TS-VVX1010LA • TS-VVX1220AH / TS-VVX1210AH DI INSTALLAZIONE OINSTALACION OCOMO INSTALAR OKAK • TS-VVX1010LA Oedemata rr• Iron plate Iron plate Eisenblech Eisenblech Plaque en for Plaque en fer Sastre di lerro Lastra di ferro Lamina de acero 4 Lamina de acero Placa de ferro Placa d.e faro Weneemaa nnacregia )10311133Hal mamma -LI-, Lei •How to attach the remote control -Installation der Fernbedienung -Comment installer la telecommande •Come installare telecomando •Como instalar el control remoto -Como instalar o controle remoto • KIIIC yClIIHOBIlTb awlbT MICTaHLWOHHOr0 ynpaaneama rC---'11 ','-.4.511k.-14 • Iron plate Eisenblech Plaque en fer Lastra di ferro Lamina de acero 6 Placa de 4erro >Keneemed nnactima L.9-5 U.S. models only / Nur US-Modelle / Modeles americains uniquement / Solo modelli degli Stati Uniti Solo modelos de EE.UU. / Modelos apenas dos EUA / Tonbao Ana momenm CWA / kk)-Ni This device complies with Pad 15 of the FCC Rules. Operation is subject to the follwing two conditions : (1) this device may not cause harmful interference, and (2) this device must accept any interference received, including interference that may cause undesired operation. Information to User Alteration or modifications carried out without appropriate authorization may invalidate the user' s right to operate the equipment Note This equipment has been tested and found to comply with the limits for a Class B digital device, pursuant to Part 15 of the FCC Rules. These limits are designed to provide reaSOnable protection against harmful interference in a residential installation. This equipment generates, uses and can radiate radio frequency energy and, if not installed and used in accordance with the instructions, may cause harmful interference to radio communications. However, there is no guarantee that interference will not occur in a particular installation. If this equipment does cause harmful interference to radio or television reception, which can be determined by turning the equipment off and on, the user is encouraged to try to correct the interference by one or more of the following measures : • Reorient or relocate the receiving antenna. • Increase the separation between the equipment and receiver. • Connect the equipment into an outlet on a circuit different from that to which the receiver is connected. • Consult the dealer or an experienced radio/TV technician for help. FEDERAL COMMUNICATIONS COMMISSION SUPPLIER'S DECLARATION OF CONFORMITY Product Name : ACTIVE SUBWOOFER Model Number : TS-VVX1220AH, VVX1210AH, WX1010LA Responsible Party Name : PIONEER ELECTRONICS (USA), INC. SERVICE SUPPORT DIVISION Address : 2050 W. 190 th STREET, SUITE 100 TORRANCE, CA 90504, USA Phone : 800-421-1404 URL : http://www.pioneerelectronics.com Canadian models only / Nur Kanada- Modelle / Modeles eanadiens uniguement / Solo modelli canadesi Salo los modelos de Canadienses / Modelos apenas dos Canada / Tonbao arm monaneii Kaaama / CAN ICES-3 B/NMB-3 B Information Note for Customers in Russia and CIS countries. 1K Information - l'attention des clients de Russie et des pays de la CEI. Nota informativa per i consumatori della Russia e dei paesi del CIS. bK Note de informed° para consumidores da Rassia e da CEI. IlucOopmatom Ana norpe6wreneft B POCCNN CHI". np44444HMG : B COOTBBTCTBNN CO CTEITKIII 5 3aKOHa POCCNACKOR 40t3AepaLWIN 3EILL04Te spas no-rpe6i4Twiefidi nocrasormesmem npaewrenscrea PoccmcicsoR4Degtepautia /*720 OT 16.06.97 Komnaiivin Pioneer Europe NV oroaapiamer mews:wig coos CJD,OK6bl mgoenisik OCONLINallbH0 nOCraensembix poccmgicumil PblHOK. ABTOMO6NAbHEIFI anerrpostisa : 6 118T KOPPIOPAtilln flAc401111P 28-8, XOHKOMEWOM3 2-40M8, Brice-icy, TOKNO 113-0021, FInomats Ilmnoprep 000 "Ill1OHEP PVC" 105064, POCCNR, r. Momma, HYOKHM171 Cycanwisrai nepeynoc, nom 5, crpoemse 19 Ten. : +7(495)956-89-01 IIICONTROLS AND THEIR USE OBEDIENELEMENTE UND IHRE VERWENDUNG OUTILISATION DES PARA METRES DE CONTROLE IIICONTROLLI ED IL LORO USO IIICONTROLES Y SU USO 411CONTROLES E SEU USO eallEMEHTbl ynPAIEMEHMII c:A1.4 • • TS-INX1220AH Ea. BASS OPST L BASS ROONz 100 N. PHASE POWER -NOR. SONz LPF SPUTLEVEL INF'UT ON RCA _r_7\_ M CIO CONTROLLER 60A 400 REV. OFF SPLINE 0 ONO/REM/BACKUP • TS-VVX1210AH / TS-VVX1010LA N. POWER -a RES. BASS BOOST L BASS ROONz 100 50Nz AO LPF SPUTLEVEL INF'UT ON RCA _r_7\_ a a CIO CONTROLLER OFF SP Llt4E',,,, ONO/REM/BACKUP CROSSOVER FREQUENCY OBERGANGSFREQUENZ FREQUENCE DE CHEAUCHEMENT FREQUENZE DI DIAFONIA FRECUENCIA DE TRANSICION FREQUENCIAS DE CRUZAMENTO LIACTOTA KPOCCOBEPA SELECTABLE FREQUENCY WAHIBARE FREQUENZ FREQUENCE SELECTIONNABLE FREQUENZA SELEZIONABILE FRECUENCIA SELECCIONABLE PREQUENCIA SELECIONAVEL Biel514PAEMAR LACTOTA JI_A&J „zaj.i 50 Hz TS-WX1220AH TS-WX1210AH TS-NO(101MA 200 Hz FULL-RANGE SPEAKER VOLLBEREICH-LAUTSPRECHER HP DE GAMME COMPLETE ALTOPARLANTE CON GAMMA COMPLETA ALTAVOZ PARA TODAS LAS FRECUENCIAS ALTO-FALANTHDEPAM/re TOTAL f1011HOCIPIADA3OHHbliA IPOMKOMBOPPTTE/lb ,s_dt ;WAS 0 Power indicator Lights up when power is turned on. (2) Gain control Use this countrol to set the desired gain level. The GAIN control circuit protects the subwoofer from excessNe input and may automatically adjust the level to prevent damage. Frequency control Tum this knob to change the frequency during sound reproducfion. Set the Mob to the bass selling of your choice (selectable frequency from 50 Hz to 200 Hz). 0 Bass boost control You can adjust a bass boost level from 0 dB to 12 dB. (5) Bass boost frequency control You can adjust a bass boost frequency from 40 Hz to 100 Hz. (5) Phase switch Use switch to select the phase according to the system. LPF ON/OFF : Engages the Low-Pass Filter (LPF) crossover of this product ON: To control the crossover frequency using this product select ON OFF: To control the crossover frequency using a compatible in-dash receNer select OFF 0 INPUT MODE SELECT SWITCH RCA : When using the RCA input SP LINE : When using the speaker level input Kontrolleudite Leuchetet, wenn die Stromversorgung eingeschaltet Verstarkungsregler Mit diesem Schaller wird die Verstarkungspegel eingestellt. Der GAIN-Steuerschaltkreis sthlitzt den Subwoofer vor zuhohenEingangspegelnundkann den Pegel automatisch regek, um Schaden zu verhinderrt e Frequenz-Regler Mit diesem Renter wird die Frequenz wahrend der Wiedergabe geandert. DenRegler nach Wunsch einstellert (waldbare Frequenz von 50Hzbis 200Hz) (4) Bassverstarkungsregler the kannert denBassversarlcundgspegel zwischen 0 dB und 12 dB einstellert. (5) Bass Boost Frequenzregler Wahlbare Bass Boost Premien. von 40Hz bis 100Hz. Phasenschalter Mit diesem schalter wird die Phase entsprechend dem System ausgewahlt (2) LPF ON/OFF: Aktiviert den Tiefpmsfilter (LPF) ON: Aktivierenum die Trennfrequenz an diesemProdukt einzustellen OFR Deaktivieren um die Obergangsfrequenz an einem kompaliblen Autoradio einzustellen EINGANGSWAHLSCHALTER RCA : Bei Nutzung des Cinch-Eingangs SP LINE : Bei Nutzung des Hochpegeleingangs Temoin d'alimentation S'allume quand Peppered fonctionne. (2) Reglage du gain Permet de regler le niveau du gain. Le circuit de commande de GAIN protege le caisson de basses de l'entree excessive et peut ajuster automatiquement le niveau pour eviter tout dommage. e Reglage de la tonalite Tournee ee bouton pour regler la tonalite. Positionnez le bouton sur le reglage des graves qui vous plait (frequence selectionnable de 50 Hz I 200 Hz). Commande de Paccentuation des graves Vous ponces Muster le niveau d'accentuation entre 0 dB et 12 dB. 6 Coarele de frequence du renforcement des basses Vous pouvez ajuster la frequence du renforcement des basses de 40 Hz it 100 Hz ® Selection de la ahem Utilises cet interrupteur pour regler la phase en foraction de votre systeme. (7) FPB ON/OFF Active le filtre edit' passe-bas Wit) du produit ON: Selectionner ON pour activer le filtre actifintegre au produit OFF: Selection:ler OFF si le filtre actif (FAR est integre Pautoradio SELECTEUR D'ENTREE RCA : Quand utilisation entree RCA SP LINE : Quand utilisation niveau haut-parleurs Indicatore di alimentazione Si illumine quand l'apparecchio acceso. (2) Controllo de guadagno Usare questo comando per stabilire livello di guandagno desiderato. II circuito di controllo GAIN protegge subwoofer da segnali in ingresso eccessivi e pub regolare automaticamente livello per evitare danni. e Conlrollo della frequenza Girare questo qulsante per cambiare la frequenza durante la riproduzione del suono. Regolare pulsante al livello del bassi della rostra scelta (frequenza selezionabile da 50 Hz a 200 Hz). 0 Comando di selesione per l'espanisione del bassi Con questo comando si pub regolare tra 0 dB e 12 dB il livello di espansione del bassi. (5) Controllo frequenza Bass Boost E possibile regolare la frequenza del Bass Boost da 40 Hz a 100 Hz. e Interrutlore di face Usare finterruttore per selezionare la face a seconda del sistema. (2) LPF OWOFF: Attiva il crossover del tiltro passa-basso (LPF) di quests predate. ON: Per controllare la frequenza di crossover ufilizzando questo prodotto, selezionare ON OFF: Per controllare la frequenza di crossover usando un ricevitore estemo 6 SELETTORE MODALITA D'INGRESSO selezionare OFF RCA Quando si usa l'ingresso RCA SP LINE : Quando si usa l'ingresso di linea Indicador de encendido Se eneiende cuando la unidad este encendida. (2) Control de gananda Use esta control para flier el nNel de ganancia deseada. Los circuitos de control de Ganancia protege al subwoofer de una entrada excesiva y puede ajustar automaticamente el nNel para prevenir delfts. 6 Control de frecuencia Gire este perilla para cambiar la frecuencia duraMe la reproduccien del sonido. Ajuste la perilla para ajustar el bajo a eleccien (de frecuencia seleccionable de 50 Hz a 200 Hz). 0 Control de refuerzo de graves Se puede ajustar el nivel de caber= de graves de 0 dB 12 dB. (5) Contro de frecuencia pare refuerzo de Graves e Se puede ajustar la frecuenda de los refuerzos de Graves de 40 Hz a 100 Hz Conmutador de fase Use el conmulador pare seleccionar la fase de acuerdo al sistema. (2) LPF ON / OFF: active el cruce del MUD de paso bajo (LPF) de este product° ON: Para coMrolar la frecuencia de cruce utilizando este producto, seleccione ON OFF: para controlar la frecuencia de cruce usando un receptor en el tablero compatible, seleccione OFF 6 INTERRUPTOR SELECCION MODO ENTRADA RCA : Cuando se use la entrada RCA SP LINE : Cuando se use la entrada de nivel de altavoz Indicador de form e Dumina-se quando a form 6 ligada. Controle de amplificado Use este controle para fixer o nivel desejado de amplificado. 0 circuit° de controlo ganho protege o subwoofer de entradas excessives e pode ajmtar automaticamente o e nivel para evitar dams. Control° de freqiiencia Girar este comando para mudar a fret:puck durante a reproduce° senors Acerte o bate° ao ajuste de baize de sua escolha (frequencia selecionivel de 50 Hz a 200Hz). e Control de refers° dos graves Voce pode ajustar o nivel de reface dos graves de 0 dB a 12 dB. (6) Controlo de frequencies Bass Boost possivel ajustar a frequencia de Bass Boost de 40 Hz a 100 Hz. hiteruptor de fase Use o interrupter para selecionar a fase que correspondaaosistema. LPF ON / OFF: ativa o crossover do aro passa-baixa (LPF) &ate produto ON: Para controlar a frequencia de ornament° usando este produto, selecione ON OFF: Pam controlar a frequencia de crmamento usando um receptor no seine] compativel, selecione OFF (6 MODO DE LIGACAO SELECIONE BOTAO RCA Para utilized° da entrada RCA SPLINE: Parautilized° da entrada de nivel de coluna Wimegarop minxes! 3aropmerce spa aorsogemere arramee. Perynerop rename licnonbayerco yCTaHOBIG4 HyWHOCO ypoema yew/lemma. Hampobra GAIN npeztoxpabger ca6Byttop OT neperpyaox MOMOT aBTOMaTI140CKI4 COACTPEMBaTb yporreHb cerHana Aosl npeAorapaiiremee ero noapexatercee. ® Pelly1MpOBKa `41/CTOTbl n0B0pOTOM 3TOM noeopormoro perynarope BO !mem Bocnpoeseespreee swim meHeerce 4aCTOTa. YCTaHOBNTI3 COB0pOTHblii perynorop B nonomeme, COOTBBICTBylaKee HICKHOMy imecomacramomy 3By4aHNIO (abIrepaersae reacrora OT 50 ry AO 200 IL* ® Peryneeposarese mumersa Hlal0a gacror Bic Bowen, perynepoearb ypoiseHb noAbema HN3KOX 4aCTOT OT 0 06 AO 12 AS. 6 linpeEkne-iiie gacroroA paticrrbi Operatece Bass Boost Bbl MOMOLIT8 N3MBHFITb 4aCTOTI Myer:Lege BaSS Boost B scianasoHe OT 40 ruilo 1oo 6 flepetniogarenb dmis Mcnonbeyerce one esthopa 0:18.3L4 B 3aBNCNMOCTN OT CNCTBMbl. LPF ON/OFF: fuommeamea rtembrpa macror (rDFIN) ON: Mroific ynpaculats 4aCTOTOR spoccoaepa, mcnansaya 3TOT nponyct, Elbl6ElpVITI3 ON OFF: groom ynpaenerb 4aCTOTOil arpoccoeepa c 40/10BH040 ympoRcrea, ebRepere OFF HEPEKIllOMATEllb PDIR4MA BXORA RCA : Pipe lecnonbeoembee RCA-exoAa SP LINE : npN NC00.71630BaHNII BX0Aa abicosor0 YPOBHPI ,A1.12.11,:,.. (:) cut+ erml • ti .2.14 ti•at sum dud e s;i4, .45,••• V • • 5,•• • •'.34-4, 11 L4A-- _314 04/0 afi seic'all .31..c 1. • ...I _AS J.! _ercilami1eeirkee,AK.s AA-s,.-11ALTUI Lilo ® ra..,L.„1, e.1434,L1a,41, Om enerl difsi: LPF ON/OFF (R) zs_,,s! OFF LAU ti44)1.4 L,A el.,1,4 14.4( LIL4I RCA er.. : RCA SP LINE OCONNECTING THE POWER TERMINAL OANSCHLIESSEN DER STROMKLEMME •CONNEXION DE LA BORNE D'ALIMENTATION OCOLLEGAMENTO DEL TERMINALE DI ALIMENTAZIONE OCONEXION DEL TERMINAL DE POTENCIA OCONEXAO DO TERMINAL DE l'OTENCIA ellOAKIll04EHHE KI1EMMbl IIHTAHHFI 411211 au., 642 J.2.10 1 Route battery wire from engine comparbnent to the vehicle interior. • When drilling a cable pass-hole into the vehicle body and routing a battery wire thorough it, take care not to short-circult the wire damaging R by the cut edges or bums of the hole. 0 Positive 0 terminal Battery wire (sold separately) The maximum length of the wire between the fuse and the positive @ temfinal of the battely is 30 cm (12 in.). 6 Fuse 40 A (TS-VVX1210AH, VVX1010LA) / 80 A (TS-VVX1220AH) This unit must be separately fused at 40 A (TS-VVX1210AH, VD(1010LA)/ 80 A (TS-VVX1220AH). 3 Connect the wires to the terminal. Fe the wires securely with the terminal screws. • Since the wire will become loose over time, it must be periodically inspected and tightened as necessary. • Do not solder or bind the ends of the twisted wires. • Fasten while making sure to not to clamp be insulating sheath of the wire. • Use the supplied hexagonal wrench to tighten and loosen the terminal screw of this unit and use it to securely fasten the wire. Be careful to avoid excessive tightening of this screw, which may damage the wire. 6 4 (4vQ- 2 Use wire cutters or a utility knife to strip the end of the battery wire, ground wire and system remote control wire to expose about 10 mm (3/8 in.) of the end of each of the wires, and then twist the exposed ends of the wires. Twist 0 Battery care 6, Power terminal e Ground wire (4) GND terminal (5) System remote control wire System remote control terminal (2) Terminal screws 10 mm (3/8 in.) 1 Positionnes le fil de la batterie du compartiment du moteurjusquNi Finterieur du vehicule. Lors du pergage d'un trou de passage des cables dans la carrosserie du vehieuk et le paSsage
-
 1
1 -
 2
2
 |
 |
