Pioneer VSX-49TXi Owner's Manual - Page 16
Auto Surround Sound Setup - and bi amp
 |
View all Pioneer VSX-49TXi manuals
Add to My Manuals
Save this manual to your list of manuals |
Page 16 highlights
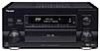
Quick Start Guide Part2 1 Auto Surround Sound Setup If setting up your surround sound speakers seems like it's going to be an involved task you only need to use this quick, automatic method to achieve good surround sound. You'll need to hook up the microphone provided so that the receiver can hear and judge the distance, size, sound character and sound pressure level of the speakers and thus know what settings to make. Follow the step-by-step guide to setting up your surround sound below. This will customize the surround sound for your listening environment. After you get used to the system it is a good idea to make more advanced settings as explained in "Expert Setup" (page 97). Also, if you want to personalize your surround sound setups by making the settings manually go to "Setting up for Surround Sound" (page 40). Make sure all the components you need, especially speakers, have been properly connected before you do the steps described here. Use the arrow buttons (5∞) and the ENTER button on the remote control to navigate the on-screen display (OSD) on your TV. 1 Switch on the receiver and your TV. 2 Make sure your TV is set to this receiver as you will use the on-screen displays (OSDs) on your TV to follow these instructions. 2 Hook up the microphone to the Front Panel. 5 6 5 RECEIVER DVD/LD Receiver TONE BASS/ ATREBLE VCR1 /DVR VCR2 VCR3 TV DISPLAY DIMMER STATUS SYSTEM SETUP VIDEO SELECT SPEAKER A/B MAIN SUB EFFECT/ CH SEL. LOUDNESS TAPE 2 MONITOR INPUT ATT. SIGNAL SELECT REMOTE SETUP CD CD-R/ TAPE1 TUNER VIDEO SAT TV CONTROL 3 Place the microphone at your normal listening position. If you have a tripod, attach the microphone to it and use that to get the mic to ear level at your normal listening position. If you don't have a tripod use a table or chair to put the microphone at the same height as you usually listen to your system from. Ensure there are no obstacles between the speakers and the microphone. 4 If you have a subwoofer turn it on. 5 Press RECEIVER then press the SUB button on the remote control. 16 7 8 System Setup [ Auto Surround Setup ] [1. Input Assign] [2. Surround Setup] [3. Expert Setup] [4. THX Audio Setup] [Exit] Auto Surround Setup Speaker System Select [ Normal Surround ] [Go Next] [Return] 6 Press the SYSTEM SETUP button and use the on-screen display (OSD) that appears on your TV. 7 The arrow should be pointing at AUTO SURROUND SETUP, press ENTER. 8 NORMAL SURROUND should be selected. (Use the 23 buttons to select it if it isn't.) Use the 5∞ buttons to select GO NEXT and press ENTER. For Bi-amp settings choose FRONT BI-AMP 5.1 and follow the directions from step 3 on page 42. RETURN brings you back to the system setup menu.
-
 1
1 -
2
-
3
-
4
-
5
-
6
-
7
-
8
-
9
-
10
-
 11
11 -
 12
12 -
 13
13 -
 14
14 -
 15
15 -
 16
16 -
 17
17 -
 18
18 -
 19
19 -
 20
20 -
 21
21 -
22
-
23
-
24
-
25
-
26
-
27
-
28
-
29
-
30
-
31
-
32
-
33
-
34
-
35
-
36
-
37
-
38
-
39
-
40
-
41
-
42
-
43
-
44
-
45
-
46
-
47
-
48
-
49
-
50
-
51
-
52
-
53
-
54
-
55
-
56
-
57
-
58
-
59
-
60
-
61
-
62
-
63
-
64
-
65
-
66
-
67
-
68
-
69
-
70
-
71
-
72
-
73
-
74
-
75
-
76
-
77
-
78
-
79
-
80
-
81
-
82
-
83
-
84
-
85
-
86
-
87
-
88
-
89
-
90
-
91
-
92
-
93
-
94
-
95
-
96
-
97
-
98
-
99
-
100
-
101
-
102
-
103
-
104
-
105
-
106
-
107
-
108
-
109
-
110
-
111
-
112
-
113
-
114
-
115
-
116
-
117
-
118
-
119
-
120
 |
 |
