Pioneer VSX-532 Operating Instructions - Page 4
Controls and displays - setup
 |
View all Pioneer VSX-532 manuals
Add to My Manuals
Save this manual to your list of manuals |
Page 4 highlights
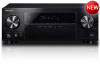
1 Controls and displays Front panel 1 2 3 4 56 7 VSX-532 2 4 33 8 9 10 11 12 1 INPUT SELECTOR dial Selects an input source (page 18). 2 Receiver control buttons SPEAKERS - Use to change the speaker system on or off. When the SP OFF is selected, no sound is output from the speakers connected to this receiver. DIMMER - Dims or brightens the display. The brightness can be controlled in four steps. STATUS - Switches the display of this unit. The listening mode, sound volume, input name can be checked by selecting an input source. 3 Character display See Display on page 5. 4 Tuner control buttons BAND - Switches between AM, FM ST (stereo) and FM MONO radio bands (page 22). TUNER EDIT - Use with TUNE /, PRESET / and ENTER to memorize and name stations for recall (page 22). TUNE / - Used to find radio frequencies (page 22). 13 14 PRESET / - Use to select preset radio stations (page 23). 5 HDMI indicator Blinks when connecting an HDMI-equipped component; lights when the component is connected (page 12). 6 Remote sensor Receives the signals from the remote control (see Operating range of remote control on page 7). 7 MASTER VOLUME dial 8 ÍSTANDBY/ON 9 PHONES jack Use to connect headphones. When the headphones are connected, there is no sound output from the speakers. The listening mode when the sound is heard from the headphone can be selected only from PHONES SURR, STEREO or STEREO ALC mode. 10 AUX INPUT jack/SETUP MIC jack Use to connect other equipment with a stereo mini jack. Use to connect a microphone when performing Full Auto MCACC setup (page 16). 11 Listening mode buttons AUTO SURROUND/STREAM DIRECT - Switches between Auto surround mode (page 24) and Stream Direct playback (page 25). ALC/STANDARD SURR - Press for standard decoding and to switch between the modes of Pro Logic and NEO:6, and the Auto level control stereo mode (page 24). ADVANCED SURROUND - Switches between the various surround modes (page 25). 12 ECO Switches between ECO 1/ECO 2. When ECO Mode is turned ON, the display will go dark (page 25). 13 SOUND RETRIEVER Turn Advanced Sound Retriever effect on/off. 14 USB terminal Use to connect your USB mass storage device as an audio source (page 15). 4
-
 1
1 -
 2
2 -
 3
3 -
 4
4 -
 5
5 -
 6
6 -
 7
7 -
 8
8 -
 9
9 -
 10
10 -
11
-
12
-
13
-
14
-
15
-
16
-
17
-
18
-
19
-
20
-
21
-
22
-
23
-
24
-
25
-
26
-
27
-
28
-
29
-
30
-
31
-
32
-
33
-
34
-
35
-
36
-
37
-
38
-
39
 |
 |
