Pioneer VSX-56TXi Owner's Manual - Page 30
Connecting your equipment, Connecting antennas
 |
View all Pioneer VSX-56TXi manuals
Add to My Manuals
Save this manual to your list of manuals |
Page 30 highlights
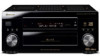
03 Connecting your equipment Connecting antennas The supplied antennas provide a simple way to listen to AM and FM radio. If you find that reception quality is poor, an outdoor antenna should give you better sound quality-see Connecting external antennas below. FM wire antenna AM loop antenna S400 S400 CENTER AC IN SWITCHED 100W(0.8A)MAX VSX-56TXi SELECTABLE AM loop antenna 1 Assemble the stand as shown in the illustration. fig. A fig. B fig. C Note • The signal ground ( ) is designed to reduce noise that occurs when an antenna is connected. It is not an electrical safety ground. • Bend the stand in the direction indicated (fig. A). • Clip the loop into the stand (fig. B). • It's possible to fix the AM antenna to a wall (fig. C). Before fixing, make sure that the reception is satisfactory. 2 Pull off the protective shields of both AM antenna wires. 3 Press the AM LOOP antenna terminal tabs to open and insert one wire into each terminal. 4 Release the tabs to secure the AM antenna wires. 5 Place the AM antenna on a flat surface and point in the direction giving the best reception. Avoid placing near computers, television sets or other electrical appliances and do not let it come into contact with metal objects. FM wire antenna • Connect the FM wire antenna to the FM UNBAL 75Ω terminal. For best results, extend the FM antenna fully and fix to a wall or door frame. Don't drape loosely or leave coiled up. Connecting external antennas To improve FM reception connect an external FM antenna to the FM UNBAL 75Ω. 75Ω coaxial cable ANTENNA 30 En
-
 1
1 -
2
-
3
-
4
-
5
-
6
-
7
-
8
-
9
-
10
-
11
-
12
-
13
-
14
-
15
-
16
-
17
-
18
-
19
-
20
-
21
-
22
-
23
-
24
-
 25
25 -
 26
26 -
 27
27 -
 28
28 -
 29
29 -
 30
30 -
 31
31 -
 32
32 -
 33
33 -
 34
34 -
 35
35 -
36
-
37
-
38
-
39
-
40
-
41
-
42
-
43
-
44
-
45
-
46
-
47
-
48
-
49
-
50
-
51
-
52
-
53
-
54
-
55
-
56
-
57
-
58
-
59
-
60
-
61
-
62
-
63
-
64
-
65
-
66
-
67
-
68
-
69
-
70
-
71
-
72
-
73
-
74
-
75
-
76
-
77
-
78
-
79
-
80
-
81
-
82
-
83
-
84
-
85
-
86
-
87
-
88
-
89
-
90
-
91
-
92
-
93
-
94
-
95
-
96
-
97
-
98
-
99
-
100
-
101
-
102
-
103
-
104
 |
 |
