Pioneer VSX-C302-S User Manual - Page 8
Connecting your equipment
 |
View all Pioneer VSX-C302-S manuals
Add to My Manuals
Save this manual to your list of manuals |
Page 8 highlights
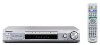
03 Connecting your equipment Chapter 3 Connecting your equipment Rear panel 1 SPEAKERS FRONT R L CENTER SURROUND R L 2 ANTENNA AM LOOP FMUNBAL75Ω 3 IN OUT CONTROL 4 AC IN VSX-C302 SPEAKERS FRONT R L CENTER SURROUND R L ANTENNA AM LOOP FMUNBAL75Ω DIGITAL IN SUB WOOFER OUT TV/SAT (DVD) OPT1 DVR/VCR OPT2 DVD (TV/SAT) COAX DIGITAL IN IN OUT CONTROL VIDEO IN IN IN L L OUT L R R R DVD TV/SAT DVR/VCR AUDIO TWO VOLTAGE SELECTORS MONITOR OUT 220 -230V 240V 110V 120-127V AC IN 110V 120 -127V 220 -230V 240V VIDEO TWO VOLTAGE SELECTORS SUB WOOFER OUT 5 TV/SAT DVR/VCR DVD (DVD) (TV/SAT) OPT1 OPT2 COAX 6 7 IN IN IN L L OUT L R R R DVD TV/SAT DVR/VCR AUDIO MONITOR OUT 220 -230V 240V 110V 120-127V 110V 120 -127V 220 -230V 240V 8 Important • Before making or changing the connections, switch off the power and disconnect the power cable from the power outlet. 1 SPEAKERS terminals (page 13) FRONT L/R, CENTER and SURROUND L/R speaker terminals. 2 Antenna connections AM LOOP (page 15) Connect the supplied AM loop antenna or an outdoor antenna if reception is bad. FM UNBAL 75Ω (page 15) Connect the supplied FM wire or an outdoor antenna if reception is bad. 3 CONTROL IN jack /CONTROL OUT jack (pages 16 and 17) Use to link Pioneer components together to enable all components in the chain to use just one remote control sensor. 4 AC IN (page 17) Connect the supplied AC power cable. 5 SUBWOOFER OUT jack (page 13) Connect a powered (active) subwoofer. 6 Digital connections The three digital audio jacks are all inputs. Connect to the digital outputs of digital source components such as DVD, CD and DVR players, satellite receivers, etc. TV/SAT(DVD) OPT1 jack (page 11) Optical digital audio jack for the TV/SAT input (although it is possible to reassign it to the DVD input). DVR/VCR OPT2 jack (page 12) Optical digital audio jack for the DVR/VCR input. • When connecting optical cables, be careful when inserting the plug not to damage the shutter protecting the optical socket. • When storing optical cable, coil loosely. The cable may be damaged if bent around sharp corners. 8 En
-
 1
1 -
2
-
 3
3 -
 4
4 -
 5
5 -
 6
6 -
 7
7 -
 8
8 -
 9
9 -
 10
10 -
 11
11 -
 12
12 -
 13
13 -
14
-
15
-
16
-
17
-
18
-
19
-
20
-
21
-
22
-
23
-
24
-
25
-
26
-
27
-
28
-
29
-
30
-
31
-
32
-
33
-
34
-
35
-
36
-
37
-
38
-
39
-
40
-
41
-
42
-
43
 |
 |
