Pioneer VSX-D209 Owner's Manual - Page 8
Connecting Your System - inputs
 |
View all Pioneer VSX-D209 manuals
Add to My Manuals
Save this manual to your list of manuals |
Page 8 highlights
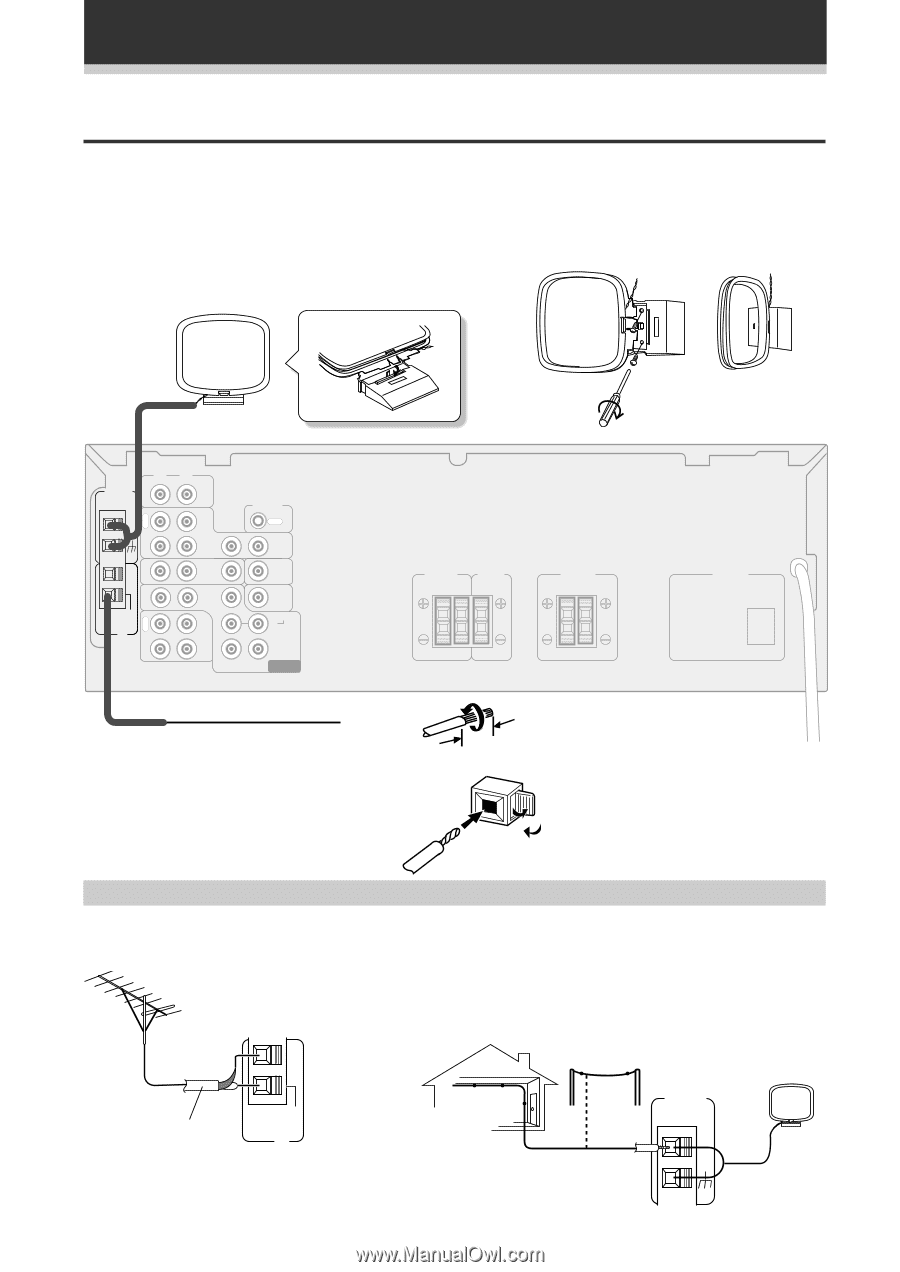
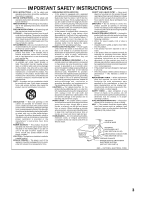
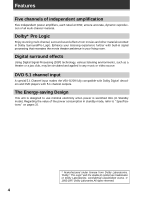
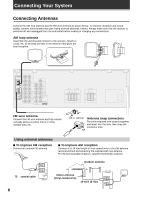
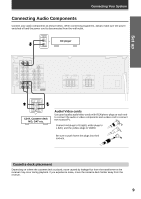
Connecting Your System Connecting Antennas Connect the AM loop antenna and the FM wire antenna as shown below. To improve reception and sound quality, connect external antennas (see Using external antennas, below). Always make sure that the receiver is switched off and unplugged from the wall outlet before making or changing any connections. AM loop antenna Assemble the antenna and connect to the receiver. Attach to a wall, etc. (if desired) and face in the direction that gives the best reception. AM LOOP ANTENNA R IN O U T IN IN IN FM UNBAL R 75Ω E C FM ANTENNA P L A Y L CD VCR/ DVR IN CONTROL OUT OUT TV/ SAT IN DVD /LD IN FRONT OUT R CD-R /TAPE /MD IN SUB WOOFER TO MONITOR TV SUB WOOFER PREOUT SURROUND L CENTER DVD 5.1 CH INPUT FRONT SPEAKERS RL CENTER SPEAKER SURROUND SPEAKERS RL AC OUTLET FM wire antenna Connect the FM wire antenna and fully extend vertically along a window frame or other suitable area, etc. 3/8 in. (10mm) Antenna snap connectors Twist the exposed wire strands together and insert into the hole, then snap the connector shut. Using external antennas 7 To improve FM reception Connect an external FM antenna. 7 To improve AM reception Connect a 15-18 feet length of vinyl-coated wire to the AM antenna terminal without disconnecting the supplied AM loop antenna. For the best possible reception, suspend horizontally outdoors. Outdoor antenna 75 Ω coaxial cable FM UNBAL 75Ω FM ANTENNA 8 Indoor antenna (Vinyl-coated wire) 15-18 ft (5-6m) AM LOOP ANTENNA
-
 1
1 -
2
-
 3
3 -
 4
4 -
 5
5 -
 6
6 -
 7
7 -
 8
8 -
 9
9 -
 10
10 -
 11
11 -
 12
12 -
 13
13 -
14
-
15
-
16
-
17
-
18
-
19
-
20
-
21
-
22
-
23
-
24
-
25
-
26
-
27
-
28
-
29
-
30
-
31
-
32
 |
 |