Pioneer VSX-D411 Owner's Manual - Page 29
Setting up the receiver - standby
 |
View all Pioneer VSX-D411 manuals
Add to My Manuals
Save this manual to your list of manuals |
Page 29 highlights
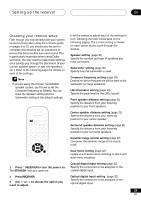
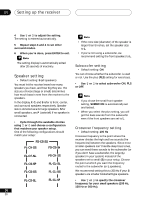
Setting up the receiver 06 Choosing your receiver setup Even though you may already have your system up and running after using the 5 minute guide on pages 6 to 10, you should also be sure to complete the following set up operations to ensure the best possible surround sound. This is particularly important when using Dolby surround. You only need to make these settings once (unless you change the placement of your current speaker system or add new speakers, etc.). Refer to the following pages for details on each of the settings. If you are using the Pioneer S-FCRW220 speaker system, you'll have to set the Crossover frequency to 200kHz. You can leave the Speaker setting and the Subwoofer setting in the default settings. It will be easiest to adjust each of the settings in turn, following the order below (and on the following pages). The current setting is shown for each option as you cycle through the display. Speaker setting (page 30) Specify the number and type of speakers you have connected. Subwoofer setting (page 30) Specify how the subwoofer is used. Crossover frequency setting (page 30) Determine which frequencies will be sent to the subwoofer (or large speakers). LFE attenuator setting (page 31) Specify the peak level for the LFE channel. Front speaker distance setting (page 31) Specify the distance from your listening position to your front speakers. Center speaker distance setting (page 31) Specify the distance from your listening RECEIVER position to your center speaker. Surround speaker distance setting (page 31) Specify the distance from your listening position to your surround speakers. ENTER RECEIVER Dynamic range control setting (page 32) Compress the dynamic range of the sound track. Dual mono setting (page 32) Isolate one channel when listening to discs with dual mono encoding. 1 Press RECEIVER to turn the power on. The STANDBY indicator goes out. Coaxial digital input setting (page 32) Specify the component to be assigned to the coaxial digital input. 2 Press RECEIVER. 3 Use } or ] to choose the option you want to adjust. Optical digital input setting (page 32) Specify the component to be assigned to the optical digital input. 29 En
-
 1
1 -
2
-
3
-
4
-
5
-
6
-
7
-
8
-
9
-
10
-
11
-
12
-
13
-
14
-
15
-
16
-
17
-
18
-
19
-
20
-
21
-
22
-
23
-
 24
24 -
 25
25 -
 26
26 -
 27
27 -
 28
28 -
 29
29 -
 30
30 -
 31
31 -
 32
32 -
 33
33 -
 34
34 -
35
-
36
-
37
-
38
-
39
-
40
-
41
-
42
-
43
-
44
 |
 |
