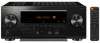
Pioneer VSX-LX505 ELITE AV Receiver Instruction Manual English - Page 103
Connecting the Sonos System for Playback, Necessary Equipment, How to Connect This Unit and Sonos
 |
View all Pioneer VSX-LX505 ELITE AV Receiver manuals
Add to My Manuals
Save this manual to your list of manuals |
Page 103 highlights
Playback Connecting the Sonos System for Playback Once your unit is connected to the Sonos Connect you will be able to send any music or source on your Sonos App to the unit. By going through the Sonos Connect, you can play your unit through other Sonos devices in the network in the same group, or you can just play on your unit. Further, the power of your unit turns on automatically when music starts playing on the Sonos App, and the linked function to switch input works. • If "System Setup" - "Hardware" - "Power Management" - "Network Standby" is set to "Off " in the Home, manually turn the unit on and then press NET on the remote controller. In the factory default setting, the Network Standby function ( →p145) is set to On. • You can register a maximum of 3 Sonos Connect. Necessary Equipment • Sonos Connect • RCA audio cable (supplied with Sonos Connect) How to Connect This Unit and Sonos Connect 1. Connect the Sonos Connect to the AUDIO IN jack of this unit with the RCA audio cable supplied with the Sonos Connect. Any input can be used other than the PHONO jack. • You can also connect with a digital cable. For details, refer to the instruction manual of the Sonos. • You can rename the input that is displayed on the unit to a more logical name. For example, you can change the name of input that the Sonos Connect is plugged into from "CD" (or another input selector name) to "SONOS". Press the button on the remote controller to display the Home screen, and select "System Setup" - "Source" - "Name Edit" to change the name. Setting Up A setup is required to play Sonos on this unit. Make the setting according to the following procedure. 1. Press the button on the remote controller to display the Home screen, select "System Setup" - "Hardware" - "Works with SONOS", and press the ENTER button. 2. Select the following items with the cursors / and set each item. Input Selector: Enable the interlocking function with the Sonos Connect. With the cursors / , select the input selector to which the Sonos Connect is connected. Connected Device: Press the ENTER button to display Sonos devices connected to the same network as the network of this unit. Select the Sonos Connect connected to the unit and press the ENTER button. • Products (e.g. Play:3 unequipped with an output terminal) other than the Sonos Connect are also displayed in the device list and selectable. In that case, when playback on the Sonos side starts, the input is switched, however, audio is not output. Select the room name of the connected 103
-
 1
1 -
2
-
3
-
4
-
5
-
6
-
7
-
8
-
9
-
10
-
11
-
12
-
13
-
14
-
15
-
16
-
17
-
18
-
19
-
20
-
21
-
22
-
23
-
24
-
25
-
26
-
27
-
28
-
29
-
30
-
31
-
32
-
33
-
34
-
35
-
36
-
37
-
38
-
39
-
40
-
41
-
42
-
43
-
44
-
45
-
46
-
47
-
48
-
49
-
50
-
51
-
52
-
53
-
54
-
55
-
56
-
57
-
58
-
59
-
60
-
61
-
62
-
63
-
64
-
65
-
66
-
67
-
68
-
69
-
70
-
71
-
72
-
73
-
74
-
75
-
76
-
77
-
78
-
79
-
80
-
81
-
82
-
83
-
84
-
85
-
86
-
87
-
88
-
89
-
90
-
91
-
92
-
93
-
94
-
95
-
96
-
97
-
 98
98 -
 99
99 -
 100
100 -
 101
101 -
 102
102 -
 103
103 -
 104
104 -
 105
105 -
 106
106 -
 107
107 -
 108
108 -
109
-
110
-
111
-
112
-
113
-
114
-
115
-
116
-
117
-
118
-
119
-
120
-
121
-
122
-
123
-
124
-
125
-
126
-
127
-
128
-
129
-
130
-
131
-
132
-
133
-
134
-
135
-
136
-
137
-
138
-
139
-
140
-
141
-
142
-
143
-
144
-
145
-
146
-
147
-
148
-
149
-
150
-
151
-
152
-
153
-
154
-
155
-
156
-
157
-
158
-
159
-
160
-
161
-
162
-
163
-
164
-
165
-
166
-
167
-
168
-
169
-
170
-
171
-
172
-
173
-
174
-
175
-
176
-
177
-
178
-
179
-
180
-
181
-
182
-
183
-
184
-
185
-
186
-
187
-
188
-
189
-
190
-
191
-
192
-
193
-
194
-
195
-
196
-
197
-
198
-
199
-
200
-
201
-
202
-
203
-
204
-
205
-
206
-
207
-
208
-
209
-
210
-
211
-
212
 |
 |
