Plantronics MX10 User Guide - Page 9
The Microphone Selection Switch should be - compatible headsets
 |
UPC - 017229007048
View all Plantronics MX10 manuals
Add to My Manuals
Save this manual to your list of manuals |
Page 9 highlights
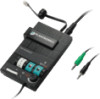
Switcher.biling.ii-25 11/4/98 7:58 PM Page 10 LEARN THE BASICS Adjusting Headset Incoming Volume 1. Adjust the volume by turning the Thumbwheel 2 on the top panel. 3 4 5 6 2. Try different volume settings. 1 is the quietest and 9 is the loudest. 3. "Make a Test Call" (see page 6) provides more details about adjusting your incoming volume. 10 english LEARN THE BASICS Adjusting Headset Outgoing Volume 1. Outgoing Volume is pre-set. Try making a test call before adjusting (see page 6). 2. Access the Outgoing Volume Control, remove the panel on the left-hand side of the amplifier. The same panel houses the Telephone/Amplifier Compatibility Switch. 3. Use the screwdriver attached to the bottom of the amplifier to adjust the Outgoing Volume Control. Turn clockwise to make your voice louder to the caller. Turn counter-clockwise to make your voice quieter to the caller. 4. Replace the panel door and the screwdriver. Adjusting Audio Device Listening Volume 1. Use the Audio Device Incoming Volume Control on top of the Switcher amplifier. 2. The Telephone/Computer Audio Switch should be depressed (colored indicator showing). The Microphone Selection Switch should be in default position (no colored indicator showing). 12 3 4 5 6 -+ 34 5 6 2 3 4 5 6 english 11
-
 1
1 -
2
-
3
-
 4
4 -
 5
5 -
 6
6 -
 7
7 -
 8
8 -
 9
9 -
 10
10 -
 11
11 -
 12
12 -
 13
13 -
 14
14 -
15
-
16
-
17
-
18
-
19
-
20
-
21
-
22
-
23
-
24
-
25
-
26
-
27
-
28
-
29
-
30
-
31
-
32
 |
 |
