Polk Audio SC85-IPR DIY In-Ceiling and In-Wall Installation Guide - Page 7
Installing Polk Speakers: Cutting Drywall, and Running Speaker Cables
 |
View all Polk Audio SC85-IPR manuals
Add to My Manuals
Save this manual to your list of manuals |
Page 7 highlights
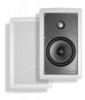
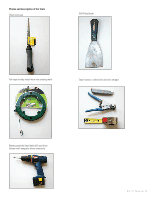
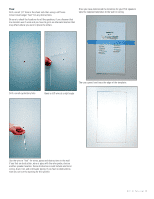
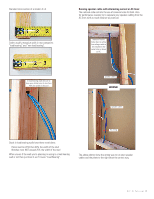
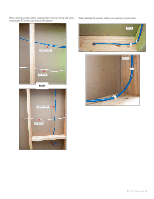
Section 4: Installing Polk Speakers: Cutting Drywall and Running Speaker Cables This section covers cutting into the walls and installing the cables. Supplies Now is the time to gather your supplies: 1) Speakers 2) Speaker cable 3) Cleaning material 4) Tools 5) Wall plates 6) Connectors Cutting Sheet Rock Cutting sheetrock is a deal-breaker for some people and you may be one of them. At this point you may make the decision to bring in a professional to pull the cable and install the speakers. Polk Audio can recommend a professional installation company, call (800) 377-7655 during normal east coast business hours. But cutting sheetrock is not that difficult, and in the long run you'll enjoy your built-in speakers even more knowing that you installed them yourself. Some obstructions could include electrical wiring, drain, hot, and cold water piping: Don't cut these things. Bad things will happen. 120 Volt AC "Romex" drain pipe Note: There are many "Roto" type power tools on the market and you may be tempted to use them to impress your audience - but they are no faster than hand saws and increase dust by a factor of 10! Hand saws also have the advantage of giving you more "feel" making it less likely that you'll saw through a water pipe. Sheetrock saws have a pointed tip that make it easy to punch into the sheetrock to start the cut. Hot and cold water pipe Installing the speaker cables: A few rules, some general guidelines and a couple of tips will help this process go smoothly. The Universal Building Code or UBC, and most all local codes have some restrictions on how large of a hole you drill in structural members, for the vast majority of installations this will not be an issue because of the small holes - you only have to pull a cable or two. Here are the guidelines: When working with studs: studs support your roof and partition off the various rooms in the home. Standard stud sizing is as follows: 2 x 4 measures 1 1/2" by 3 1/2" 2 x 6 measures 1 1/2" by 5 1/2" 2 x 8 measures 1 1/2" by 7 1/2" DIY CI Tutorial 7
-
 1
1 -
 2
2 -
 3
3 -
 4
4 -
 5
5 -
 6
6 -
 7
7 -
 8
8 -
 9
9 -
 10
10 -
 11
11 -
 12
12 -
13
-
14
-
15
-
16
 |
 |
