Poulan 1999-12 User Manual - Page 7
Cutting Methods
 |
View all Poulan 1999-12 manuals
Add to My Manuals
Save this manual to your list of manuals |
Page 7 highlights
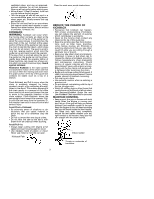
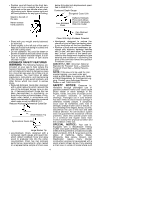
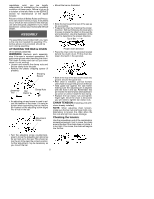
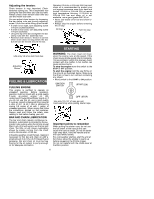
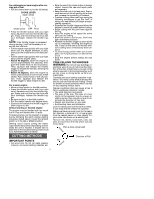
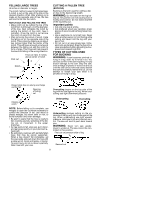
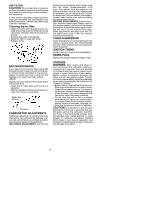
For cold engine or warm engine after running out of fuel. S Pull the choke lever out to the full extent. CHOKE LEVER (SIDE VIEW) Choke Lever OFF FULL S Press the throttle lockout with your right hand. Squeeze and hold the throttle trigger; Press and hold the fast idle lock with your forefinger; release the throttle trigger. NOTE: If the throttle trigger is squeezed during starting, it will be necessary to reset the fast idle lock. S Pull the starter rope quickly with your right hand until the engine attempts to start, then push the choke lever to the half position. S Pull the starter rope quickly with your right hand until the engine starts. S Above 40 degrees, allow the engine to run for approximately five seconds, then push the choke knob to the off position. Then, squeeze and release the throttle trigger to release the fast idle, allowing the engine to idle. S Below 40 degrees, allow the engine to warm up 30 seconds to one minute at half choke. Push choke knob to the off position; Then, squeeze and release the throttle trigger to allow engine to idle. For a warm engine: S Move on/stop switch to the ON position. S Press the throttle lockout with your right hand. Squeeze and hold the throttle trigger; Press and hold the fast idle lock with your forefinger; release the throttle trigger. S Be sure choke is in the OFF position. S Pull the starter handle until engine starts. S Squeeze and release the throttle trigger to allow engine to idle. Difficult starting or flooded engine: The engine may be flooded with too much fuel if it has not started after 10 pulls. Flooded engines can be cleared of excess fuel by following the warm engine starting procedure listed above. Insure the ignition switch is in the ON or START position. Starting could require pulling the starter rope handle many times depending on how badly the unit is flooded. If engine fails to start refer to the troubleshooting chart or call your Authorized Service Dealer. CUTTING METHODS IMPORTANT POINTS S Cut wood only. Do not cut metal, plastics, masonry, non-wood building materials, etc. S Stop the saw if the chain strikes a foreign object. Inspect the saw and repair parts as necessary. S Keep the chain out of dirt and sand. Even a small amount of dirt will quickly dull a chain and increase the possibility of kickback. S Practice cutting a few small logs using the following techniques to get the "feel" of using your saw before you begin a major sawing operation. S Squeeze the throttle trigger and allow the engine to reach full speed before cutting. S Begin cutting with the saw frame against the log. S Keep the engine at full speed the entire time you are cutting. S Allow the chain to cut for you. Exert only light downward pressure. S Release the throttle trigger as soon as the cut is completed, allowing the engine to idle. If you run the saw at full throttle without a cutting load, unnecessary wear can occur. S To avoid losing control when cut is complete, do not put pressure on saw at end of cut. S Stop the engine before setting the saw down. TREE FELLING TECHNIQUES WARNING: Do not cut near buildings or electrical wires if you do not know the direction of tree fall, at night since you will not be able to see well, or during bad weather such as rain, snow, or strong winds. as fall is unpredictable. Carefully plan your sawing operation in advance. You need a clear area all around the tree so you can have secure footing. Check for broken or dead branches which can fall on you causing serious injury. Natural conditions that can cause a tree to fall in a particular direction include: S The wind direction and speed. S The lean of the tree. The lean of a tree might not be apparent due to uneven or sloping terrain. Use a plumb or level to determine the direction of tree lean. S Weight and branches on one side. S Surrounding trees and obstacles. Look for decay and rot. If the trunk is rotted, it can snap and fall toward the operator. Make sure there is enough room for the tree to fall. Maintain a distance of 2-1/2 tree lengths from the nearest person or other objects. Engine noise can drown out a warning call. Remove dirt, stones, loose bark, nails, staples, and wire from the tree where cuts are to be made. Plan a clear retreat path Direction of Fall 45_ 7
-
 1
1 -
 2
2 -
 3
3 -
 4
4 -
 5
5 -
 6
6 -
 7
7 -
 8
8 -
 9
9 -
 10
10 -
 11
11 -
 12
12
 |
 |