Poulan C20H42YT User Manual - Page 19
To Level Mower - lawn tractors
 |
View all Poulan C20H42YT manuals
Add to My Manuals
Save this manual to your list of manuals |
Page 19 highlights
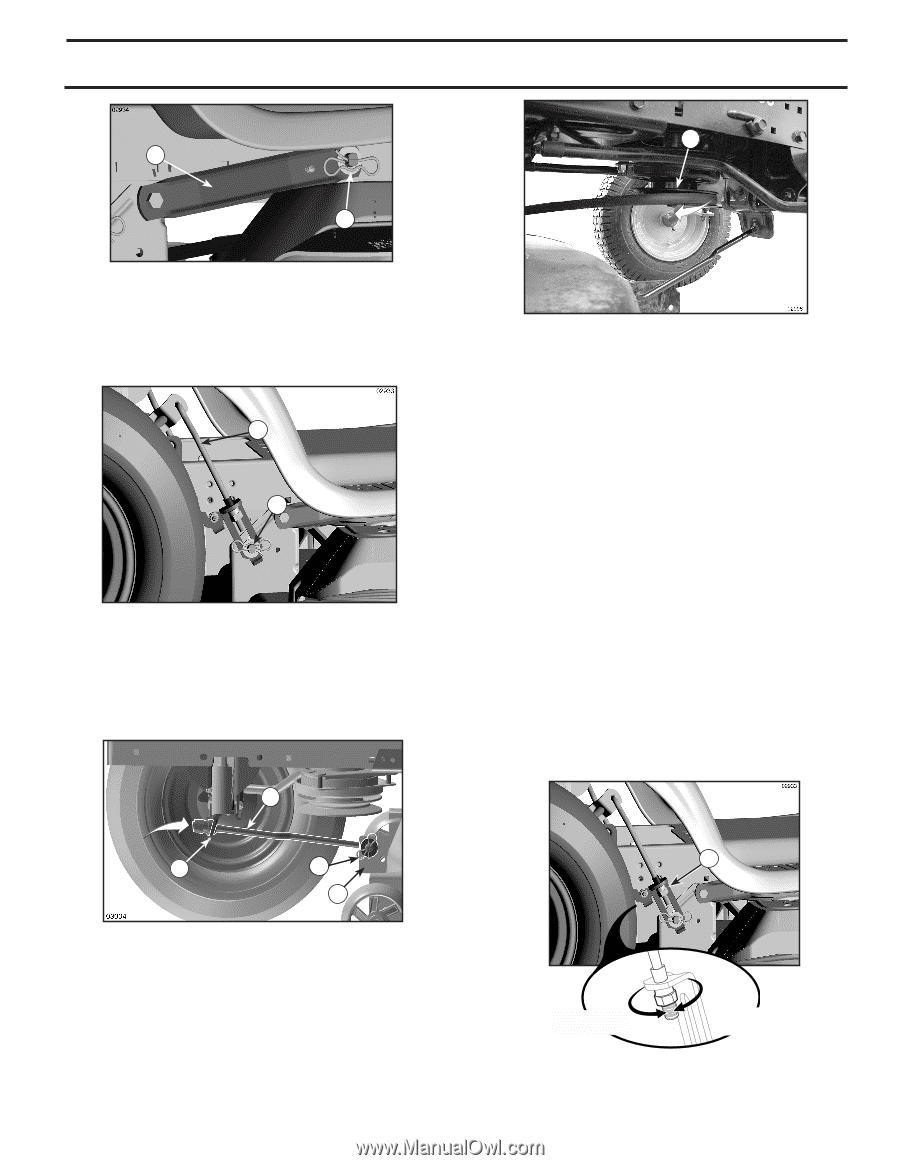
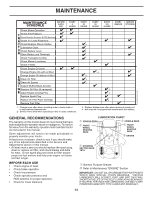
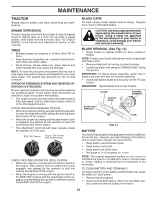
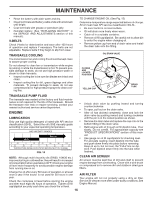
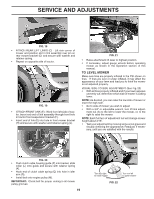
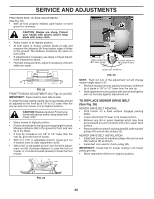
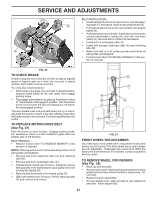
SERVICE AND ADJUSTMENTS M A B FIG. 18 • ATTACH REAR LIFT LINKS (C) - Lift rear corner of mower and position slot in link assembly over pin on rear mower bracket (D) and secure with washer and retainer spring. • Repeat on opposite side of tractor. C D FIG. 19 • ATTACH FRONT LINK (E) - Work from left side of trac- tor. Insert rod end of link assembly through front hole in tractor front suspension bracket (F). • Insert end of link (E) into hole in front mower bracket (H) and secure with washer and retainer spring (J). E FIG. 21 • Raise attachment lift lever to highest position. • If necessary, adjust gauge wheels before operating mower as shown in the Operation section of this manual. TO LEVEL MOWER Make sure tires are properly inflated to the PSI shown on tires. If tires are over or under inflated, it may affect the appearance of your lawn and lead you to think the mower is not adjusted properly. VISUAL SIDE-TO-SIDE ADJUSTMENT (See Fig. 22) • With all tires properly inflated and if your lawn appears unevenly cut, determine which side of mower is cutting lower. NOTE: As desired, you can raise the low side of mower or lower the high side. • Go to side of mower you wish to adjust. • With a 3/4" or adjustable wrench, turn lift link adjust- ment nut (A) to the left to lower the mower, or, to the right to raise the mower. NOTE: Each full turn of adjustment nut will change mower height about 3/16". • Test your adjustment by mowing some uncut grass and visually checking the appearance. Readjust, if necessary, until you are satisfied with the results. F J H FIG. 20 • Push clutch cable housing guide (P) into bracket, slide collar (L) onto guide and secure with retainer spring (K). • Hook end of clutch cable spring (Q) into hole in idler arm (R). • Install belt onto engine pulley (M). IMPORTANT: Check belt for proper routing in all mower pulley grooves. 19 A Turn nut right to raise mower 02948 FIG. 22 Turn nut left to lower mower
-
 1
1 -
2
-
3
-
4
-
5
-
6
-
7
-
8
-
9
-
10
-
11
-
12
-
13
-
 14
14 -
 15
15 -
 16
16 -
 17
17 -
 18
18 -
 19
19 -
 20
20 -
 21
21 -
 22
22 -
 23
23 -
 24
24 -
25
-
26
-
27
-
28
-
29
-
30
 |
 |