Poulan P54ZX Owner Manual - Page 24
Adjusting the Mower Deck, Leveling deck, Technical Data, Deck Belt Installation
 |
View all Poulan P54ZX manuals
Add to My Manuals
Save this manual to your list of manuals |
Page 24 highlights
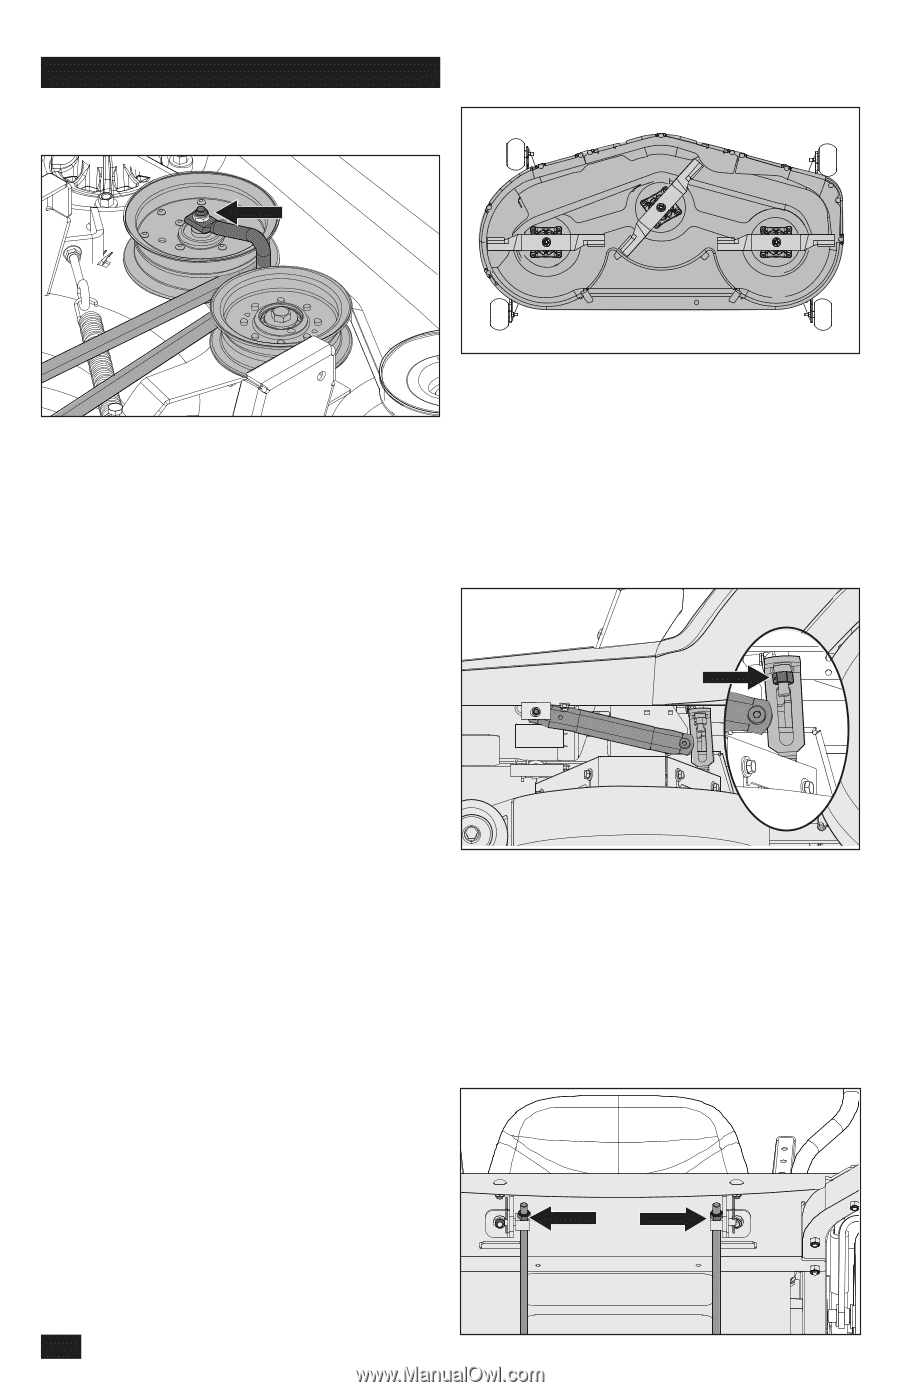
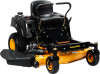
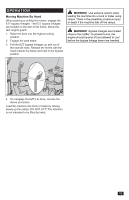
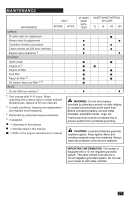
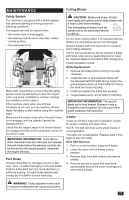
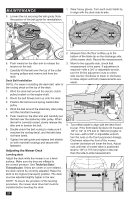
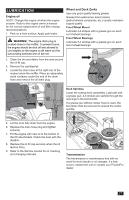
MAINTENANCE 5. Loosen the nut securing the belt guide. Note the position of the belt guide for reinstallation. 1. Wear heavy gloves. Turn each outer blade tip to align with the deck side-to-side. 6. Push inward on the idler arm to release the tension on the belt. 7. Carefully lift the belt over the top of the cutter housing pulleys and remove belt from the deck. Deck Belt Installation NOTE: For ease in installing the deck belt, refer to the routing decal on the top of the deck. 1. Wind the deck belt around the electric clutch pulley located on the engine shaft. 2. Route the belt forward and up onto the deck. 3. Position the belt around spring loaded idler pulley. 4. Wind the belt around the stationary idler pulley and the mandrel housings. 5. Push inward on the idler arm and carefully put the belt over the stationary idler pulley. When the belt is correctly routed, slowly release the idler arm to tension the belt. 6. Double check the belt routing to make sure it matches the routing decal, and the belt does not have twists. 7. Tighten the belt guide and replace belt shields on both mandrel housings and secure with fasteners. Adjusting the Mower Deck Leveling deck Adjust the deck while the mower is on a level surface. Make sure the tires are inflated to the correct pressure. See Technical Data / Transmission. If tires are under or over inflated, the deck cannot be correctly adjusted. Raise the deck to the highest (transport) position. The deck must be adjusted slightly higher in the rear. NOTE: To insure the precision of the leveling procedure, the mower deck drive belt must be installed before leveling the deck. 2. Measure from the floor surface up to the bottom of the blade tip on the discharge side of the mower deck. Record the measurement. 3. Move to the opposite side, check that measurement is the same. If adjustment is required-with a 3/4" or adjustable wrench, turn the lift link adjustment nuts on either side counter clockwise to lower or clockwise to raise. Adjust until both measurements are equal. 4. Turn either blade to align with the deck frontto-rear. If the front blade tip does not measure 1/8" to 1/2" (3.175 mm to .500 mm) higher in the rear-with a 5/8" or adjustable wrench, turn the nuts on the front suspension linkage. Clockwise raises the front of the mower, counter clockwise will lower the front. Adjust nuts until rear of mower deck is positioned level to 1/8" (3.175 mm) higher in the rear than the side-to-side measurement. 24
-
 1
1 -
2
-
3
-
4
-
5
-
6
-
7
-
8
-
9
-
10
-
11
-
12
-
13
-
14
-
15
-
16
-
17
-
18
-
 19
19 -
 20
20 -
 21
21 -
 22
22 -
 23
23 -
 24
24 -
 25
25 -
 26
26 -
 27
27 -
 28
28 -
 29
29 -
30
-
31
-
32
-
33
-
34
-
35
-
36
-
37
-
38
-
39
-
40
-
41
-
42
-
43
-
44
-
45
-
46
-
47
-
48
-
49
-
50
-
51
-
52
-
53
-
54
-
55
-
56
-
57
-
58
-
59
-
60
-
61
-
62
-
63
-
64
-
65
-
66
-
67
-
68
-
69
-
70
-
71
-
72
 |
 |