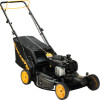
Poulan PR550Y22R3 Owner Manual - Page 12
Operation, Maintenance - pro manual
 |
View all Poulan PR550Y22R3 manuals
Add to My Manuals
Save this manual to your list of manuals |
Page 12 highlights
OPERATION "THREE POINT" ADJUSTMENT (18" (45cm) HI-VAC MODELS ONLY) Both rear wheels are adjusted by a single lever on the left rear wheel. • Pull adjuster lever toward wheel. To raise mower, move lever forward to desired position. To lower mower, move the lever toward the rear. NOTE: There are seven (7) height adjustment positions for the rear wheels. Both front wheels are adjusted as follows: 1. Remove wheel, bolt, and hardware and reassemble in desired adjustment hole. 2. Reinstall wheel components in the same order as they were before removal. Tighten securely. NOTE: There are seven (7) height adjustment holes for the front wheels. Be sure both front wheels are in the same hole. IMPORTANT: Be sure to adjust both front and rear wheels to the same height. LEVER BACKWARD TO LOWER REAR OF MOWER Height adjuster lever LEVER FORWARD TO RAISE REAR OF MOWER Bolt TO CONVERT MOWER: Most mowers are shipped ready to be used as a mulcher. "REAR DISCHARGE ONLY" MOWERS Some models have a seperate mulcher plug, other models have the mulcher plug built into the rear door. To convert to bagging or discharging, the plate or plug (if so equipped) must be removed from the discharge opening of the lawn mower. • Open rear door and remove mulcher plate or plug (if so equipped). Store mulcher plate or plug in a safe place. • You can now install grass catcher or optional clipping deflector accessory. • To return to mulching operation, install mulcher plate or plug into discharge opening of mower. CAUTION: Do not run your lawn mower without mulcher plate/plug in place or approved clipping deflector or grass catcher in place. Never attempt to operate the lawn mower with the rear door removed or propped open. MULCHER "PLATE" Lockbar ("locked" position) Washer Spacer Wing nut O-Ring Lockbar ("freewheel" position) CASTER WHEEL OPERATION ("THREE POINT" ADJUSTMENT ONLY) The front wheels can be "locked" into position or set to "freewheel" for better maneuverability. Placing the lockbars in the outer holes of the adjustment brackets "locks" the front wheels. Likewise, placing the lockbars in the inner holes of the adjustment brackets allows the front wheels to spin freely ("freewheel"). • Lift lockbar until the frontmost end clears the adjustment bracket, then pivot lockbar to desired position. IMPORTANT: Front wheels must be "locked" into position when operating on a slope. Mow across the face of slopes: never up and down. Slots Mulcher plate tabs MULCHER "PLUG" Mulcher plug MULCHER PLUG BUILT INTO REAR DOOR 12 MAINTENANCE ENGINE Read the maintenance section of your engine manual. LUBRICATION Change the oil after the first two hours of operation and every 25 hours thereafter or at least once a year if the lawn mower is not used for 25 hours in one year. Refer to engine manual. NOTE (B&S W26 engines with Synthetic oil ONLY): An oil change is not required but if you desire to change the oil follow the procedure below. IN-LINE FUEL FILTER (KOHLER or B&S PRO / ENDURANCE ENGINES ONLY) The fuel filter should be replaced once each season. If fuel filter becomes clogged, obstructing fuel flow to carburetor, replacement is required. 1. With engine cool, remove filter and plug fuel line sections. 2. Place new fuel filter in position in fuel line with arrow pointing towards carburetor. 3. Be sure there are no fuel line leaks and clamps are properly positioned. 4. Immediately wipe up any spilled gasoline. TO CHANGE ENGINE OIL (SEE ENGINE MANUAL) Clamp Clamp • Be sure lawn mower is on level surface. • Oil will drain more freely when warm. • Catch oil in a suitable container. • For engines without dipstick, remove bottom oil drain plug. • For engines with oil fill cap/dipstick, Fuel Filter remove bottom drain plug or remove engine oil cap and turn lawn mower on its side. NOTE: Before tipping lawn mower to MUFFLER Inspect and replace corroded muffler as it could create a fire hazard and/or damage. drain oil, empty fuel tank by running engine until fuel tank is empty. • After oil has drained completely, replace oil drain plug and tighten securely. • Refill engine with oil. Pour slowly. Do not overfill. • Fill to top of slot inside of filler hole or to "FULL" line on dipstick on models so SPARK PLUG Replace spark plug at the beginning of each mowing season or after every 100 hours of operation, whichever occurs first. Set spark plug gap according to engine manual specifications. equipped. Keep oil at proper level. CLEANING AIR FILTER Your engine will not run properly and may be damaged by using a dirty air filter. Clean the element after every 25 hours IMPORTANT: For best performance, keep mower housing free of grass build-up and trash. Clean the underside of your mower after each use. of operation or every season. Replace the air filter every 100 hours of operation or every season, whichever occurs first. Service air cleaner more often under dusty conditions. See the maintenance section of your engine manual. • Clean the underside of your lawn mower by scraping to remove buildup of grass and trash. • Clean engine often to keep trash from accumulating. A clogged engine runs hotter and shortens engine life. • Keep finished surfaces and wheels free of all gasoline, oil, etc. • With the exception of the water washout port (if equipped), we do not recommend using a garden hose to clean the outside of your lawn mower unless the electrical system, muffler, air filter and carburetor are covered to keep water out. Water in 25 engine can result in shortened engine life.


