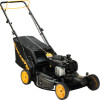
Poulan PR550Y22R3 Owner Manual - Page 16
Operation
 |
View all Poulan PR550Y22R3 manuals
Add to My Manuals
Save this manual to your list of manuals |
Page 16 highlights
OPERATION 3. Secure rear of side discharge deflector to lawn mower housing with knob. • Mower is now ready for side discharging operation. SIMPLE STEPS TO REMEMBER WHEN CONVERTING YOUR 18" HI-VAC: FOR MULCHING 1. Grass catcher, discharge chute and side discharge deflector removed. 2. Mulcher door secured to mower hous- ing with knob. FOR REAR BAGGING 1. Side discharge deflector removed. 2. Grass catcher and discharge chute installed with discharge chute secured to lawn mower housing with knob. FOR SIDE DISCHARGING 1. Grass catcher and discharge chute removed. 2. Side discharge deflector installed and secured to mower housing with knob. CAUTION: Do not run your lawn mower without mulcher door closed; side discharge deflector installed, or discharge chute and approved grass catcher in place. Never attempt to operate the lawn mower with mulcher door removed or propped open. TO EMPTY GRASS CATCHER 1. Remove grass catcher with clippings from lawn mower using both front and center of handle as shown. 2. Empty clippings from grass catcher. 3. Reinstall grass catcher on rear door. NOTE: Do not drag the bag when emptying; it will cause unnecessary wear. Handle 21" (53cm) HI-VAC MODELS: Your lawn mower was shipped ready to be used as a mulcher. To convert to rear bagging or side discharging: REAR BAGGING 1. Remove knob securing mulcher door to lawn mower housing. Rear handle Crossbar Grass catcher Round door Discharge chute Knob Threaded stud Mulcher door 2. Open mulcher door and insert tabs of discharge chute into hinge bracket opening and position rear of chute over threaded stud. Discharge chute tabs Hinge bracket Mulcher door 16 OPERATION MOWING TIPS CAUTION: Do not use de-thatcher blade attachments on your mower. Such attachments are hazardous, will damage your mower and could void your warranty. • For most cutting conditions and better bagging performance, the engine speed should be set in the FAST position. • Under certain conditions, such as when mowing very tall grass, raise the mower height on the first cut to reduce pushing effort, to avoid overheating the engine, and to avoid leaving clumps of grass clippings. Make the second cut to the desired height. • For extremely heavy cutting, reduce the width of cut. • For side discharge lawn mowers, cut in a counterclockwise direction, starting at the outside of the area to be cut, in order to spread grass clippings more evenly and to put less load on the engine. To keep clippings off of walkways, flower beds, etc., make the first cuts in a clockwise direction. • When using a rear discharge lawn mower in moist, heavy grass, clumps of cut grass may not enter the grass catcher. Reduce ground speed (pushing speed) and/or run the lawn mower over the area a second time. • If a trail of grass clipping is left on the right side of a rear discharge lawn mower, mow in a clockwise direction with a small overlap to collect the clippings on the next pass. FOR MULCHING MOWERS ONLY MULCHING MOWING TIPS IMPORTANT: For best performance, keep mower housing free of built-up grass and trash. See "CLEANING" in the Maintenance section of this manual. • The special mulching blade will recut the grass clippings many times and reduce them in size so that as they fall onto the lawn they will disperse into the grass and not be noticed. Also, the mulched grass will biodegrade quickly to provide nutrients for the lawn. Always mulch with your highest engine (blade) speed as this will provide the best recutting action of the blades. • Avoid cutting your lawn when it is wet. Wet grass tends to form clumps and interferes with the mulching action. The best time to mow your lawn is the early afternoon. At this time the grass has dried, yet the newly cut area will not be exposed to direct sunlight. • For best results, adjust the lawn mower cutting height so that the lawn mower cuts off only the top one-third of the grass blades. If the lawn is overgrown it will be necessary to raise the height of cut to reduce pushing effort and to keep from overloading the engine and leaving clumps of mulched grass. For extremely heavy grass, reduce your width of cut by overlapping previously cut path and mow slowly. MAX 1/3 • Pores in cloth grass catchers can become filled with dirt and dust with use and the catcher will collect less grass. To prevent this, regularly hose catcher off with water and let dry before use. • Certain types of grass and grass conditions may require that an area be mulched a second time to completely hide the clippings. When doing a second cut, mow across (perpendicular) to the first cut path. • Change your cutting pattern from week to week. Mow north to south one week then change to east to west the next week. This will help prevent matting and graining of the lawn. 21


