Poulan PR625Y22RHP Owner Manual - Page 27
Service And Adjustments
 |
View all Poulan PR625Y22RHP manuals
Add to My Manuals
Save this manual to your list of manuals |
Page 27 highlights
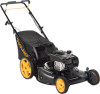
SERVICE AND ADJUSTMENTS CAUTION: Before performing any service or adjustments: • Release operator presence control bar. • Make sure the blade and all moving parts have completely stopped. • Disconnect spark plug wire from spark plug and place wire where it cannot come in contact with plug. LAWN MOWER TO ADJUST CUTTING HEIGHT See "TO ADJUST CUTTING HEIGHT" in the Operation section of this manual. REAR DEFLECTOR The rear deflector, attached between the rear wheels of your mower, is provided to minimize the possibility that objects will be thrown out of the rear of the mower into the operator's mowing position. Replace the deflector if it becomes damaged. DISCHARGE DEFLECTOR (IF EQUIPPED) The discharge deflector, attached to the discharge opening of your lawn mower, is provided to prevent the possibility of injury resulting from objects being thrown out of the discharge opening into the operator mowing position. Replace the discharge deflector if it becomes damaged. 3 POSITION "QUICK" HANDLES The handle on your lawn mower has three (3) height positions - adjust to height that suits you. • Squeeze the bottom ends of lower handle towards each other until the pin in handle can be inserted into one of the three height adjustment holes. High Medium Handle pin Handle adjustment bracket SQUEEZE Low TO ADJUST HANDLE 3 POSITION "EZ" HANDLES The handle on your lawn mower has three (3) height positions - adjust to height that suits you. • Remove knob and carriage bolt on one side of the lower handle. • While holding handle assembly, remove knob and carriage bolt from opposite side, align hole in handle with desired hole in handle bracket and reassemble bolt and knob and tighten securely. • Align opposite side of handle with same positioning hole and secure with bolt and knob. "QUICK RELEASE" HANDLES The upper handle may be adjusted to three (3) different height positions. 1. Loosen both handle levers enough to allow the upper handle to pivot to the desired adjustment position. 2. Tighten both handle levers securely. Handle Knob Bolt bracket High Medium Low LEVERS DOWN TO ADJUST HANDLE Handle levers 27
-
 1
1 -
2
-
3
-
4
-
5
-
6
-
7
-
8
-
9
-
10
-
11
-
12
-
13
-
14
-
15
-
16
-
17
-
18
-
19
-
20
-
21
-
 22
22 -
 23
23 -
 24
24 -
 25
25 -
 26
26 -
 27
27 -
 28
28 -
 29
29 -
 30
30 -
 31
31 -
 32
32 -
33
-
34
-
35
-
36
 |
 |
