ProForm 117 English Manual - Page 10
Trouble, Shooting, Storage
 |
View all ProForm 117 manuals
Add to My Manuals
Save this manual to your list of manuals |
Page 10 highlights
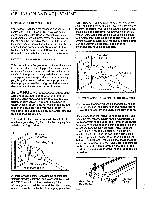
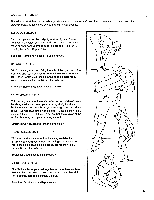
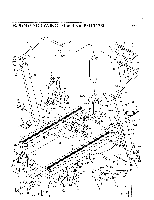
TROUBLE-SHOOTING AND STORAGE Most treadmill problems can be solved by following the simple steps below. Find the symptom that applies, and follow the steps listed. If further assistance is needed, call our Customer Service Department toll-free at 1-800-999-3756, Monday through Friday, 6 a.m. until 6 p.m. Mountain Time. 1. SYMPTOM: THE POWER DOES NOT TURN ON a. Make sure that the power cord is plugged into a properly grounded outlet. (See HOW TO PLUG IN THE POWER CORD on page 7.) If an extension cord is needed, use only a 14-gauge general-purpose cord of five feet or less in length. b. After the power cord has been plugged in, make sure that the safety key is fully inserted into the console. Various indicators on the console should light. (See HOW TO TURN ON THE POWER on page 8.) c. Check the circuit breaker located on the treadmill near the power cord. If the switch protrudes as shown, the circuit breaker has tripped. To reset the circuit breaker, wait for five minutes and then press the switch back in. Tripped Reset 2. SYMPTOM: THE POWER TURNS OFF DURING USE a. Check the circuit breaker located on the treadmill near the power cord. If the circuit breaker has tripped (see the drawing above), wait for five minutes and then press the switch back in. b. Make sure that the power cord is plugged in. c. Remove the safety key from the console. Reinsert the safety key fully into the console. Various indicators on the console should light. 3. SYMPTOM: THE WALKING BELT SLOWS WHEN WALKED ON a. If an extension cord is needed, use only a 14-gauge general-purpose cord of five feet or less in length. b. If the walking belt is overtightened, treadmill performance may decrease and the walking belt may be permanently damaged. Remove the safety key and UNPLUG THE POWER CORD. Using the 3/16" allen wrench, turn both rear roller adjustment bolts counterclockwise, 1/4 of a turn. When the walking belt is properly tightened, you should be able to lift each side of the walking belt 3-4 inches off the walking platform. The center of the walking belt should just touch the walking platform. Be careful to keep the walking belt centered. Plug in the power cord, insert the safety key and run the treadmill for a few minutes. Repeat until the walking belt is properly tightened. 3"-4" Rear Roller Adjustment Bolts c. If the walking belt still slows when walked on, please call our Customer Service Department. 4. SYMPTOM: THE WALKING BELT IS OFF-CENTER OR SLIPS WHEN WALKED ON a. If the walking belt has shifted to the left, first remove the safety key and UNPLUG THE POWER CORD. Using the 3/16" allen wrench, turn the left rear roller adjustment bolt clockwise, and the right bolt counterclockwise, 1/4 of a turn each. Be careful not to overtighten the walking belt. Plug in the power cord, insert the safety key and run the treadmill for a few minutes. Repeat until the walking belt is centered. sa 10
-
 1
1 -
2
-
3
-
4
-
 5
5 -
 6
6 -
 7
7 -
 8
8 -
 9
9 -
 10
10 -
 11
11 -
 12
12 -
 13
13 -
 14
14 -
 15
15 -
16
 |
 |
