ProForm 16.0 Ne Elliptical English Manual - Page 20
How To Use The Manual Mode
 |
View all ProForm 16.0 Ne Elliptical manuals
Add to My Manuals
Save this manual to your list of manuals |
Page 20 highlights
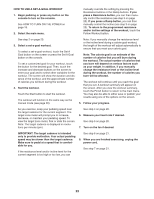
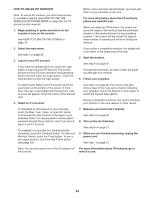
HOW TO USE THE MANUAL MODE 1. Touch the screen or press any button on the console to turn on the console. See HOW TO TURN ON THE POWER on page 18. 2. Select the main menu. When you turn on the console, the main menu will appear on the screen after the console boots up. If desired, keep your pedaling speed near the target cadence. The target zone meter will prompt you to increase, decrease, or maintain your pedaling speed. To view the target zone meter, flick or slide the screen. Note: The target cadence is displayed in revolutions per minute (rpm). If desired, adjust the volume level by pressing the volume increase and decrease buttons on the console. Touch the home button at the bottom of the screen or press the Manual Control button to return to the main menu at any time. 3. Change the resistance of the pedals and the incline of the ramp as desired. To pause the workout, touch one of the menu buttons on the screen. To continue the workout, touch the Resume button. To end the workout session, touch the End Workout button. 5. Measure your heart rate if desired. Touch the Start button or begin pedaling. As you pedal, you can change the resistance of the pedals. To change the resistance, press the Resistance increase and decrease buttons. Note: After you press a button, it will take a moment for the pedals to reach the selected resistance level. To vary the motion of the pedals, you can change the incline of the ramp. To change the incline, press one of the numbered Quick Power Ramp buttons or press the Power Ramp increase and decrease buttons. Note: After you press a button, it will take a moment for the ramp to reach the selected incline level. 4. Follow your progress. The console offers several display modes. The display mode that you select will determine which workout information is shown. To select the desired display mode, simply flick or slide the screen. You can also view additional workout information by touching the red boxes on the screen. To use the chest heart rate monitor, see page 13. To use the handgrip heart rate monitor, follow the instructions below. IMPORTANT: If you use both heart rate monitors at the same time, the console will not display your heart rate accurately. If there are sheets of plastic on the metal con- tacts on the handgrip heart rate monitor, remove the plastic. To measure your heart rate, hold the Contacts handgrip heart rate monitor with your palms resting against the contacts. Avoid moving your hands or gripping the contacts tightly. When your pulse is detected, your heart rate will be shown. For the most accurate heart rate reading, hold the contacts for at least 15 seconds. 20
-
 1
1 -
2
-
3
-
4
-
5
-
6
-
7
-
8
-
9
-
10
-
11
-
12
-
13
-
14
-
 15
15 -
 16
16 -
 17
17 -
 18
18 -
 19
19 -
 20
20 -
 21
21 -
 22
22 -
 23
23 -
 24
24 -
 25
25 -
26
-
27
-
28
-
29
-
30
-
31
-
32
-
33
-
34
-
35
-
36
-
37
-
38
-
39
-
40
 |
 |
