ProForm 375e English Manual - Page 6
ProForm 375e Manual
 |
View all ProForm 375e manuals
Add to My Manuals
Save this manual to your list of manuals |
Page 6 highlights
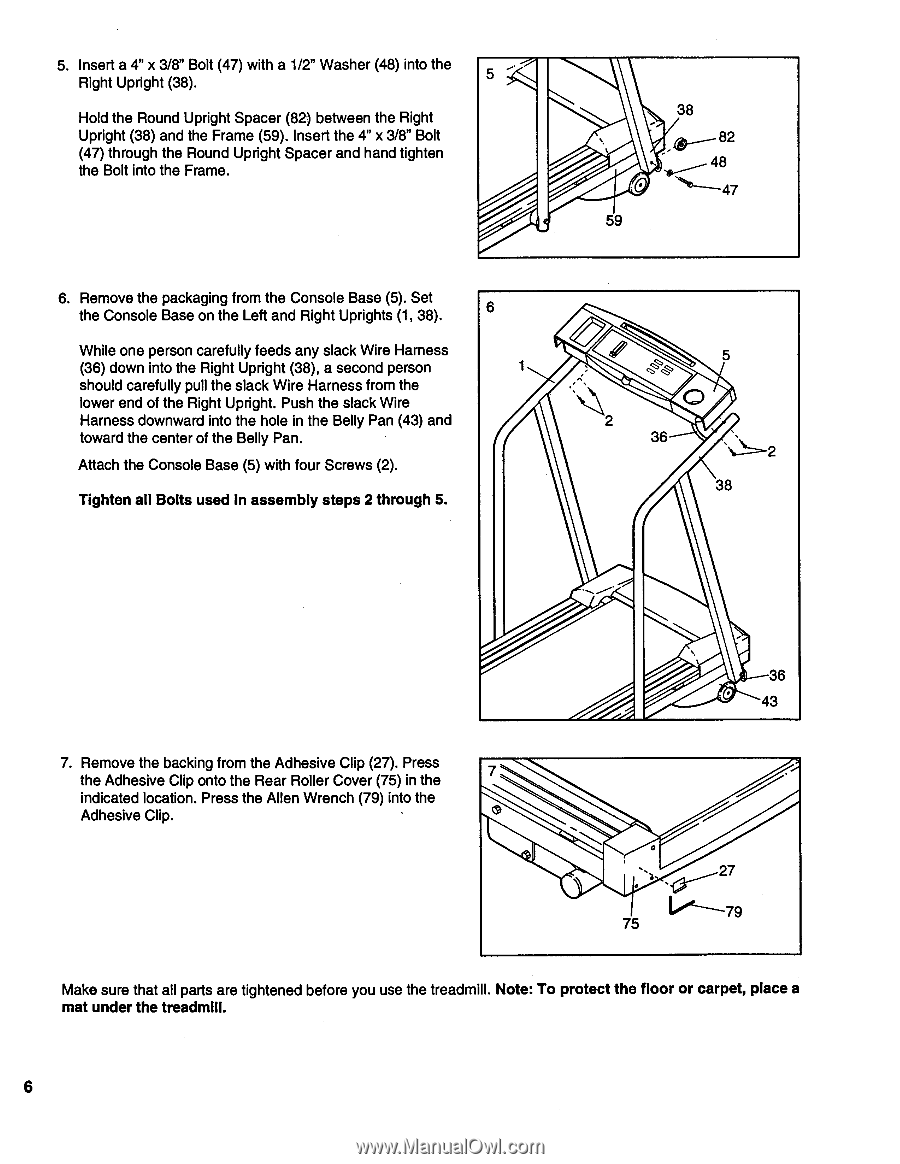
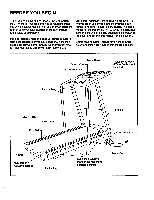
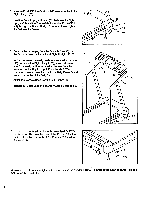
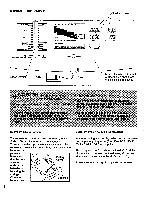
5. Insert a 4" x 3/8" Bolt (47) with a 1/2" Washer (48) into the Right Upright (38). 5 Hold the Round Upright Spacer (82) between the Right Upright (38) and the Frame (59). Insert the 4" x 3/8" Bolt (47) through the Round Upright Spacer and hand tighten the Bolt into the Frame. 6. Remove the packaging from the Console Base (5). Set the Console Base on the Left and Right Uprights (1, 38). 6 While one person carefully feeds any slack Wire Harness (36) down into the Right Upright (38), a second person should carefully pull the slack Wire Harness from the lower end of the Right Upright. Push the slack Wire Harness downward into the hole in the Belly Pan (43) and toward the center of the Belly Pan. Attach the Console Base (5) with four Screws (2). Tighten all Bolts used In assembly steps 2 through 5. 38 82 48 "D"---47 59 5 000 0 2 36 2 38 7. Remove the backing from the Adhesive Clip (27). Press the Adhesive Clip onto the Rear Roller Cover (75) in the 7 indicated location. Press the Allen Wrench (79) into the Adhesive Clip. ••• 36 43 75 Make sure that all parts are tightened before you use the treadmill. Note: To protect the floor or carpet, place a mat under the treadmill. 6
-
 1
1 -
 2
2 -
 3
3 -
 4
4 -
 5
5 -
 6
6 -
 7
7 -
 8
8 -
 9
9 -
 10
10 -
 11
11 -
 12
12 -
13
-
14
-
15
-
16
-
17
-
18
-
19
 |
 |