ProForm 400 Gi Treadmill Canadian English Manual - Page 13
For the most accurate heart rate read
 |
View all ProForm 400 Gi Treadmill manuals
Add to My Manuals
Save this manual to your list of manuals |
Page 13 highlights
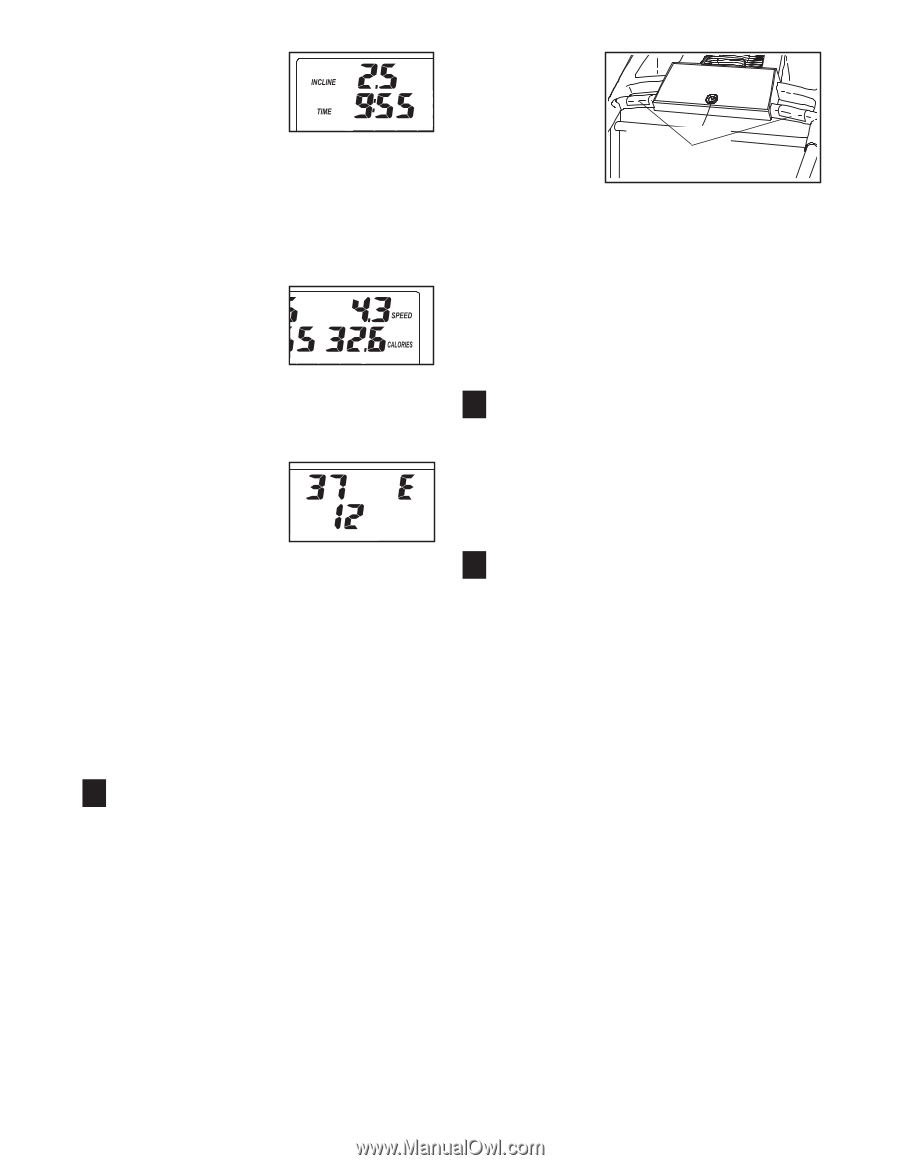
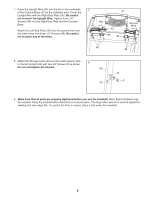
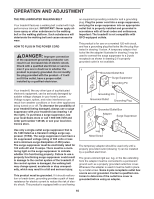
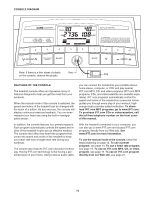
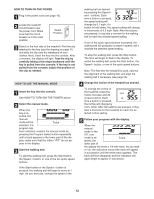
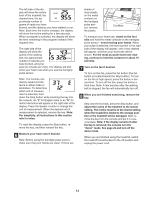
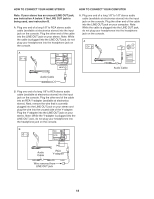
The left side of the display will show the incline level of the treadmill, the elapsed time, the approximate number of grams of carbs you have burned, and the distance you have walked or run. Note: Each time the incline changes, the display will show the incline setting for a few seconds. When a program is selected, the display will show the time remaining in the program instead of the elapsed time. The right side of the display will show the speed of the walking belt, the approximate number of calories you have burned, and your pace (in minutes per mile). The display will also show your heart rate when you use the handgrip pulse sensor. Note: The console can display speed and distance in either miles or kilometers. To determine which unit of measurement is selected, hold down the Stop button while inserting the key into the console. An "E" for English miles or an "M" for metric kilometers will appear in the right side of the display. Press the Speed + button to change the unit of measurement. When the desired unit of measurement is selected, remove the key. Note: For simplicity, all instructions in this section refer to miles. To reset the display, press the Stop button, remove the key, and then reinsert the key. 6 Measure your heart rate if desired. Note: Before using the handgrip pulse sensor, make sure that your hands are clean. If there are sheets of clear plastic on the metal contacts on the handgrip pulse sensor, remove the plastic. Contacts To measure your heart rate, stand on the foot rails and hold the metal contacts on the handgrip pulse sensor-avoid moving your hands. When your pulse is detected, the heart symbol in the right side of the display will appear, one or two dashes will appear, and then your heart rate will be shown. For the most accurate heart rate reading, continue to hold the contacts for about 15 seconds. 7 Turn on the fan if desired. To turn on the fan, press the fan button (the fan button is located beside the Stop button). To turn on the fan at high speed, press the button a second time. To turn off the fan, press the button a third time. Note: A few minutes after the walking belt is stopped, the fan will automatically turn off. 8 When you are finished exercising, remove the key. Step onto the foot rails, press the Stop button, and adjust the incline of the treadmill to the lowest setting. The incline must be at the lowest setting when the treadmill is folded to the storage position or the treadmill will be damaged. Next, remove the key from the console and put it in a secure place. Note: If the display remains lit after the key is removed, the console is in the "demo" mode. See page 22 and turn off the demo mode. When you are finished using the treadmill, switch the reset/off circuit breaker to the off position and unplug the power cord. 13
-
 1
1 -
2
-
3
-
4
-
5
-
6
-
7
-
 8
8 -
 9
9 -
 10
10 -
 11
11 -
 12
12 -
 13
13 -
 14
14 -
 15
15 -
 16
16 -
 17
17 -
 18
18 -
19
-
20
-
21
-
22
-
23
-
24
-
25
-
26
-
27
-
28
-
29
-
30
-
31
 |
 |