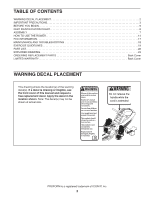
ProForm 440r Instruction Manual - Page 7
Attach the Rail Bracket 41 to the Frame 39
 |
View all ProForm 440r manuals
Add to My Manuals
Save this manual to your list of manuals |
Page 7 highlights
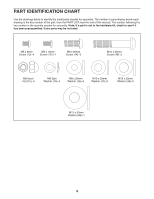
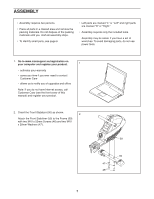
3. Remove the Frame Pin (37) from the Frame (39). Next, unwrap the Bungee Cord (45) from the Frame (39). Then, remove the 1/2" Locknut (54), the two M13 x 22mm Washers (33), and the 1/2" x 100mm Bolt (36) from the Frame (39). Note: The parts that you removed will be used in steps 4 and 5. 3 37 54 33 39 33 36 4. Orient the Rail (8) as shown. 4 Attach the Rail Bracket (41) to the Frame (39) with the 1/2" x 100mm Bolt (36), the two M13 x 22mm Washers (33), and the 1/2" Locknut (54) that you removed in step 3. Then, press the Nut Cap (55) onto the 1/2" Locknut (54). 45 55 54 33 39 41 8 33 36 8
-
 1
1 -
 2
2 -
 3
3 -
 4
4 -
 5
5 -
 6
6 -
 7
7 -
 8
8 -
 9
9 -
 10
10 -
 11
11 -
 12
12 -
13
-
14
-
15
-
16
-
17
-
18
-
19
-
20
-
21
-
22
-
23
 |
 |

8
3.
Remove the Frame Pin (37) from the Frame (39).
Next, unwrap the Bungee Cord (45) from the
Frame (39).
Then, remove the 1/2" Locknut (54), the two M13
x 22mm Washers (33), and the 1/2" x 100mm
Bolt (36) from the Frame (39).
Note: The parts that you removed will be used in
steps 4 and 5.
45
54
33
33
36
37
3
39
4.
Orient the Rail (8) as shown.
Attach the Rail Bracket (41) to the Frame (39)
with the 1/2" x 100mm Bolt (36), the two M13 x
22mm Washers (33), and the 1/2" Locknut (54)
that you removed in step 3.
Then, press the Nut Cap (55) onto the 1/2"
Locknut (54).
4
8
54
33
33
36
41
55
39