ProForm 770 Ekg Treadmill Canadian English Manual - Page 7
the Foam Grip and the Handrail Extension 34. If neces - parts
 |
View all ProForm 770 Ekg Treadmill manuals
Add to My Manuals
Save this manual to your list of manuals |
Page 7 highlights
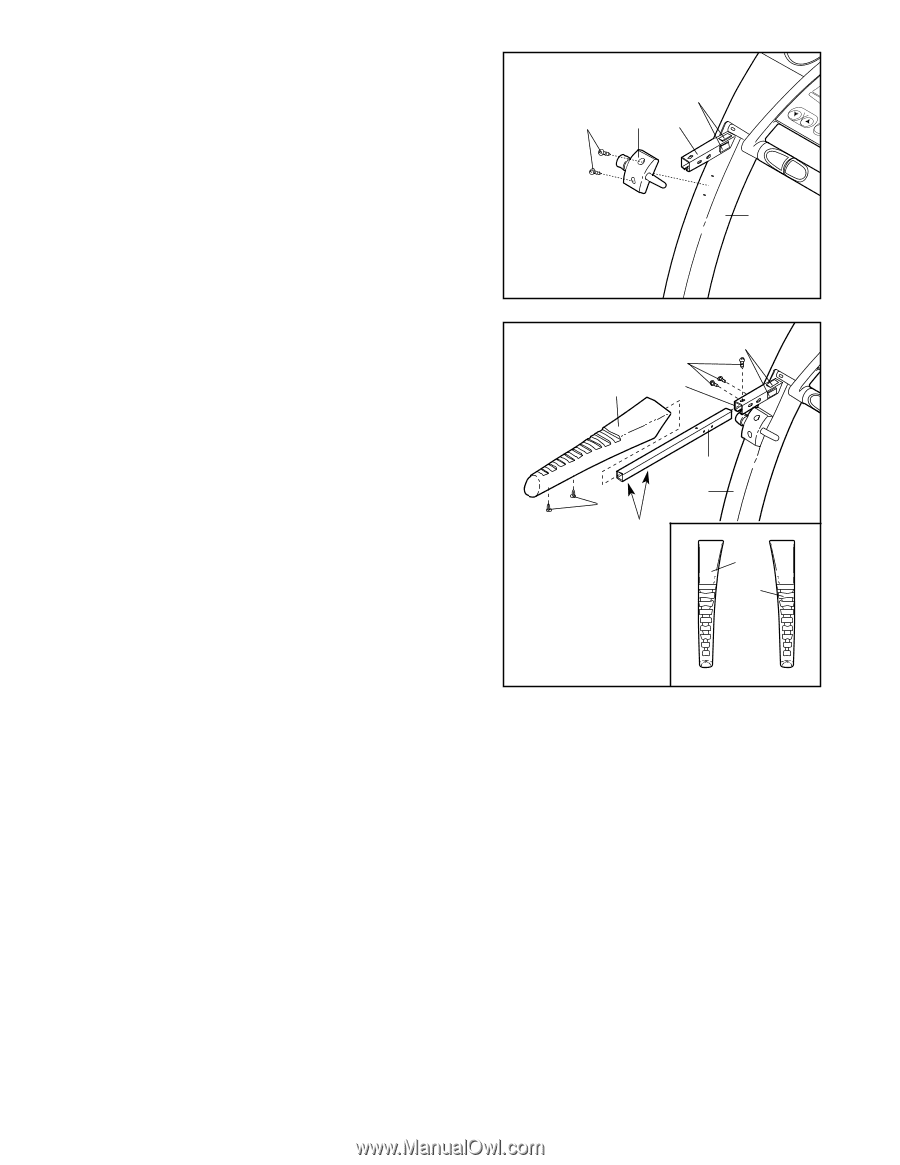
3. With the help of a second person, carefully tip the Uprights (64) back to the vertical position. 3 Attach the Latch Assembly (32) to the left Upright (64) with two Extension Screws (35). Note: There may already be two pieces of Foam Tape (82) attached to each post. If there are not, peel the paper off two of the included pieces of Foam Tape. Press the Foam Tape onto the left post in the locations shown. Press the other two pieces of Foam Tape onto the right post in the same way. 82 35 32 Post 64 4. Turn a Handrail Extension (34) so that the two larger holes are on the bottom as shown. Insert the Handrail 4 Extension as far as possible into the post on the left Upright (64). If necessary, tap the Handrail Extension with a rubber mallet to fully insert it. Next, attach the Handrail Extension by tightening three Extension Screws (35) into the indicated holes. Identify the Left Foam Grip (31) (see the inset drawing). Remove any remaining paper from the two indicated pieces of Foam Tape (82). Apply a small amount of water to the Foam Tape. Slide the Left Foam Grip as far as possible onto the post on the left Upright (64). Note: It may be helpful to lubricate the Handrail Extension (34) with soapy water. Press two Plastic Fasteners (9) into the Foam Grip and the Handrail Extension (34). If necessary, use a blunt object to press in the Fasteners. Attach the other Handrail Extension (not shown) and the Right Foam Grip (43) as described above. Note: Make sure that the Extension Screws (35) are attached on the outside of the post as shown. 82 35 31 Post 9 Holes 34 64 31 43 5. Make sure that all parts are tightened before you use the treadmill. Keep the included allen wrench in a secure place; the allen wrench is used to adjust the walking belt (see page 24). To protect the floor or carpet from damage, place a mat under the treadmill. 7
-
 1
1 -
 2
2 -
 3
3 -
 4
4 -
 5
5 -
 6
6 -
 7
7 -
 8
8 -
 9
9 -
 10
10 -
 11
11 -
 12
12 -
13
-
14
-
15
-
16
-
17
-
18
-
19
-
20
-
21
-
22
-
23
-
24
-
25
-
26
-
27
-
28
-
29
-
30
-
31
 |
 |