ProForm 985r English Manual - Page 12
Maintenance And Trouble-shooting
 |
View all ProForm 985r manuals
Add to My Manuals
Save this manual to your list of manuals |
Page 12 highlights
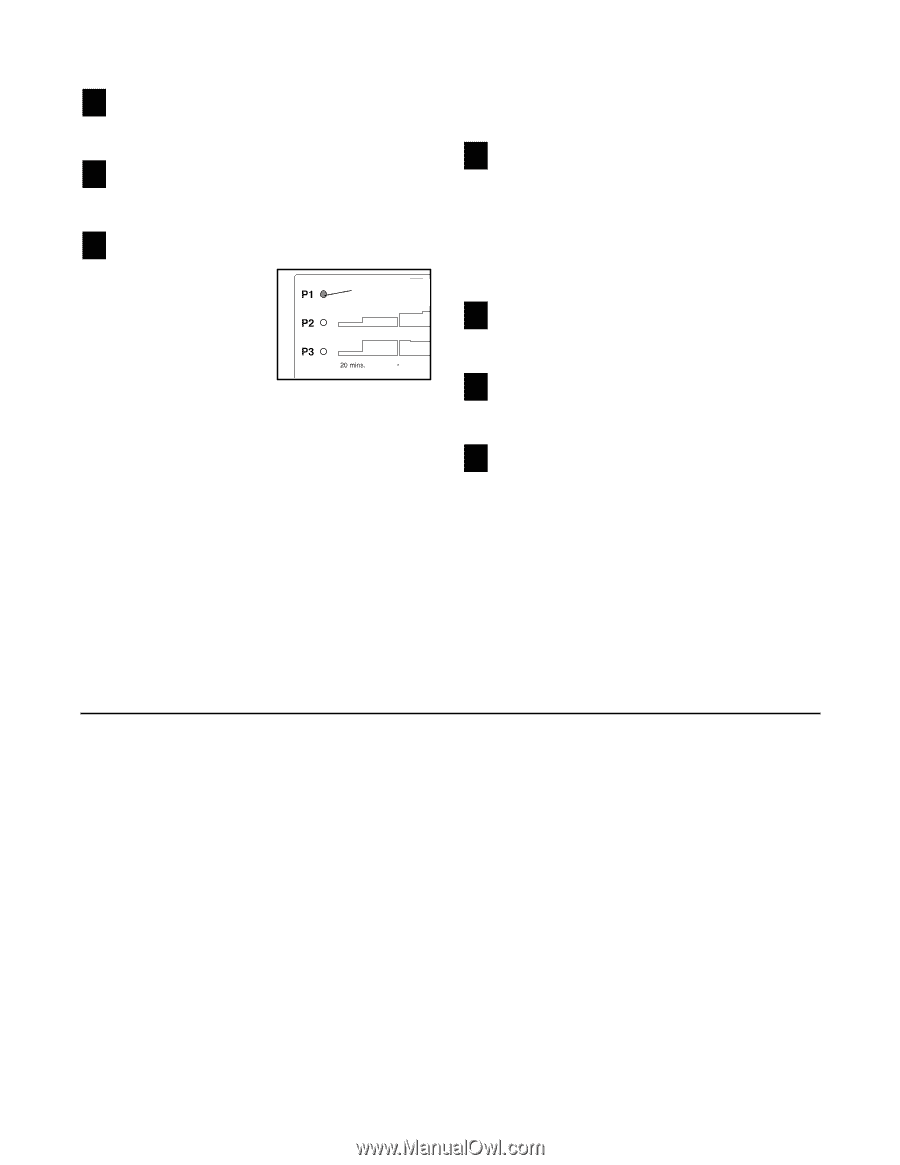
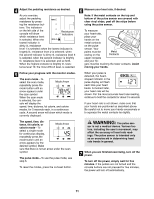
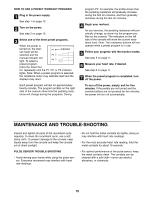
HOW TO USE A PRESET WORKOUT PROGRAM 1 Plug in the power supply. See step 1 on page 10. 2 Turn on the power. See step 2 on page 10. 3 Select one of the three preset programs. When the power is turned on, the man- Indicator ual mode will be selected and the manual indicator will light. To select a preset program, press the select but- ton repeatedly until the P1, P2, or P3 indicator lights. Note: When a preset program is selected, the resistance motor may calibrate itself and the displays may reset. Each preset program will last for approximately twenty minutes. The program profiles on the right side of the console show how the pedaling resistance will change during the programs. During program P2, for example, the profile shows that the pedaling resistance will gradually increase during the first ten minutes, and then gradually decrease during the last ten minutes. 4 Begin your workout. As you exercise, the pedaling resistance will periodically change, as shown by the program profiles on the console. The indicators on the left side of the console will show the current resistance level. Note: The resistance buttons will not operate while a preset program is in use. 5 Follow your progress with the monitor modes. See step 5 on page 11. 6 Measure your heart rate, if desired. See step 6 on page 11. 7 When the preset program is completed, turn off the power. To turn off the power, simply wait for five minutes. If the pedals are not turned and the console buttons are not pressed for five minutes, the power will turn off automatically. MAINTENANCE AND TROUBLE-SHOOTING Inspect and tighten all parts of the recumbent cycle regularly. To clean the recumbent cycle, use a soft, damp cloth. To prevent damage to the console, keep liquids away from the console and keep the console out of direct sunlight. PULSE SENSOR TROUBLE-SHOOTING ¥ Avoid moving your hands while using the pulse sensor. Excessive movement may interfere with heart rate readings. ¥ Do not hold the metal contacts too tightly; doing so may interfere with heart rate readings. ¥ For the most accurate heart rate reading, hold the metal contacts for about 15 seconds. ¥ For optimal performance of the pulse sensor, keep the metal contacts clean. The contacts can be cleaned with a soft clothÑnever use alcohol, abrasives, or chemicals. 12
-
 1
1 -
2
-
3
-
4
-
5
-
6
-
 7
7 -
 8
8 -
 9
9 -
 10
10 -
 11
11 -
 12
12 -
 13
13 -
 14
14 -
 15
15 -
 16
16
 |
 |