Pyle PLMR90UW User Manual - Page 8
Operation
 |
View all Pyle PLMR90UW manuals
Add to My Manuals
Save this manual to your list of manuals |
Page 8 highlights
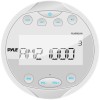
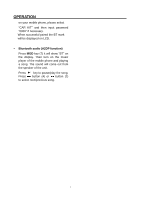
OPERATION TURN ON/OFF THE UNIT Press button (3) to turn on/off the unit. DISPLAY TIME Press CLK button (1) to show the time. After 5 seconds it will return to show the information. SET THE CLOCK Press and hold CLK button for 2 seconds. The "HH" will flash. Using the knob (2) (4) to change the hour. After that press CLK button the "MM" will flash. Press the knob (2) (4) to change the minute. After that press CLK button to confirm. If you don't press CLK button to confirm. It will writing here for your confirm. AUXILIARY INPUT The unit can be connected a portable audio player through the AUX IN interface. LOW BATTERY DISPLAY When the battery of the car is lower below 10V around. It will show "LOW BAT". MEMORY FUNCTION When B+ wire and Acc wire is off. It can memory the radio's preset stations. RESET FUNCTION RESET button (9) must be activated with either a ballpoint pen or thin metal object. The RESET button is to be activated for the following reasons: - Initial installation of the unit when all wiring is completed. - All the function buttons do not operate. - Error symbol on the display. Note: if press RESET button (9), the unit can't work yet, please use a cotton swab soaked in isopropyl alcohol to clean the socket on the front panel. RADIO OPERATION SWITCHING TO RADIO MODE Press MODE button (7) to select radio mode, the radio mode appears on the display together with the memory band and frequency. SELECTING THE FREQUENCY BAND At radio mode, press BND button (11) shortly to select the desired band. The reception band will change in the following order: →FM1→ FM2→ FM3→ AM1→AM2 SELECTING STATION Press button (4) or button (2) shortly to activate automatic seek function. It will search up/down a station automatically. Press for 2 seconds until "MANUAL" appears on the display, the manual tuning mode is selected. In this mode you can turn up/down a step frequency one by one till searched a station. If both buttons have not been pressed for several seconds, they will return to seek tuning mode and "AUTO" appears on the display. MANUALLY STATION STORING To receive a station, Press and hold the button (5) for 2 seconds. It will show "SAVE CH1". If you want to store the station to CH2. Shortly press it again it will show "SAVE CH2". In this moment press and hold the button (5) for 2 seconds. The current station is stored into the CH2. PRESET STATIONS SELECTING Press the button (7) shortly. You can select the preset station (CH1~6). 7
-
 1
1 -
2
-
 3
3 -
 4
4 -
 5
5 -
 6
6 -
 7
7 -
 8
8 -
 9
9 -
 10
10 -
 11
11 -
 12
12
 |
 |
