Pyle PLPTS3 PLPTS3 Manual 2 - Page 2
bracket. Snap it on to the other side of the t - from
 |
View all Pyle PLPTS3 manuals
Add to My Manuals
Save this manual to your list of manuals |
Page 2 highlights
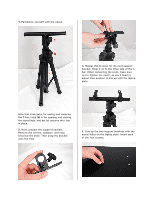
1. Familiarize yourself with the tripod. 3. Repeat this process for the next support bracket. Snap it on to the other side of the tbar. When reinserting the knob, make sure not to tighten too much, as you'll need to adjust their position to line up with the laptop plate. Note that knob (a) is for raising and lowering the T-bar, knob (b) is for opening and closing the tripod legs, and bar (c) secures the t-bar in place. 2. Next, prepare the support brackets. Remove the screws, washers, and nuts. Unscrew the knob. Then snap the bracket onto the t-bar. 4. Line up the two support brackets with the screw holes on the laptop plate. Insert each of the four screws.
-
 1
1 -
 2
2 -
 3
3
 |
 |

1.
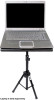
Familiarize yourself with the tripod.
Note that knob
(a)
is for raising and lowering
the T-bar, knob
(b)
is for opening and closing
the tripod legs, and bar
(c)
secures the t-bar
in place.
2.
Next, prepare the support brackets.
Remove the screws, washers, and nuts.
Unscrew the knob. Then snap the bracket
onto the t-bar.
3. Repeat this process for the next support
bracket. Snap it on to the other side of the t-
bar. When reinserting the knob, make sure
not to tighten too much, as you’ll need to
adjust their position to line up with the laptop
plate.
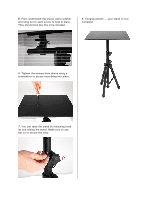
4. Line up the two support brackets with the
screw holes on the laptop plate. Insert each
of the four screws.