Pyle PRJELMT76 Instruction Manual - Page 1
Pyle PRJELMT76 Manual
 |
View all Pyle PRJELMT76 manuals
Add to My Manuals
Save this manual to your list of manuals |
Page 1 highlights
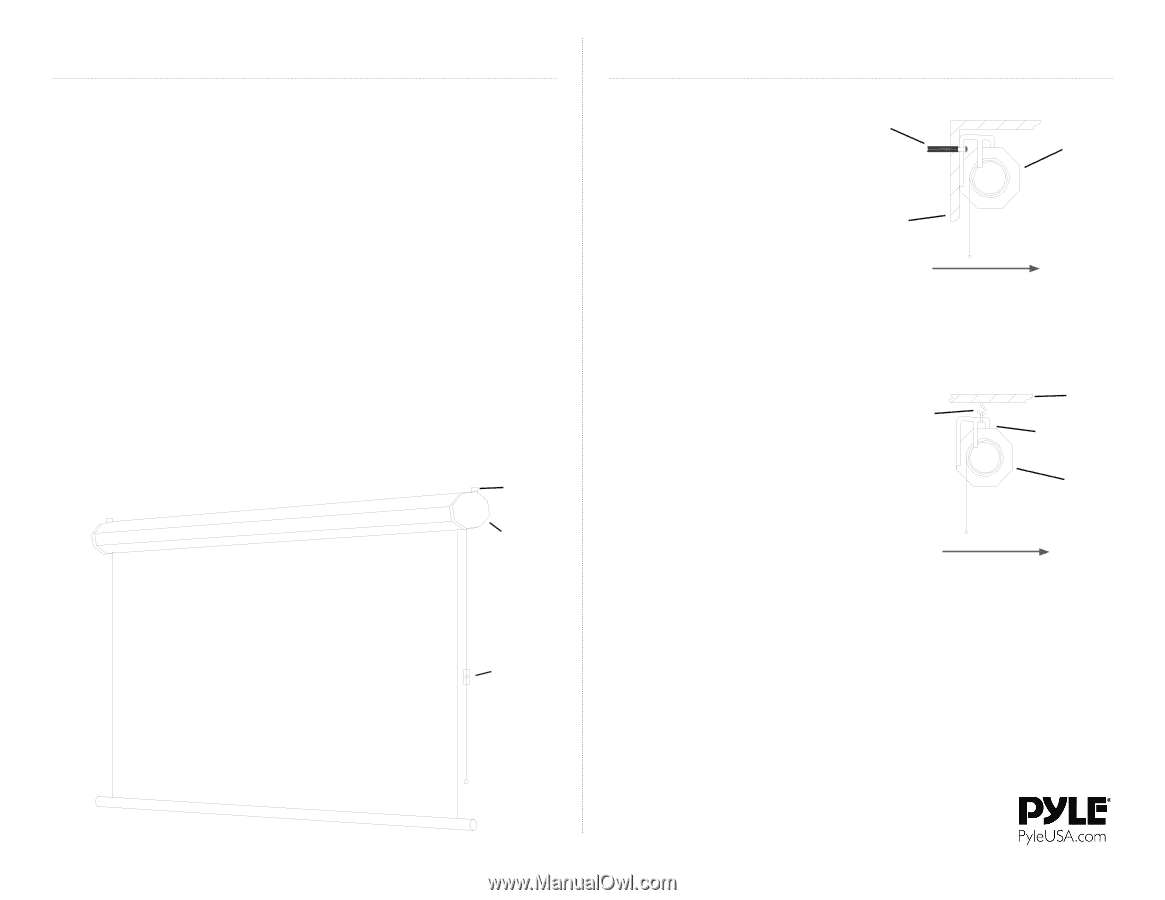
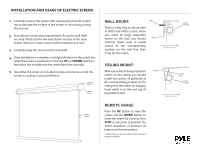
INSTALLATION AND USAGE OF ELECTRIC SCREEN: 1. Carefully remove the screen after opening the box. Be careful not to damage the surface of the screen or its housing during this process. 2. According to projecting requirements, fix up the wall shelf securely. (Note that the two wall shelves must be at the same height, otherwise screen surface will be slanted to one side) 3. Carefully hang the screen on the wall shelf. 4. Once installation is complete, a red light will show on the switch box when the screen is powered on. Press the UP and DOWN switch on the switch box to make sure the screen functions normally. 5. Use either the wired, or included wireless remote to control the screen according to your preference. HANGING HOOK SCREEN HOUSING WIRED REMOTE WALL MOUNT: NAIL There is a key ring on the bracket at both ends of the screen, when you need to hang projection screen on the wall, you should WALL hammer down nails or install screws at the corresponding position on the wall first, then hang up the screen. SCREEN DIRECTION SCREEN HOUSING CEILING MOUNT: When you need to hang projection screen on the ceiling, you should install two pieces of pothooks at the corresponding position on the ceiling first, then latch on hanging hook which is on the end cap of projection screen. POTHOOK CEILING HANGING HOOK SCREEN HOUSING SCREEN DIRECTION REMOTE USAGE: Press the UP button to raise the screen and the DOWN button to lower the screen for viewing. Press STOP at any point to position the screen anywhere in between its highest and lowest position * NOTE: Screen can be controlled by both wired and wireless controllers
-
 1
1 -
 2
2
 |
 |