Pyle SLDPS Instruction Manual - Page 5
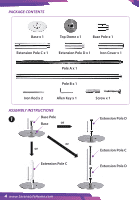
Screws, Iron Cover, Pole B, Extension Pole C
 |
View all Pyle SLDPS manuals
Add to My Manuals
Save this manual to your list of manuals |
Page 5 highlights
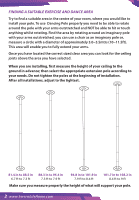
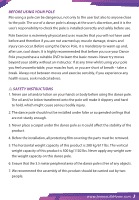
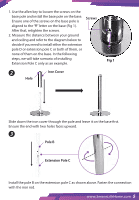
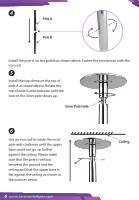
1. Use the allen key to loosen the screws on the base pole and install the base pole on the base. Ensure one of the screws on the base pole is aligned to the "Y" letter on the base (Fig 1). After that, retighten the screws. 2. Measure the distance between your ground and ceiling and refer to the diagram below to decide if you need to install either the extension pole D or extension pole C or both of them, or none of them on the base. In the following steps, we will take scenario of installing Extension Pole C only as an example. Screws 2 Hole Iron Cover Fig 1 Slide down the iron cover through the pole and leave it on the base rst. Ensure the end with two holes faces upward. 3 Pole B Extension Pole C Install the pole B on the extension pole C as shown above. Fasten the connection with the iron rod. www.SereneLifeHome.com 5
-
 1
1 -
 2
2 -
 3
3 -
 4
4 -
 5
5 -
 6
6 -
 7
7 -
 8
8 -
 9
9 -
 10
10 -
 11
11 -
12
 |
 |
