Pyle UPRJD903 User Manual - Page 15
Turn on/shut down, Remote control
 |
View all Pyle UPRJD903 manuals
Add to My Manuals
Save this manual to your list of manuals |
Page 15 highlights
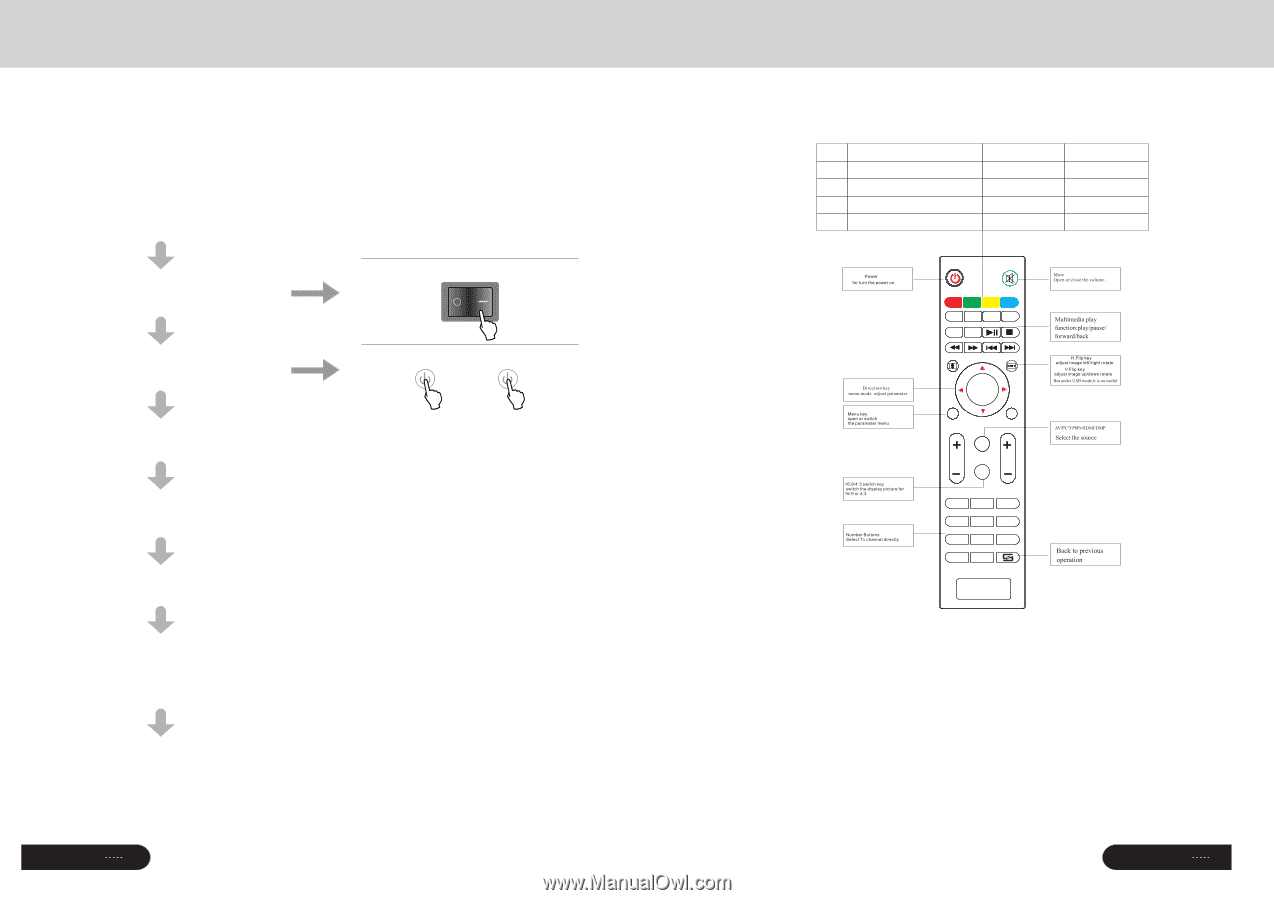
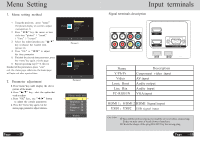
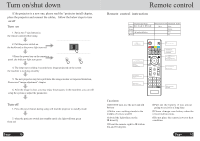
Turn on/shut down If the projector is a new one, please read the "projector install chapter, place the projector and connect the cables,follow the below steps to turn on/off Turn on 1.Put in two 7-size battery in the remote control before using 2.Pull the power switch on the backboard as the power light turn red 3.Press the power key on the remote or panel ,the indicator light turn green 4.The lamp start working 2 seconds later, image projected on the screen the machine is working smoothly 5.The new projector may have problems like image unclear or trapezoid distortion, Please read "image adjustment" chapter 6.After the image is clear ,you may enjoy the program, in the meantime ,you can still setup the system or adjust the parameters Turn off 1.Press the power button during using will lead the projector to standby mode 2.when the projector switch into standby mode ,the light will turn green from red Page 15 Remote control Remote control instruction Multimedia Mode R e d 【Sub Menu】→【Delete】 Green Yellow 【Confirm】Delete Blue Manual channel search Channel Edit Save Delete Rename Move Skip MODE ZOOM SCHEDULE DTV EPG SUPAGE GOTO TTX REC OK M EXIT VOL S 16:9/4:3 CH 1 2 3 4 5 6 7 8 9 A-SCAN 0 Cautions: ☆DO NOT mix-use the new and old battery ☆Make sure nothing stands in the middle of remote and IR ☆Avoid the light shine on the IR directly ☆Point the remote right to IR within 6m,and 30 degrees ☆Pull out the battery if you are not going to use it for a long time ☆Please ch ang e new battery when the remote malfunctions. ☆Do not place the remote in wet or heat condition Page 12
-
 1
1 -
2
-
3
-
4
-
5
-
6
-
7
-
8
-
9
-
 10
10 -
 11
11 -
 12
12 -
 13
13 -
 14
14 -
 15
15 -
 16
16
 |
 |